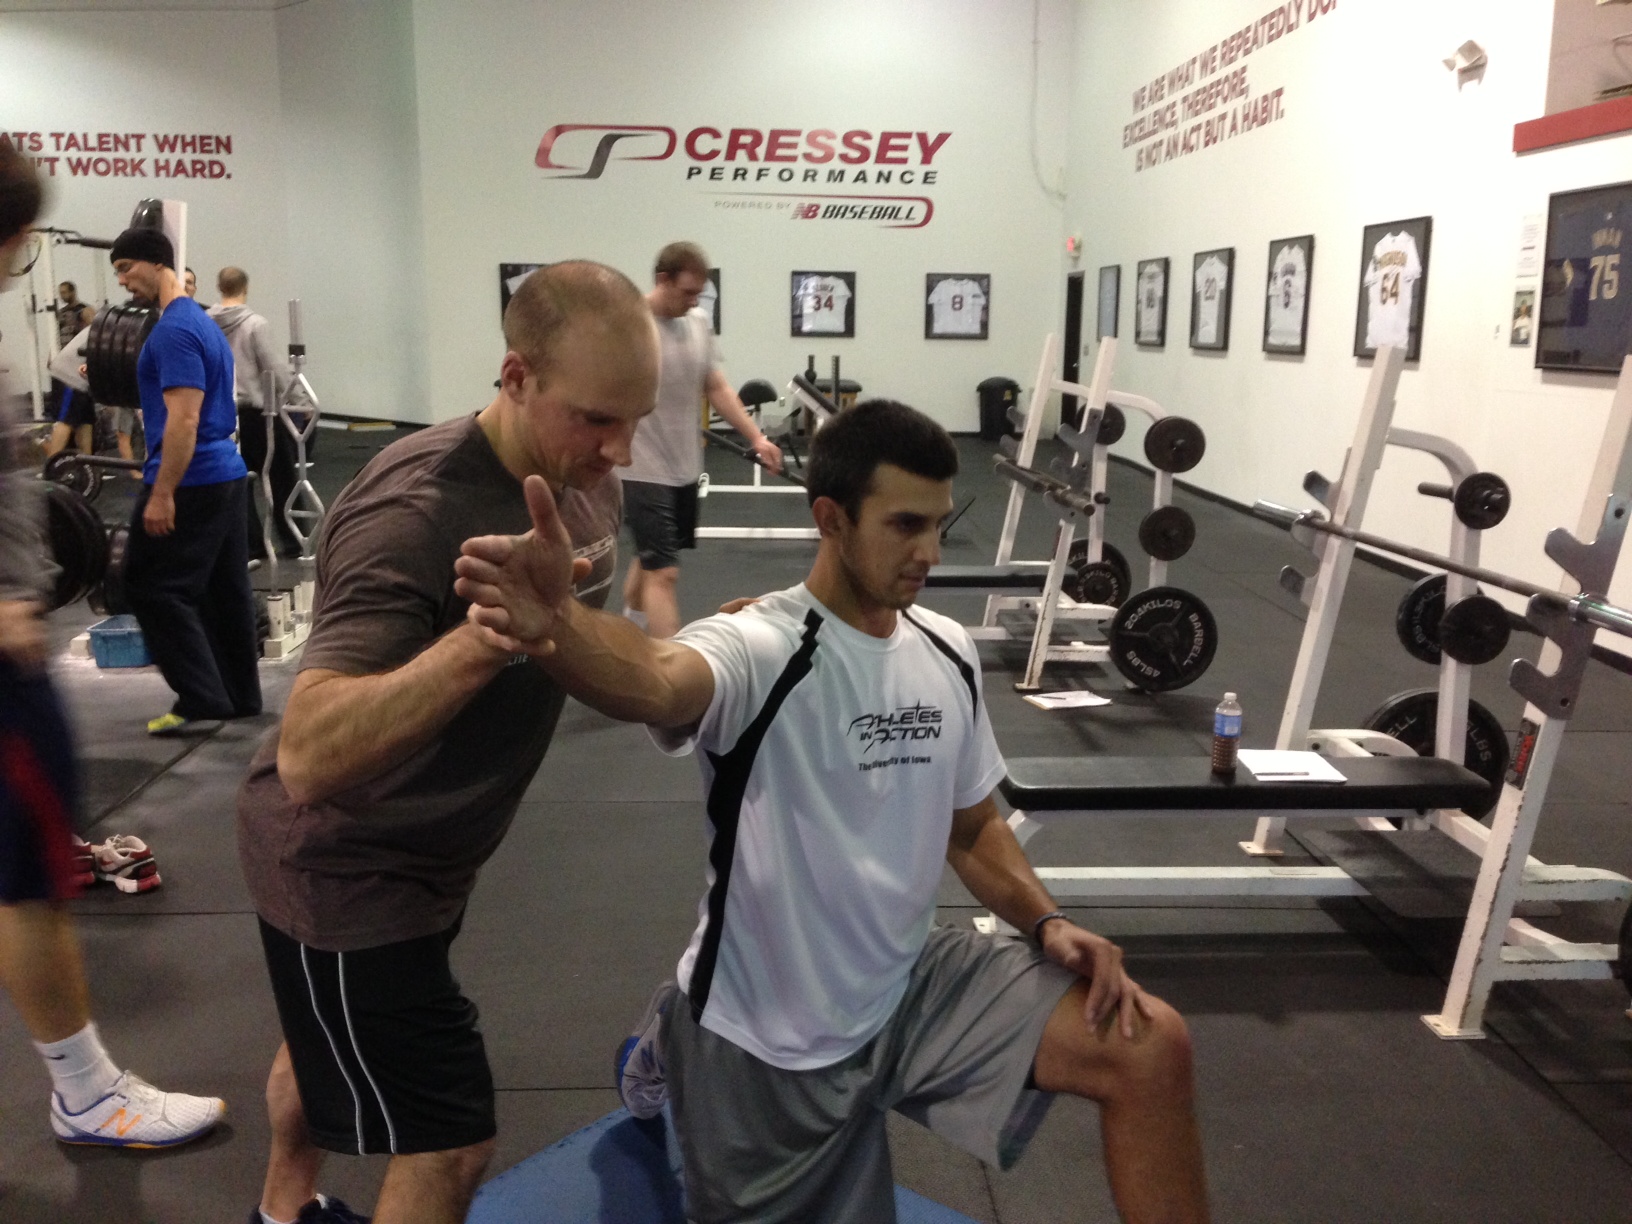
In collaboration with Cressey Performance coach Greg Robins, here are some tips to get just a little more awesome this weekend.
1. Hard start, easy finish.
This phrase applies to almost everything in training and in life. In short, putting in the work up front is going to benefit you ten-fold throughout the rest of your...
Exercise Set: Put the time in to set up a lift correctly (bar placement, spotters, foot position, etc) and you will make the entire set go off smoothly.
Training Session: Don't skimp on your warm-ups. Make sure you spend the 15 minutes to hit self massage, mobility, and activation work.
Training Block: Make the time to make a plan. If you do not have the time (really?!), or the knowledge (fair enough), then seek out someone to make a plan for you.
Training Career: If you're new to the game, take the proper amount of time to learn correct movement patterns, build general work capacity, and understand technique. If you're not, and these sound like foreign concepts, have you considered pressing rewind?
2. Meet the bar.
3. Address lagging body parts with frequency.
If you have a body part that isn't making the grade, the answer could very well be to adjust the frequency in which you train it. Training variables such as volume and intensity are household names, even if their application is often butchered. Frequency is a less-considered variable in your training program. The frequency at which you train a muscle group can have a profound effect on its growth. Additionally, high frequency protocols can produce major surges in strength when programmed correctly. Using high frequencies to make gains in strength is definitely more complex. The more demanding the exercise selections (think deadlifts, squats, cleans, etc), the more tinkering you'll need to do in the overall management of volume and intensities. Luckily for you, using higher frequencies to illicit gains in "size" isn't as involved.
Here is a good place to start: choose an area (i.e. arms) and add a specialization day to your strength training program. Make this days short, but challenging. This is a good time to utilize drop sets, forced reps, pre-exhaustion etc. Stick with the same area for three weeks, back off a week, and either choose a new area for three weeks or continue with the previous selection. Maybe you'll do calves like Tony does?
4. Appreciate that various characteristics relate to throwing velocity.
A study conducted in 2009 by The Open Sports Medicine Journal looked at the relationship between six anthropometric (body height, body mass, body mass index (BMI), arm span, hand spread and length) and four physical fitness (aerobic capacity, explosive power of the lower limbs, flexibility and running speed) characteristics and their relationship to throwing velocity in female handball players. The study found that "throwing performance is significantly correlated with all variables calculated in this study except of the body mass index. This suggests that high performance requires advanced motor abilities and anthropometric features."
This isn't revolutionary, and the study does not go into details (that have been found important to velocity) such as joint mobility, stiffness and laxity. However, it is interesting to note that the researchers ranked each characteristic in order of importance in terms of the effect on velocity:
1. Hand Spread
2. Playing Experience
3. Arm Span
4. Body Height
5. Standing Long Jump
6. 30m Sprint
7. Sit and Reach
8. Body Mass.
9. VO2max
10. Body Mass Index
As you’ll see, the recipe for success will always be a combination of genetic pre determents, mechanical skill (sport practice), and physical performance traits (explosiveness, strength, etc). Two out of three of those you have control over, and if you are willing to put the work in, you can make up for quite a bit that Mommy and Daddy didn't pass on to you.
EC’s notes: three interesting asides to this…
First, it’s interesting that body mass index wasn’t more highly ranked, as body weight has been shown to have a significantly positive association with throwing velocity in baseball pitchers. The primary difference between these two populations, of course, is that the handball players aren’t throwing downhill on a mound, so perhaps having a greater body mass benefits pitchers because they’re more “gravity-aided?”
Second, this is friendly reminder that your silly long distance running won’t do anything for throwing velocity.
Third, the researchers only tested straight-ahead (sagittal) plane measures of power development. If they’d tested power development in the frontal and transverse planes, I’d expect to see a greater value for these measures.
5. Don't limit yourself.
Have you heard this before?
If I do everything you say, and work as hard as possible, do I have a shot at: making it, losing 10lbs, benching 315?
The answer is always YES; why would it be NO? We are all capable of impressing - and even surprising - ourselves with what we are capable of doing. Not everyone (even with an insane work ethic) is going to look like Captain American or play on ESPN. It doesn't matter.
What matters is that you never shot for something less than that. You gave everything you had, and you ran that course until it was over. Wherever that point may be, you arrived there knowing that you didn't leave anything in the tank. This is the absolute most you could do, given the tools you had, and you can be happy and fulfilled knowing that. If you attack everything with that mentality, you will be successful and happy with the result, even if that result isn't exactly what you thought it was when you got started.
This is an important lesson to remind young athletes and adult clients alike. Teach them to respect the process, and find value in the journey. Remind them that many variables are not within their control, but their effort is.
Sign-up Today for our FREE Newsletter and receive a four-part video series on how to deadlift!
It goes without saying that poor adductor length is a huge problem in many of the athletes I encounter, particularly those participating in sports (e.g., hockey, soccer, baseball) involving a lot of extension and rotation. As a result, we always spend a lot of time with self myofascial release, static stretching, and mobility exercises for the adductors.
As I've written in the past, though, after you transiently reduce stiffness in a tissue, you want to build some stability through that newfound range-of-motion. Unfortunately, it isn't exactly easy to load folks up in the frontal plane, and some folks still won't be able to get in to a lateral lunge position without pitching forward. Enter the Dumbbell Goblet Lateral Lunge, which borrows the "counterbalancing" benefits we see with a traditional goblet squat to allow us to get back "into" the hip and build some longer-term mobility in the frontal plane.
I don't worry about folks really loading this up; in fact, form tends to break down a bit if you go heavier than 40 pounds with the dumbbell. We'll usually include it as the last exercise on a lower-body day, for 2-3 sets of 8-10 reps.
We spend a lot of time focusing on building strength and power, but a lot of times, movement quality gets overlooked. Here's an exercise that helps you to improve the latter without forgetting the former. Give it a shot and let me know how it goes!
Sign-up Today for our FREE Newsletter and receive a four-part video series on how to deadlift!
I was introduced to the bowler squat originally by Dr. Stuart McGill at one of his seminars back around 2005. Beyond the endorsement from one of the world's premier spine experts, the fact that it's been a mainstay in our strength and conditioning programs for about seven years should prove just how valuable I think this combination mobility/activation exercise is.
Before describing it, though, I should mention that the name is a bit misleading. While it does look like a bowler's motion, the truth is that it's more of a "rotational deadlift" than it is a squat. There is some knee flexion involved, but the shin remains essentially vertical, and most of the motion occurs at the hips - and that's what makes it such a fantastic exercise. Have a look:
We talk all the time about how important glute activation is, but most folks simply think that a few sets of supine bridges will get the job done. The problem is that this exercise occurs purely in the sagittal plane, while the glutes - as demonstrated by their line of pull - are also extremely active in the frontal and transverse planes. The gluteus maximums isn't just a hip extensor; it is also a hip abductor and external rotator.
As such, the gluteus maximus is essential to properly eccentrically controlling hip flexion, adduction, and internal rotation that occurs with every step, landing, lunge, and change-of-direction. You can even think of it as an "anti-pronator."
A bowler squat effectively challenges the glutes to both lengthen and activate in a weight-bearing position in all three planes. And, for the tennis and baseball players out there, check out how closely the bowler squat replicates the finish position from a serve and pitch (I noted this in a recent article, Increasing Pitching Velocity: What Stride Length is and How to Improve It).
To perform the exercise, push the hips back as if attempting a 1-leg RDL, but reach across the body with the arm on the side of the non-support leg. The "hips back" cue will get the sagittal plane, while the reach across will get the frontal and transverse plane. Make sure to keep the spine in neutral to ensure that the range of motion comes from the hips and not the lower back. Keep the knee soft (not locked out), but not significantly flexed, either. Be sure to get the hips all the way through at the top, finishing with a glute squeeze.
A few additional cues we may use are:
1. Tell the athlete to pretend like he/she is trying to pick up a basketball with the support foot; it can help those who keep tipping over.
2. Provide a target - a medicine ball or dumbbell - that the athlete should reach for in the bottom position (this keeps folks from cutting the movement short, or making it too sagittal plane dominant).
3. Encourage the athlete to keep the chin tucked (to keep the cervical spine in neutral).
4. Put your hand a few inches in front of the kneecap and tell the athlete not to touch your hand with the knee; this keeps an athlete from squatting too much when he/she should be hip-hinging.
Typically, we'll perform this drill for one set of eight reps per side as part of the warm-up. However, in a less experienced population - or one with very poor balance - this may serve as a great unloaded challenge that can be included as part of the actual strength training program.
Anyone who has ever broken or burned a finger will tell you that you just don't appreciate how much you use your hands until you don't have access to one for a bit. Obviously, you partially lose your ability to do things - but what many folks might not appreciate is that you also lose some of your ability to sense things, as the hands contain a tremendously amount of sensory receptors relative to the rest of the body. In fact, the tiny folds in our skin on the fingertips that comprise the fingertip are there because they increase the surface area of the hands - which allows us to get more sensory receptors where we need them. Cool stuff, huh?
Why then, do we not give the hands any love when it comes to soft tissue work? We'll foam roll our hip flexors, lats, and other large muscle groups (which are certainly valuable), but we'll ignore one of the most sensory-rich parts of our body - and one that is constantly active (and overused, in some cases) throughout the day. We grip, type, and flip people the bird - but we never really pay attention to soft tissue quality in this region...until today, that is.
If you look at the structure of the hand, you'll see that it has a large fascial, the palmar aponeurosis (we'll call it the palmar fascia to keep things simple). This structure has an intimate relationship with the muscles/tendons and ligaments of the hand, and serves as a link between the forearm and fingers.
Based on the size alone, you can see that it has plantar-fascia-caliber importance even if it isn't weight bearing. You see, of the five muscles that attach via the common flexor tendon on the medial epicondyle at the elbow, four cross the wrist joint and palmar fascia on the way to the hand, where they work to flex and abduct or adduct the wrist, and flex the fingers.
Loads of people have tendinopathies going on up on the medial elbow (Golfer's Elbow), but they only work on this spot (called a zone of convergence). Meanwhile, the soft tissue quality might be just as bad further down at the wrist and hand, adding tension on an already over-burdended common flexor tendon. Think about it this way: if you had a pulled hamstring up by your glutes, would you only work to improve tissue quality at that spot, or would you work all the way down to the posterior knee to make sure that you'd improved some of the poor tissue quality further down as well?
Below, massage therapist and Cressey Performance coach Chris Howard talks you through two different ways to work out the kinks in the palmar fascia and surrounding regions, but keep in mind that it'll always be more effective to have a qualified manual therapist do the job - and that's certainly someone you should see if you have any symptoms whatsoever.
We've found that quite a few of our pitchers comment on how the ball seems to come out of their hand easier after this work. Usually, they're the guys who have the most stiffness along the forearm, particularly into wrist extension and supination.
Give it a shot at your desk at work and see how it feels.
When it comes to corrective exercise programs, everyone simply wants to know "what" is and isn't included - and rightfully so. Picking the right strength exercises and mobility drills - and contraindicating others - is absolutely crucial to making sure you get folks to where they want to be.
However, very rarely will you hear anyone specifically discuss the "when" in these scenarios, and as I'll demonstrate in today's piece, it's likely just as crucial to get this aspect correct.
To begin to illustrate my point, I'm going to reuse a quote from an article I wrote a few weeks ago, Correcting Bad Posture: Are Deadlifts Enough?, on the Law of Repetitive Motion :
Consider the law of repetitive motion, where “I” is injury to the tissues, “N” is the number of repetitions, “F” is the force of each repetition as a percentage of maximal strength, “A” is the amplitude (range of motion) of each repetition, and “R” is rest. To reduce injury to tissues (which negative postural adaptations can be considered), you have to work on each of the five factors in this equation.
You perform soft tissue work – whether it’s foam rolling or targeted manual therapy – on the excessively short or stiff tissues (I). You reduce the number of repetitions (length of time in poor posture: R), and in certain cases, you may work to strengthen an injured tissue (reduce F). You incorporate mobility drills (increase A) and avoid bad postures (increase R).
What I failed to mention a few weeks ago, though, was that the sequencing of these corrective modalities must be perfect in order to optimize the training/corrective effect and avoid exacerbating symptoms. Case in point, we recently had a client come to us as a last resort with chronic shoulder issues, as he was hoping to avoid surgery. Physical therapy had made no difference for him (aside from shrinking his wallet with co-pays), and following that poor outcome, he'd had a similar result with soft tissue treatments twice a week for six weeks. In a single four-week program, we had him back to playing golf pain free. What was the difference?
In the first physical therapy experience, he'd been given a bunch of traditional rotator cuff and scapular stabilization exercises. There had been absolutely no focus on soft tissue work or targeted mobility drills to get the ball rolling. In other words, all he did was improve stability within the range of motion he already had. In the equation above, all he really worked on was reducing the "F" by getting a bit stronger.
In his soft tissue treatment experiences, he felt a bit better walking out of the office, but ran into a world of hurt when his provider encouraged him to "just do triceps pressdowns and lat pulldowns" for strength training. In other words, this practitioner worked on reducing "I" and increasing "A," but totally missed the boat with respect to enhancing strength (reducing "F") and increasing rest ("R") because of the inappropriate follow-up strength exercise prescription. Doh!
What did we do differently to get him to where he needed to be? For starters, he saw Dr. Nate Tiplady, a manual therapist at CP, twice a week for combination Graston Technique and Active Release treatments (reducing "I") at the start of his training sessions. He followed that up with a specific manual stretching, positional breathing, and mobility exercise warm-up program (increase "A") that was designed uniquely for him. Then, he performed strength training to establish stability (decrease "F") within the new ranges of motion (ROM) attained without reproducing his symptoms (decreasing "N" and increasing "R).
The sequencing was key, as we couldn't have done some of the strength exercises we used if we hadn't first gotten the soft tissue work and improved his ROM. He may have had valuable inclusions in his previous rehabilitation efforts, but he never had them at the same time, in the correct sequence.
This thought process actually closely parallels a corrective exercise approach Charlie Weingroff put out there much more succinctly in his Rehab = Training, Training = Rehab DVD set:
Get Long. Get Strong. Train Hard.
Keep in mind that there are loads of different ways that you can "get long." You might use soft tissue work (Active Release, Graston Technique, Traditional Massage, etc.), positional breathing (Postural Respiration Institute), mobility drills (Assess and Correct), manual stretching, or any of a host of other approaches (Mulligan, DNS, Maitland, McKenzie, etc). You use whatever you are comfortable using within your scope of practice.
When it's time to "get strong," you can do so via several schools of thought as well - but the important thing is that the strength exercises you choose don't provoke any symptoms.
It's interesting to note that this corrective exercise approach actually parallels what we do with our everyday strength and conditioning programs at Cressey Performance - and what I put forth in Show and Go: High Performance Training to Look, Feel, and Move Better. We foam roll, do mobility warm-ups, and then get cracking on strength and stability within these "acutely" optimized ranges of motion to make them more permanent.
Q: I know that you work a ton with baseball players and that medicine ball workouts are an integral part of their training at Cressey Sports Performance. However, I'm not a baseball player - or a competitive athlete in any discipline, for that matter - and I'm wondering if I should still consider adding medicine ball workouts to my strength and conditioning program. Are there benefits that I can't get from a traditional strength training program with comprehensive mobility drills?
A: This is a great question - and I'll start off by saying that we actually have quite a few athletes at Cressey Sports Performance who aren't baseball players. Plus, we firmly believe that everyone has an athlete in them, so our training mandates a functional carryover to the real world for everyone. Integrating some medicine ball workouts - even if the volume and frequency aren't as high as in our rotational sport athletes - can definitely add some benefits to a strength and conditioning program. Here are seven of those benefits:
1. Real World Transfer - Regardless of how effectively a strength and conditioning program is designed, it'll usually be very sagittal plane dominant. Integrating some rotational medicine ball training immediately increases the number of movements from which you can choose in the transverse and frontal planes.
2. Low-Impact Fat Loss Medleys - Look at all of the fat loss programs out there, and the overwhelming majority of them require a lot of impact - whether it's from sprinting/jogging, jumping rope, or taking step aerobics. Performing medleys of various medicine ball throws not only allows you to increase volume in a program while minimizing stress on the lower extremity, but also affords some much appreciated variety in a program that might otherwise be dominated by a lot of boring cardio equipment.
3. Better Integration of the Core -With a correctly executed rotational med ball throw, the power should come predominantly from the lower half - which means that it should be transmitted through a stable core so that the energy will be appropriately utilized with thoracic rotation to get to the arms and, in turn, the ball. This sequencing is no different than lifting a bag of groceries, swinging a golf club, or going up on one's tip-toes to grab something on the top shelf. If you move in the wrong areas (lumbar spine), you'll eventually wind up with back pain - but if you've handled the rotational challenges of medicine ball workouts with perfect technique, you'll be protected in the real world.
4. Improved Ankle, Hip, and Thoracic Spine Mobility - When performed correctly, medicine ball exercises serve as an outstanding way to "ingrain" the mobility you've established with a dynamic warm-up prior to training. Additionally, we utilize mobility and activation "fillers" between sets of medicine ball drills to not only slow people down between sets, but also address issues they have that might warrant extra attention.
5. A Way to Train Power Outside of the Sagittal Plane - Research has demonstrated that the biggest problems with folks as they grow older are not just the loss of strength, muscle mass, and bone density, but the loss of power - or how quickly they can apply force. It's this reduction in power that makes elderly individuals more susceptible to falls. We can't always train power "optimally" in some older adults because of ground reaction forces being too stressful, but most can learn to apply a significant amount of force to a medicine ball - whether it's rotationally or with an overhead stomp/throw variation. Everyone should obviously build a solid foundation of strength and mobility before undertaking these options, but when the time is right, they are great additions. On a related note, here's a video I filmed a while back that shows how medicine ball workouts fit into our overall approach to developing power in athletes.
6. Reduction of Asymmetry - Most of us are very one-side dominant, and while I have no aspirations of ever expecting folks to be completely symmetrical, I think that training with rotational medicine ball drills can go a long way in ironing out prominent hip and thoracic spine asymmetries. This has been one reason why they comprise such an integral part of our off-season baseball training programs; these players spend their entire lives in an asymmetrical sport.
7. A Way to Blow off Some Steam - Lifting weights is great for letting out some aggression after a bad day, but throwing a medicine ball is on a whole different level. In most cases, I encourage folks to try to break the medicine balls on every single throw. As you can see, we've broken quite a few...
When we integrate medicine ball workouts with our adult fitness clients, it's usually a matter of three sets two times per week between the mobility warm-ups and strength exercises. If it's used for fat loss, though, we'll include medleys at the end of the strength training programs.
As for a specific brand of medicine balls that we use, we've now made the switch to the Perform Better Extreme Soft Toss Medicine Balls. I've found that the rebound is optimal on these, and they still provide great durability (which has been an issue with not only other "padded" options, but also other rubber models that are using more filler materials). This is what our preferred option looks like:
With all that in mind, how many you break will be heavily dependent on how much you incorporate medicine ball workouts and how powerful your clients are. The medicine ball lifespan will be a lot longer in a facility catering to middle-aged women than it will be at Cressey Performance, where 85% of clients are baseball players executing 240-360 medicine ball throws per week during certain portions of the year.
If you're looking for a lot more detail on the specific medicine ball exercises and workouts we do with our clients, be sure to check out my Medicine Ball Master Class.
Sign-up Today for our FREE Newsletter and receive a deadlift technique tutorial!
We received the following testimonial from a very satisfied Assess and Correct customer via email last week, and I thought I'd share.
"After spending five years heading in the wrong direction regarding my training, I was left with many injuries in my upper as well as my lower body. I had multiple muscle/strength imbalances and horrible posture which caused overuse injuries, chronic pain, pinched nerves and other problems. I physically couldn’t do a single thing without causing some sort of pain. Even though I was only 22 years old at the time, I just assumed that I had headed so far down the wrong path that I would never recover and never be able to comfortably work out again. I accidentally came across one of Eric’s articles about one of my many problems. I read the article and instantly looked for others.
"After some deliberation I decided that Assess and Correct might be something that could help me. I gave it a try, consistently performing the exercises, in combination with other exercises recommended by Cressey, Robertson, and Hartman aimed at restoring correct posture. The best way to describe this product was that it completely changed my life.
"I have loads of mobility and stability in all the right places. I went through every exercise or mobility drill in every progression even if I didn't need to. All the exercises are described thoroughly and simple to complete. Injuries or no injuries, I would recommend this product to every single person who lives and active lifestyle. I am a believer and will be a lifetime follower of Eric Cressey, Mike Robertson, and Bill Hartman. Thanks, guys!"
Click here to pick up a copy of Assess and Correct for yourself!
Sign up for our FREE Newsletter today and and receive this deadlift technique video!
Q: How does one find a balance between "technique/form/corrective/sissy work" and lifting heavy weights to make gains in a strength training program? I see both extremes, but am curious about what affects the balance between the two.
A: This is actually a great question, and I am actually surprised that I’ve never answered it before in over five years of writing on this site.
For me, it all comes down to five factors in each athlete/client: strength training experience, injury history, goals, time to commit, and training session structure.
In someone with limited strength and conditioning, more of the session is going to be devoted to technique work on entry level strength exercises. You don’t have to worry as much about lifting really heavy weights simply because beginners can make appreciable strength gains with as little as 40% of 1-rep max on exercises. The more advanced an athlete becomes, the less time you spend on technique work, and the more work you do with strength development and corrective exercise. Eventually, when an athlete has a lot of strength, you have to consider whether all the time and effort that would go in to adding 20 pounds to his squat would actually be better spent elsewhere – whether it’s with corrective work, power training at a lower percentage of 1-rep max, or in introducing new exercises. Effectively, it always comes down to finding someone’s biggest window of adaptation and exploiting it. That's one reason why I tried to make the Show and Go program so versatile by including 2x/week, 3x/week, and 4x/week training options alongside five supplemental metabolic training protocols.
If we are talking about someone with a lengthy injury history, though, the rules get thrown out the window. You are not only spending more time with corrective exercise, but also refining your strength exercise selection to work with this individual – so it might mean that you have to do more technique work to add in new strength exercises, regardless of that individual’s training experience.
One’s training goals impact the corrective/heavy lifting balance as well. If I’m training someone who simply wants to improve quality of life or stay healthy in athletics, I can be a bit more cautious on the heavy lifting side of things and hold back. However, if we are talking about someone who was put on this planet to get strong and wants to be the most badass guy in the gym, we have to lift some heavy weights to make that happen. So, while the second scenario in many cases requires more corrective exercise, we’re talking about a population that is willing to take more risks in training to get to a goal that might not be at all interesting to a more “low key” population. This does not, however, mean it’s okay to let strength-oriented people lift with atrocious technique. Doing so makes you an unethical clown who is more likely to get sued – not a professional.
Time to commit is another important consideration that many folks overlook. Very simply, if someone can only get in two exercise sessions a week, I’m not going to be spending a ton of time on corrective exercise with them. You’re much more likely to die from being fat and having diabetes than you are from having a cranky rotator cuff. I’ll gladly give these folks additional corrective exercise that they can do during their busy schedules (which are never as busy as they claim), but I won’t coddle them when they need to move.
The last factor, which is more about the training model than the athlete/client in question, is how one structures a training session. At Cressey Performance, athletes start their sessions with foam rolling and then proceed to an 8-10 exercise dynamic warm-up. For many folks – particularly young athletes – that is enough “corrective” work, and the remainder of the session can be devoted to technical instruction and increasing strength on exercises that are safe for them. Those with more accumulated wear-and-tear on their bodies will need more corrective exercise beyond what they’ll get from strength training alone – so we add in fillers (e.g., extra mobility work) between sets, and some additional corrective work at the end of the session. Since you have a limited amount of time with people, you may have to cut back on strength training or metabolic conditioning initially just so that you can get in this early corrective work to get them over the initial “hump.” Trust me: it will set the stage for long-term success rather than “short-term gain, long-term pain.”
There are two final points I’d like to make. First, in my experience, many experienced lifters/athletes have responded well to separating the heavy lifting from the corrective stuff. When they show up to train, they may be really fired up and ready to go – so the last thing they’ll want is to do some wall slides or spend five minutes getting some length in their rectus femoris.
These folks would be wise to do just enough warm-up work to prepare for their heavy training, and then add in some separate sessions to address movement inefficiencies – whether we’re talking additional foam rolling, massage, mobility drills, rotator cuff work, or something else. They can also add it in on the end of the session after the hardest work is done.
Second, for many folks, maximal strength can be tremendously corrective. Increasing strength in one area can reduce excessive stress in another area of the body. An example of this would be using the box squat or deadlift to learn proper hip hinging techniques, which would increase posterior chain contribution and take some of the burden off the quads in someone with anterior knee pain. Likewise, all other factors held constant, a stronger muscle is less likely to become degenerative. You can read more along these lines in two older newsletter of mine on the Law of Repetitive Motion: Parts 1 and Part 2.
Obviously, there are many things to consider, but this should at least get you headed in the right direction in finding the right balance in your strength training program.
Sign-up Today for our FREE Newsletter and receive a deadlift technique tutorial!
This wraps up a four part series on key points to consider and techniques to utilize for correcting bad posture. In case you missed them, check out the previous three installments of this series:
Strategies for Correcting Bad Posture - Part 1Strategies for Correcting Bad Posture - Part 2Strategies for Correcting Bad Posture - Part 3
We'll pick this up with tips 13-16.
13. Look further down the kinetic chain.
I spent much of the last installment discussing the role of the thoracic spine and glenohumeral joint in distorting upper body posture. However, the truth is that it goes much further down than this, in many cases, and isn't quite as predictable. As the picture below shows, a posteriorly rotated pelvis (swayback posture - third from left)) can kick off a nasty thoracic kyphosis, but an excessively lordotic posture (second from left) can do the exact same thing; it really just comes down to where folks compensate.
In the swayback posture, we see more flexion-based back pain (in addition to the classic upper body injuries/conditions), whereas the lordotic posture kicks off extension-based back pain. Stretching the hip flexors a ton will help the lordotic folks, but usually have minimal effect for the swayback folks. So, you really have to assess the hips individually and contemplate how they impact what goes on further up.
Likewise, you can look even further down the chain. Overpronation at the foot and ankle kicks on excessive tibial and femoral internal rotation, which encourages more anterior pelvic tilt - which goes hand-in-hand with a lordotic posture. Further up, we may compensate for this lordosis by getting more kyphotic to reposition our center of mass and remain "functional" and looking straight ahead.
14. Get ergonomic...conservatively.
While some ergonomic adjustments to your work station can be extremely valuable, simple modifications often yield the quickest and most profound results. I've known folks who have gotten symptomatic relief by going to a standing or kneeling desk to get away from extended periods of time in hip flexion - and by getting the computer screen up to eye level.
Likewise, I always remind people that the best posture is the one that is constantly changing. So, regardless of how "correct' your posture may be, it should always be a transient thing.
If you're doing the program, chance are that you've noticed that there are quite a few unilateral upper body strength exercises - often one in each upper body training session. The reason is pretty simple; you train thoracic rotation and scapular protraction/retraction on each and every rep.
If we are doing thoracic mobility work and lower trap/serratus anterior activation drills in our warm-ups, this is a perfect opportunity to create stability within that new ROM and solidify the neural patterns we've hoping to establish (and get an added core training benefit). You simply can't get this with bilateral exercise, particularly in a supine (bench presses) or prone (chest-supported rows) position.
16. Add range of motion - not just load - to your weight training program.
This note is one that anyone with a decent power of observation could make. Walk in to any gym, and notice the people with the absolute worse posture as they go through their workout routines. What do they do?
They move as little as possible on every single rep. They squat high, don't go anywhere near the chest on bench presses, or just make up "strength exercises" that amount to violent spasms. And that's just the ignorant folks.
Among advanced lifters, you'll see a lot of folks with terrible shoulder mobility and posture sticking with board presses and floor presses (which are certainly justified in limited volumes at specific training times), and doing rows with crazy heavy weights that force them to substitute forward head posture in place of anything even remotely close to scapular retraction.
In short, these folks keep working to add load, when they really should be maintaining or even lowering the load while adding range of motion to their weight training programs.
Wrap-up
Hopefully, this series brought to light some concepts that you can put into action right away. Down the road, I may "reincarnate" this series as I think up some more strategies - or based on reader feedback. Are there other areas you'd like covered? If so, post in the comments section and there may be a Part 5 afterall!
Sign-up Today for our FREE Newsletter and receive a deadlift technique tutorial!


