10 Ways to Progress Inverted Rows
I’m a big fan of including inverted row variations in strength and conditioning programs, as they not only build a strong, functional upper back, but also challenge core stability at the same time. Unfortunately, for more advanced lifters, they can become too easy very quickly. With that in mind, I thought I’d use today’s post to introduce ten ways that you can progress these variations to increase the difficulty.
1. Do them correctly!
The first progression for most people is to simply perform the exercise with correct technique. The most common errors I see in most folks’ technique are:
- forward head posture
- elbows drifting behind the body (scapula doesn’t retract, so the lifter substitutes extra movement of the humerus)
- hip sagging (the body doesn’t stay in a straight line)
If you’d like some quick refreshers on how to make these look good, check out these videos:
2. Change the grip.
Just as we see with pull-up variations, going to a pronated (overhand) grip will increase the difficulty of inverted rows, as compared to neutral (palms facing one another) and supinated (underhand) grips.
3. Try some mechanical advantage drop sets.
While we’re on the topic of which grip set-ups are harder than others, we can use this to our advantage to do some drop-off sets. If you’re someone who can bang out inverted reps pretty easily and want a crazy challenge, try doing the first half of your set pronated, and then switching to supinated for the second half when you fatigue. I like suspension trainer variations for this approach, as it’s easiest to go pronated, to neutral, to supinated without having to let go of the handle.
4. Add isometric holds at the top.
The top position is without a doubt the most challenging, so you can increase the time under tension – and therefore the difficulty – by adding 1-3 second pauses at the top of each rep.
5. Elevate the feet.
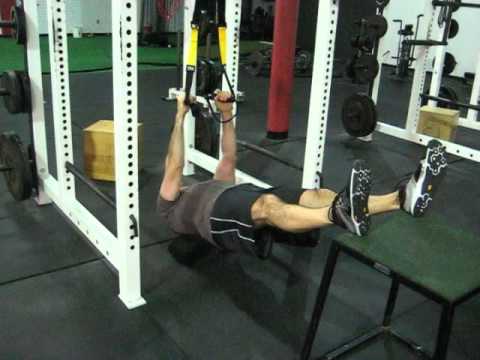
This progression is somewhat “assumed,” but most people overlook the fact that you can elevate the feet a lot further than you might think. I like to use the 24″ box.
You can also utilize various elevations for mechanical advantage drop sets. Go from a more extreme elevation, to a subtle elevation, to no elevation, and then even to a more upright position to finish things off. A set of 20-25 inverted rows can be a fantastic finisher.
6. Load with chains.
Chains might be the single greatist luxury one almost never gets in commercial gyms. We’re fortunate to have them at Cressey Sports Performance, and they’re a complete “game changer” if you can get your hands on them. They’re also a great way to add extra loading to inverted rows:
7. Wear a weight vest.
This one seems logical, but there’s a problem: there still isn’t what I’d consider to be a great weight vest on the market. The heaviest ones are too bulky and always seem to fall apart. The lighter one are simply too light, and the velcro straps always seem to stop working in a matter of months of use. If you’ve got one, by all means, use it – but I actually prefer #7…
8. Load with a backpack.
About 5-6 years ago, I bought a Dell computer that came with a padded backpack. The computer was mediocre at best, but the backpack proved to be really useful in the gym! You see, the extra padding made it conducive to adding extra loading, as you can slide plates up to 25 pounds (the diameter on anything heavier is too much to fit). Just strap it on your chest and wear it in reverse for your inverted rows. I’ve got two 25-pound plates in for this demonstration:
9. Use Fat Gripz.
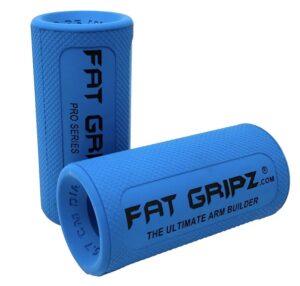
Adding load and range of motion aren’t the only way to increase the difficulty of inverted rows; you can also challenge the grip more aggressively. I really like Fat Gripz for this purpose, as they’re super affordable and wrap over any barbell, dumbbell, or suspension trainer to make for a thicker handle.
10. Go to one-arm variations.
You can do inverted row variations one arm at a time, too. In doing so, you add a little more of a challenge to rotary stability of the core. Here’s the basic version, although you can expand upon it by adding a reach at the bottom (toward the floor) and top (toward the rack) with the non-working arm.
Inverted rows are a staple exercise, but that doesn’t mean that they need to be boring! Try these progressions – and even combine some of them – and you’ll find that you’re able to include an inverted row variation in just about every strength and conditioning program you complete.


