Home 2014 (Page 16)

Strength and Conditioning Stuff You Should Read: 2/20/14

Here's this week's list of recommended strength and conditioning reading:

Long-Term Athletic Development and the ABCs of Training - This was an awesome article from US Lacrosse, but it applies to all sports. It closely reflects our approach to developing baseball players at Cressey Performance.

CP3

Carb Controversy: Why Low-Carb Diets Have It All Wrong - Brian St. Pierre wrote up an extremely well-researched post for Precision Nutrition - and some of the points he make will surprise you.

precision_nutrition

11 Ways to Make an Exercise Harder - Call this a little "Throwback Thursday" inclusion, as I wrote it back in 2010. If you're looking to learn how to write strength and conditioning programs, this is a good resource for understanding progression and regression.

Sign-up Today for our FREE Newsletter and receive a four-part video series on how to deadlift!

Name
Email
Read more

Coaching Cues to Make Your Strength and Conditioning Programs More Effective – Installment 8

It's time for the eighth installment of my series on coaching cues.  Try putting these three cues to work for you.

1. Bear hug a tree.

I love anti-rotation chops as a way to train rotary core stability. Unfortunately, a lot of people butcher the technique so that they can really load up the weight on these. In short, the closer the arms are to the body, the easier the exercise.  So, if you really bend the elbows, you can use a lot more weight without getting as good of a training effect.  With that in mind, I tell folks to "bear hug a tree" as they're doing these exercises, as it ensures that the elbows are only slightly bent, but still well out in front of the body.

2. Be heavy on the pad.

Chest-supported rows (also known as T-bar rows) are an awesome exercise to strengthen the upper back, and the presence of the pad on the front of the torso is a great external focus point to keep the lifter's technique sound.  That is, of course, only if people use it!

One of the most common mistakes I see is that people will keep their hips on the lower pad, but then extend heavily through their lumbar spine (lower back) to lift the weight.  In reality, it should be a neutral spine posture from top-to-bottom; the ribs have to stay down. The cue I like to give athletes is to "be heavy on the pad." Keeping the chest firmly on the pad prevents the rib cage from flaring up when it should just be movement of the scapula and upper arms.

3. Pull the bar into your upper back.

This was a coaching cue that made a huge difference with my squat. One of the biggest mistakes you see lifters make when back squatting is that they don't take control of the bar. Rather than pulling it down into the upper back to create a good "shelf," they just let it sit there. The last thing you want to be under heavy weights is passive.  By pulling the bar into the upper back, you not only dictate the bar path (it can't roll), but also get the lats engaged as a core stabilizer.

While on the topic of squatting, if you're looking for a thorough squat technique resource, I'd encourage you to check out Jordan Syatt's new resource, Elite Performance Squatting. It's a great two-hour presentation.

Sign-up Today for our FREE Newsletter and receive a four-part video series on how to deadlift!

Name
Email
Read more

7 Random Thoughts on Sports Performance Training

It's been a while since I posted one of my "Random Thoughts" pieces, so here are seven things that came to mind yesterday.

1. After the initial year or so of “organized” strength training, athletes don’t get hurt because they’re globally weak; they get injured because they’re positionally weak. This dictates the window of adaptation you seek out.

2. The Turkish Get-up is an outstanding exercise for not only challenging athletes, but also re-establishing fundamental movement patterns they may have lost over the years.  However, that doesn’t mean that everyone is prepared for it on day 1.  Obviously, one must have adequate shoulder flexion to hold a kettlebell overhead, but – as the picture below shows – you can’t overlook the importance of having adequate hip mobility and a good hip hinge pattern.

Get-up hip hinge

In short, if you can’t hip hinge and have brutally short adductors, you can’t do a Turkish Get-up…or at least not a good looking one.

3. Taking this a step further, if you're familiar with the Postural Restoration Institute school of thought, many individuals will likely have a harder time "getting into" the left hip if they present with this common aberrant posture:

adductedrighthip

So, if you struggle with the left hand overhead in particular on get-ups, there's a good chance that it's because everything under that arm is slightly out of whack.  For those folks, a left-stance toe touch can be a game changer.

4. Pull a quad (rectus femoris), and you’ll usually bounce back really quickly.  Pull an oblique and it’s much more stubborn. What’s the difference?  The rectus femoris is really all about the sagittal plane, whereas the obliques have a big role in controlling excessive motion in the sagittal, frontal, and transverse planes.  The more complex the job of the muscle, the more significant the injury – and the longer the rehab.  Hamstrings have roles outside the sagittal plane and can be equally stubborn, too.

201px-Rectus_femoris

5. “This athlete is strong enough” is an observation you might make with some male athletes.  The risk of continuing to load up to try to improve maximal strength far outweighs the potential benefits of those strength increases – and there’s likely a bigger window of adaptation elsewhere in their athletic profiles.  Conversely, I can honestly say that I’ve never met a female athlete who was strong enough. It just doesn’t happen.

6. Downright terrible coaches don’t look to the literature at all, or they do so only to cherry-pick study results that support what they’re already doing.  Mediocre coaches look to these resources so that they can have someone else tell them exactly what to do.  The best coaches read diligently and critically, scrutinizing everything they encounter to determine if it is correct and, if so, how it can be incorporated into their existing philosophies. 

Full disclosure: this is actually an excerpt from my e-book, The Ultimate Off-Season Training Manual. I reincarnated it after a discussion with one of my interns the other day.

uotm

7. Watching the incredible success that the Netherlands has with speed skating makes me wonder how many 100mph arms there might be kicking around in the NBA, NFL, and other professional sports.   Much like we’ve seen with baseball players in the Dominican Republic – where there really aren’t “competing” sports – if you prioritize development one sport across a population, you’re going to find more studs even if that population is smaller.

In the United States, a larger country with more “sports variety,” it makes me wonder if this is actually one more argument against early sports specialization.  Maybe if we were more patient and followed athletes for longer in a general sense, we might discover more freak athletes later in the game?

Former NBA player Tracy McGrady attempting to play baseball is a great example.  He was a very good NBA player, but could he have been a Hall-of-Famer in baseball?  Similarly, does anyone deny that some NFL tight ends could have been NBA power forwards, if they’d directed that focus elsewhere?

Early specialization doesn’t just lead to more injuries and burnout and stunted development; it also potentially redirects good athletes away from sports in which they could be sensational.  Of course, there’s no way to know!

Sign-up Today for our FREE Newsletter and receive a four-part video series on how to deadlift!

Name
Email
Read more

Strength and Conditioning Stuff You Should Read: 2/13/14

Here's this week's list of recommended strength and conditioning reading:

Is Your Vitamin D Supplement Hurting or Helping You? - This might be the single-best thing I've ever read on Vitamin D.  The Precision Nutrition team did a great job with it.

Buddy Morris: The Next Chapter - This is a great podcast at EliteFTS with Buddy Morris, head strength and conditioning coach at the University at Buffalo. I've long been a fan of Buddy's not only because he's a bright guy, but also because he's an example of everything that's right about strength and conditioning. He's humble, super approachable, and always looking to get better - regardless of how long he's been in the field.  This is a "must listen" for up-and-coming coaches.

Cressey Performance on Social Media - You might not know it, but Cressey Performance is well represented on social media.  If you aren't following us already, you're missing out on daily tips, exclusive articles, and the ever popular "quote of the day."  Here's where you can find them all:

Cressey Performance on Facebook

Excellence Bootcamps on Facebook

Cressey Performance on Instagram

Cressey Performance on Twitter

Enjoy!

CP3

Sign-up Today for our FREE Newsletter and receive a four-part video series on how to deadlift!

Name
Email
Read more

Strength Training Programs: 3 Habits to Make You a Better Lifter

Today's guest post comes from Cressey Sports Performance coach, Andrew Zomberg.  Andrew's a fantastic coach and a great writer, so you'll be seeing much more about him around here in the future!
 

Habitual behavior happens unconsciously and compulsively. Daily activities like brushing your teeth or setting your alarm before bed are programmed into your brain simply because of the repetitive nature in which you carry out these actions.  You want to create the same kind habitual behavior in your lifting routine. But, building these habits requires specificity. In other words, it is not enough to say, “I want to be a more efficient lifter.” This big goal needs to be broken down into small, specific behaviors in order to make the change attainable.

Below are three important habits to establish in your lifting routine. These behaviors will pave the way to efficiency. Just know, reinforcing them will take time. According to a 2009 study from London’s University College, it takes 66 days to successfully adopt a new habit.  What does this mean? At first, you will have to work hard at implementing them into your lifting routine – so don’t get discouraged! Eventually, these habits will become second nature, and you will incorporate them without even thinking about it.

1. Create structure. Structure provides a baseline to achieve your fitness goals. By planning things out and establishing a purpose to be at the gym, you can ensure quality and consistency in your workouts. Structure also makes it easier to stick to a program long-term. But planning requires effort and discipline, especially in the preparation phase. To make structure and organization a habit, aim to:

  • Write everything down. This includes the load (amount of weight lifted), any modifications (regressions, progressions, etc.), and the settings (cable column adjustments, hand placements, stance, etc.). It is not practical to remember exactly what you did last week, so take the guesswork out. Keeping track of your workouts is also highly motivational. Tracking your progress provides positive feedback and reminds you just how hard you are working to attain the end goal.
     
  • Execute the program without deviation. Program designs are created for a reason. Exercise choice and exercise order aren’t just arbitrary recommendations that can be ignored. Sure, warm-ups can be boring, and of course it is easier to do a lat pull down than a chin-up, but there are no shortcuts to speed, strength and growth. So, stick to the plan!
     
  • Improve your accountability to minimize hiccups in your programming. If you have a work commitment, schedule your training session around it. If you have an injury, find a way to safely work out. If you often make excuses to skip a weekend workout, train with a partner to increase your accountability to get the gym.

2.  Improve the proficiency of each lift. Awareness is underrated in fitness. Take single-leg work, for instance. Many “lungers” allow their knee to translate too far forward, which yields premature heel lift. Unbeknownst to their knowing, this redistributes the stress to unwanted areas and simply doesn’t target the intended areas (the hamstrings and glutes). It is so important to hone in on proper technique to ensure stability, proper body alignment, movement quality, and of course, safety. In order to improve proficiency in your programming, make a habit to:

  • Learn the right way to do each exercise. There are plenty of experts in the field who have mastered specific lifts from whom you can learn. However, please keep an open mind. Do not get caught up with just one individual. By learning from several enthusiasts, you are exposed to many different physical and verbal cues that will help perfect your lifts.
     
  • Practice lifts and all of their steps. There are several key components of a lift, including (but not limited to) the set-up, the tempo of the ascent/decent, and the lockout of the movement. Do not race through exercises. Take the time to execute the movements in their entirety in order to maximize results.
     
  • Figure out the limiting factors. These factors may include, mobility or stability restraints, lack of kinesthetic awareness or a pre-existing injury that is preventing the proper execution of a movement. There are several ways to reveal these issues.  Watch videos. Work with a training partner. Get assessed by a trained professional, like an athletic trainer, physical therapist, or chiropractor. It is essential to address limiting factors because if you continue to perform in faulty movements, they will become ingrained, which prohibits growth and could eventually lead to further injury.

3.  Add variations to programs and exercises. Variations are different ways of executing movements to increase or decrease the level of difficulty, eliminate monotony or simply expand your existing knowledge base. Adding variety to your programming will not only create the necessary adaptations for growth, but it will also enhance your level of expertise in specific lifts. Variations are effective on a monthly basis. To add variations in your programs, strive to:

  • Manipulate the volume. Changing your reps and sets by either adding more or less weight in your current program will provide the muscular disturbances needed for noticeable and consistent growth.
     
  • Add more exercises to your toolbox. Your muscles will not get stronger unless you force them to do so. By utilizing different exercises, you impose new stresses to the body, eliminating monotony and allowing for adaptation. This change leads to an endless list of benefits, including the improvement of cardiovascular health, the enhancement of body composition, and the development of quality of movement.
     
  • Play around with additional training variables. Alter your base of support (stance), create new ranges of motion (deficits or partials), adjust your grip placement or modify your tempo.  Changing the variables not only warrants growth, but also helps you avoid plateaus.  Remember, repetition allows the body to adapt to the repetitive motions, so mix it up – on a monthly basis!

Andrew Zomberg is a strength and conditioning coach at Cressey Performance.  You can follow him on Twitter: @AndrewZomberg.

Sign-up Today for our FREE Newsletter and receive a four-part video series on how to deadlift!

Name
Email
Read more

Baseball Training: Are Shoulder Dislocates Appropriate?

I received the following email the other day, and thought my response would make for a good Q&A here:

Q: I recently heard a national level gymnastics coach speak on how he believed shoulder dislocates with a dowel rod (working up to weighted dislocates) are a panacea for shoulder health and strength. I was wondering if you use them with your clients/players, and why or why not?

OBroomstick1BDislocations2

A: Thanks for your question.  In short, the answer would be NO, I would never do shoulder dislocates with a throwing athlete.  I discussed why in a previous video that goes into great detail, so rather than reinvent the wheel, here it is!   Effectively, shoulder dislocates replicate some of the movements that I outline as problems here.

As a general rule of thumb, as a thrower, it's always better to be too tight than it is to be too loose.  WIth that in mind, you always need to ask why you're stretching an area out.  If the front of the shoulder feels "tight," it may be from a number of different causes:

1. Protective tension of the biceps tendon (secondary to rotator cuff weakness) - just stretching it out would remove what little anterior stability remains.

2. An injury to the anterior capsule, latissimus dorsi (humeral attachment point), subscapularis, supraspinatus, or biceps tendon - just stretching these areas out will likely exacerbate the injury.

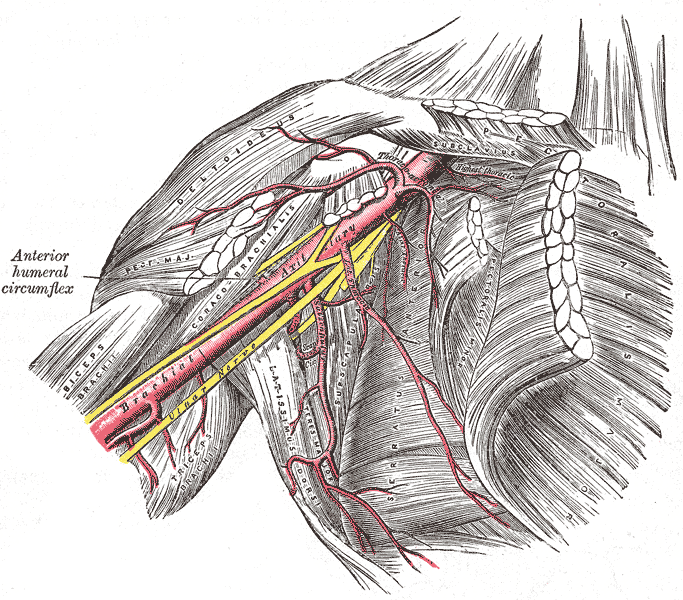
3. Irritate of the nerves that run anterior to the humeral head - nerves don't like to be stretched.

Gray523

4. True muscular shortness of pectoralis major or another structure - Effectively, in doing shoulder dislocates, you're throwing all your eggs in this basket.

The only problem?  Most throwers already have an insane amount of horizontal abduction and external rotation range-of-motion on their throwing shoulders.  They aren't even close to having legitimate tissue shortness that would benefit from stretching.  This is something we work hard to drill home in our Elite Baseball Mentorships as one of the most important takeaways from the events.

Now, if we're talking about a regular ol' desk jockey who doesn't throw a baseball (or other sporting implement), play tennis, or swim, then dislocates might have some merit.  These individuals likely have some muscle/tendon stiffness that can be stretched out before they get to a point where they might crank on their joint capsule or nerves.  I would never use it as a "blanket" recommendation for everyone, though.  The only way to know is assess the individual and then plan accordingly.

Sign-up Today for our FREE Baseball Newsletter and Receive Instant Access to a 47-minute Presentation from Eric Cressey on Individualizing the Management of Overhead Athletes!

Name
Email
Read more

Quick and Easy Ways to Feel and Move Better: Installment 54

It's time for this week's random strength and conditioning and nutrition tips from Greg Robins:

1. Use a kettlebell to off-set load 1-arm TRX rows.

The TRX (and other suspension trainers) are a great tool for any kind of training. They offer closed-chain horizontal rowing options, which for a long time were only doable by using a barbell inside the power rack.

The only downside is that after some time people’s body weight becomes a bit to easy. We got past that with some of the options Eric mentioned in 10 Ways to Progress Inverted Rows.

With the 1-arm variation, body weight is enough of a challenge to the row portion. However, challenging the rotational stability aspect of the row, while still working at an angle that is doable for the working arm, may take some external loading. Check out this quick fix:

2. Use avocado oil for a change of pace in the kitchen.

Recently, one of our bootcamp clients was nice enough to give me a bottle of avocado oil as a gift for the holidays.

Funny story: it was wrapped tightly and kept its shape; in fact, I thought it was a bottle of scotch! Oh well, maybe next year…

I’ve been using it in the kitchen, and I love it! It’s definitely worth trying out as another option to complement mainstays like coconut and olive oil.  And, in addition to tasting great, it offers some other really great benefits.

For starters, it boasts a really high cooking temperature – over 500 degrees to be exact. It’s also got a solid fatty acid composition, which is great news for our cardiovascular system. Lastly, it not only boasts a ton of antioxidants itself, but actually helps absorption of nutrients in other foods as well. In fact, this study showed that adding avocado oil to a salad boosted carotenoid absorption up to 400%!

Avocado

3. Watch out for this mistake with reverse lunge technique.

At Cressey Performance, reverse lunge varietions are staples in our programming. Reverse lunges offer a great single leg exercise that is more hip dominant, and often time knee friendly, than the forward and walking lunge variations. A big reason for this is the fact that it’s less decelerative in nature – unless, of course, you make the mistake I outline below:

4. Consider this approach to integrating heart rate variability (HRV) data into your training.

A few months ago I began charting my HRV scores using the BioForce technology from Joel Jameison.

I know a lot of folks are talking about using the data to help them maximize their training. Here is what I did, and I think it’s a solid approach for others to try as well.

I decided to record my HRV scores, but not act on them for the first three months I used the application. I wanted to chart the data alongside my training, which for the most part stays organizationally the same year-round. I use block periodization to train for powerlifting meets. Over the course of about 20 weeks, I go through longer periods of loading at lower intensities, medium periods at higher intensities, and shorter periods at very high intensities.

As it stood, I would stay in the first block for four weeks, second for three, and third for two.

I noticed that my HRV scores were high enough to train at full intensity each of my three training days in the first block, all four weeks. However in the second block, I was not fully recovered going into my third week. Moreover, I was also not fully recovered moving into my second week of the last block.

I didn’t change my approach this go-round. Instead, I plan next cycle to load the first block all four weeks, split the second block into two 2-week loading phases, and the third block into two 1-week loading phases.

If you were about to begin using HRV I would recommend the same approach. If your training was productive already, as mine was, chart HRV scores alongside what you normally do, but don’t change the organization. Look for trends like this and adjust the next go around.

This will keep you from second-guessing yourself based on the data, and help you use trends to optimize your training next cycle.

5. Try setting your hands like this on back squats for optimal positioning.

Sign-up Today for our FREE Newsletter and receive a four-part video series on how to deadlift!

Name
Email
Read more

Strength and Conditioning Stuff You Should Read: 2/7/14

Here is this week's recommended strength and conditioning reading.  As it turns out, you could call this the Assess and Correct edition, as it features the three of us who collaborated on this product:

The Secret to Ab Training - Mike Robertson did an awesome job introducing some movements you've probably never seen before.  That said, we've been using them at Cressey Performance with great results for quite some time now.

Thoughts on Long-Term Athletic Development and Training Young Athletes - Bill Hartman doesn't write very often, but when he does, he crushes it!

3 Things Everyone Should Know About the Shoulder - This is a quick read, but has some really useful takeaways if you're looking to wrap your head around shoulder assessment and training.

Sign-up Today for our FREE Newsletter and receive a four-part video series on how to deadlift!

Name
Email
Read more

Strength and Conditioning: What I Learned in 2013

This is the eighth time I’ve recapped some of the bigger discoveries of the previous year in an article.   As I look back on the previous seven years of content, I notice a number of key observations that have immeasurably improved the way that I coach and program for athletes.  To that end, I hope that the 2013 recap offers some solid pearls of wisdom you can apply right away.

1. Frequent soft tissue work throughout the day works best.

We might not know exactly why soft tissue approaches – everything from foam rolling, to massage, to instrument-assisted modalities – work, but we do know that they help people feel and move better.  With that in mind, we’re always searching for ways to help people get faster results with less discomfort.

Earlier this year, Chris Howard, the massage therapist at Cressey Performance, was flipping back through an old massage therapy textbook and found a little pearl: a suggestion that shorter, frequent exposures to soft tissue work throughout the day is likely more effective than one longer session.  And, it certainly makes sense; our bodies “learn” and adapt better with frequent exposures. 

Candidly, it always drives me bonkers when I see someone foam roll for 30 minutes at the start of the session.  You aren’t going to magically fix everything in one session; you have to be patient and persistent.  In fact, Thomas Myers (an authority on fascia and bodywork), has commented that prominent changes may take 18-24 months to set in. 

Nowadays, when we have an athlete who is particularly balled up in one area, we heavily emphasize repeated exposures.  We recommend that they split massage therapy sessions up into shorter appointments throughout the week.  And, we’ll have them hop on the foam roller 5-6 times per day for 30-60s, as opposed to just grinding away at the same spot in one lengthy session.  It’s not convenient, but the results are definitely noticeably better.

2. Understanding an individual’s movement learning style can improve your coaching effectiveness instantly.

I’ve always divided folks I coach into three categories, according to their dominant learning styles: visual, kinesthetic, and auditory.

Visual learners can watch an exercise be performed, and then go right to it.

Auditory learners can simply hear a cue, and then go to town.

Kinesthetic learners need to actually be put in a position to appreciate what it feels like, and then they can rock and roll.

ECCishek

While most individuals are a combination of all three categories, one invariably predominates in every single case I’ve ever encountered.  With this in mind, determining an individual’s learning style during my assessment is something I started to do in 2013.  If you can streamline the cues you give, athletes will pick movements up faster, and you’ll be able to get in more quality work from the session.

I should also note that no one of these three categories is “superior;” they’re just different.  I’ve had professional athletes from all three categories.

3. External focus cues rock.

Building on the coaching cues theme, the best presentation I saw this year was Nick Winkelman’s Perform Better talk on external focus cues.

As a brief background, an internal focus cue would be one that made you think about how your body is moving.  Examples would be “extend your hips” or “tuck your elbows.”

Conversely, an external focus cue would have you focus on something in your surrounding environment. Examples would be “rip the bar apart” or “drive your heels through the floor.”  The bar and the floor are points of external focus.

Most coaches use a combination of the two – but with a greater emphasis on internal focus cues.  As Nick demonstrated with an extensive review of the literature, we out to reverse this trend, as external focus cues almost universally lead to improved performance and technique when compared to internal focus cues.

With this research in mind, evaluate the cues you give yourself before each lift.  When you deadlift, are you telling yourself to “keep the chest up” or are you reminding yourself to “show the logo on your shirt to the guy in front of you?”  Sometimes, relating things just a little bit differently can yield dramatic changes.

4. You should learn as much about recovery as you do about training at an early age.

Every decade in life seems to come with new “scare tactics” to make you think that your body is going to fall apart when you hit 30, 40, 50, 60, etc.  I turned 32 in 2013, so I’ve now had almost three years to stew over this.  Recovery just isn’t the same as you age, not matter how great you are with diet, sleep, and monitoring training volume, as degenerative changes kick in faster.  I can tell you this and I’m only at the start of the gradual downslope!

I’ve heard that, on average, strength peaks at age 29.  Obviously, this can change dramatically based on training experience.  However, in my line of work – professional baseball – the “prime” for players is widely regarded as ages 26-31.  Effectively, this constitutes just before the peak, the peak itself, and then just after the peak.  The higher the peak, the longer a playing career a player has.  This is one reason it’s so important to establish a strong physical foundation with athletes early in their career; it’s what will likely sustain their skillsets for longer.

It is equally important, however, to learn about what recovery strategies work well for you at an early age.  In fact, I’d say that not paying more attention to recovery in my younger years was one of the biggest mistakes I made.  It would have not only made my progress faster, but just as importantly, it would have prevented accumulated wear and tear for down the road (i.e., now).

Everyone responds differently to various recovery protocols.  I have guys who love ice baths, and others who absolutely hate icing.  I’ve seen players thrive with compression approaches, and others who saw no change. 

norm602133_10150376122714953_1211762470_n

Some high-level athletes can do great with seven hours of sleep, and others need 9-10 each night. Recovery is a 100% individual thing – and it’s constantly changing as you age and encounter new training challenges.

For that reason, don’t just get excited about the latest, greatest training program on the market.  Rather, try to get just as excited about finding a way that you can bounce back effectively between sessions.  It might be nutrition, supplementation, manual therapy, movement schemes, or initiatives like ice or compression.  The sooner you learn it, the better off you’ll be when you start hearing more and more of the “scare tactics” about age.

Conclusion

These four items were just the tip of the iceberg, as the strength and conditioning field is incredibly dynamic and new information emerges on a daily basis. Luckily, it's easy to stay up to speed on the latest cutting-edge information.  If you're looking for an affordable online resource to help you in this regard, check out Elite Training Mentorship.

Sign-up Today for our FREE Newsletter and receive a four-part video series on how to deadlift!

Name
Email
Read more

Quick and Easy Ways to Feel and Move Better: Installment 53

It's time for this week's quick strength and conditioning tips!

1. Elevate the feet to make stir the pot a more challenging core stability exercise.

Stir the pot is a great anterior core stability exercise, but a lot of folks claim that it gets too easy.  One quick solution to this is to just elevate the feet on a 12" box, as it effectively works very similarly to a push-up progression.  As an added bonus, you'll get a little bit more serratus anterior recruitment in this position, so you could actually consider it a shoulder health drill, too.

2. Work with gravity before you work against it.

I talk a lot to our staff about the importance of sequencing warm-ups correctly.  As examples, we always do our positional breathing drills before our mobility work, which would progress from ground-based to standing.  One more thing I like to emphasize is the importance of working with gravity before you work against it. 

I've talked about how the bench t-spine mobilization and back-to-wall shoulder flexion are two of my favorite drills for helping to get people out of extension - and we make sure to do them in this order.  With the bench t-spine mobilization, we're using gravity to help us get a good stretch on the lats and long head of the triceps, on top of taking the thoracic spine into some extension.  We just brace the core and resist extension at the lower back.

Conversely, with the back-to-wall shoulder flexion, we have to work against gravity to get the arms overhead the correct way.

This might seem like minutia, but the stiffness reduction we get by working with gravity makes it much easier to work against gravity, as there is less bad stiffness we need to overcome to get to good movement.

3. Hold light weights in your hands to increase the challenge on dead bugs.

Just as we saw with stir the pot, dead bugs can quickly become far too easy.  We'll always add a big exhale at the bottom position of each rep, but even still, this becomes too easy for most lifters.  And, while not every exercise is supposed to be made harder, we do have some wiggle room in this regard with dead bugs.  You can hold some 5-10 pound plates in each hand:

4. Buy a spice rack - or at least a bunch of spices that would theoretically go in a spice rack if you owned one.

Want to add some variety to your bland diet? Having an extensive collection of spices at your fingertips can go a long way in making the same food taste entirely different from one day to the next.  Try turmeric on eggs, or mix up some homemade Mexican seasoning for your chicken by combining chili powder, cayenne pepper, garlic powder, onion powder, sea salt, and anything else you want to add to the mix! 

One of the biggest advantages of buying the rack as a whole is that it gives you a chance to sample a lot of different options. Once you’ve discovered the spices you like, you can always look to buy them in bulk later on.

spicerack

5. Think "chest before chin" on push-up variations.

One of the most common push-up technique mistakes I encounter is athletes who substitute forward head posture in place of scapular retraction.  When this happens, you'll see the nose get close to the floor while the lower back is heavily arched, the upper back is rounded over, and the elbows are flared out.  I encourage athletes to get the chest to the floor before the chin get there, as it encourages them to be patient and allow the torso to descend.  Of course, you have to be careful to not allow the athlete to crank into a big arch to puff the chest out - but it's still a super-effective cue, particularly with those with less training experience.

Sign-up Today for our FREE Newsletter and receive a four-part video series on how to deadlift!

Name
Email
Read more
Page 1 14 15 16 17 18
LEARN HOW TO DEADLIFT
  • Avoid the most common deadlifting mistakes
  • 9 - minute instructional video
  • 3 part follow up series