Programming Principles: Installment 5
In light of some recent questions about my popular resource, Sturdy Shoulder Solutions, it seemed like a good time to update this series on program design strategies. Many fitness professionals and strength and conditioning enthusiasts have looked to this resource as a model upon which to base some of their program design efforts, so I thought I’d dig in a bit deeper on a few useful principles you’ll find in it that should be consistent across all programs.
1. Use your “pre-work” to address the most pressing issues.
In Cressey Sports Performance programs, you’ll see five distinct “components” to each day in most programs:
a. Warm-ups
b. Pre-Work
c. Strength Training
d. Metabolic Conditioning
e. Cooldown
Of course, there’s always some variation included. For instance, not every day will feature metabolic conditioning, and there may be training sessions that don’t include strength training. All that said, when folks come to observe at CSP and take a glance at a program, they’re often most intrigued about our “pre-work.”
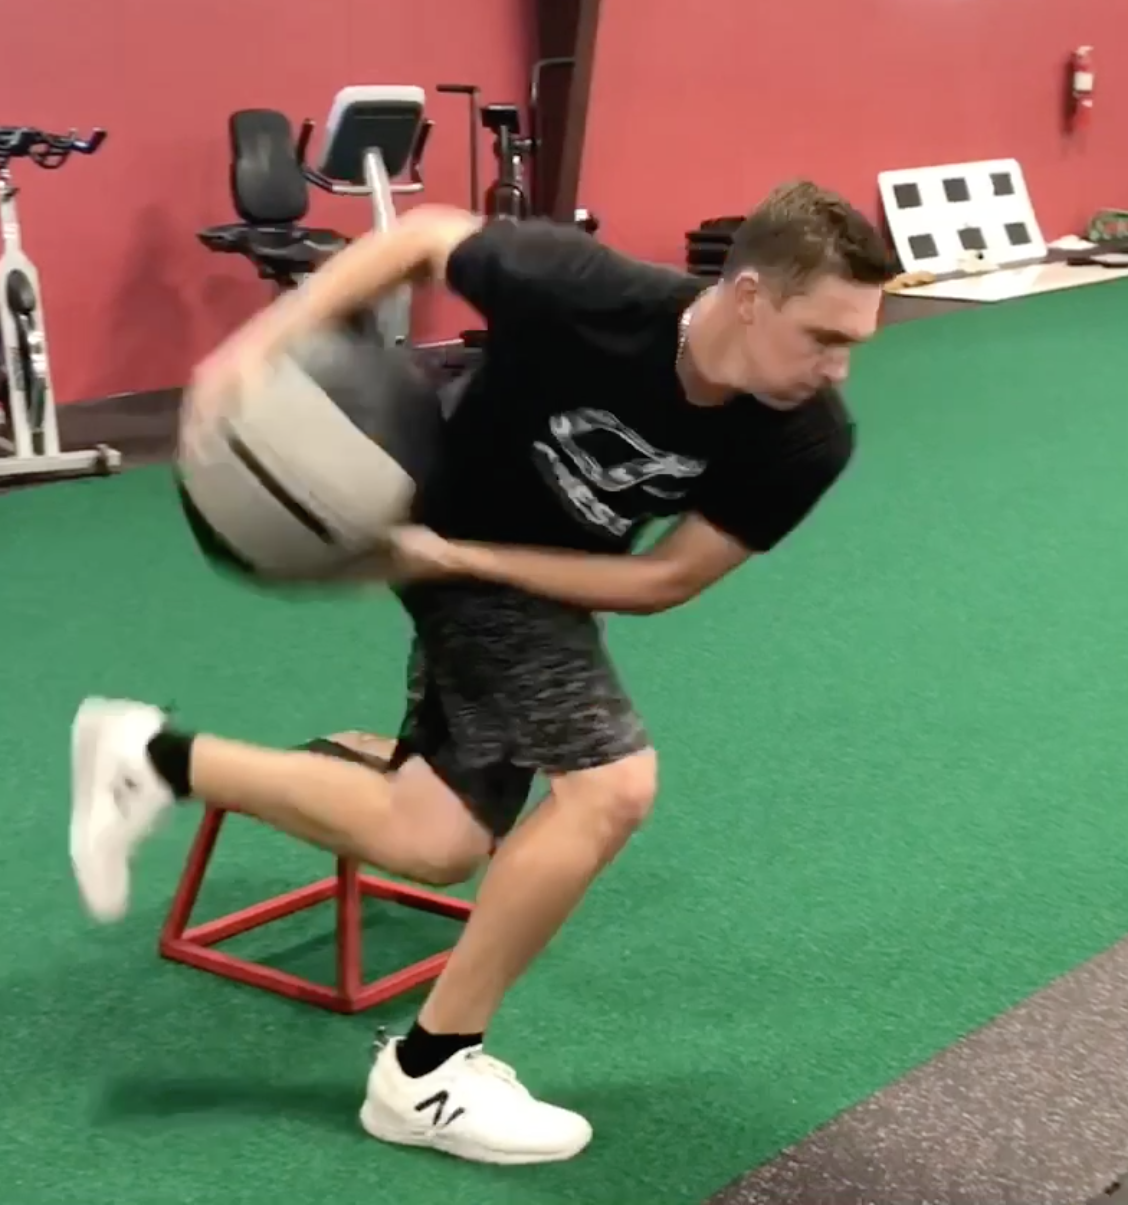
This section of the training session comes at the end of the warm-up and before the strength training for the day. Typically, it’s power training that’ll include some medicine ball work and sprint/agility/plyometric work. However, we’ll often take it a step further and include some single-leg balance work, or even mix in some technique practice on something like a Turkish get-up. Basically, it’s a bridge from the warm-up to the heavier lifting; we want this period to be all about athletes actually being athletic: moving fast, and being challenged in a rich proprioceptive environment.
Typically, in this time period, there are some rest periods that athletes have a tendency to rush through. Since they don’t feel very fatigued from a set of 6/side rotational medicine ball shotputs, they tend to rush from one set to the next. To get the most of these drills, though, we need to slow them down – and if we’re going to have them rest, we might as well make it productive rest. To that end, we use the pre-work period as a great time to mix in some fillers. Here’s an example we might use for an athletes with a flat thoracic spine and poor end-range external rotation control:
A1) Step-Behind Rotational Med Ball Scoop Toss: 3×4/side, 6lb
A2) Alternating TRX Serratus Slides: 3×6/side
B1) Side-to-Side Overhead Med Ball Stomps: 3×4/side, 10lb
B2) Prone External Rotation End-Range Lift-off: 3x(3x5s)
The secret is to pick the 2-3 highest priority movement struggles for each athlete and attack those in the 2-3 fillers you have each day in the pre-work. Over the course of a week, this could be an additional 15-20 sets to help get things moving in the right direction.
2. Proximal-to-distal almost always works great…almost.
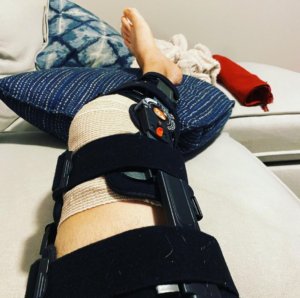
Anyone who’s followed my work knows that working proximal-to-distal is a strategy I like to employ when addressing movement challenges. The principle is simple: work on something toward the center of the body (e.g., neck positioning) and it’ll often yield downstream benefits (e.g., shoulder range-of-motion) as we work our way to the extremities. One time you might backtrack this strategy, however, is when there is a known pathology more distally. I’ll use myself as an example. I had a left knee meniscus repair (the first orthopedic surgery of my life) just over six weeks ago, and it has actually been a great learning experience for me.
As part of the surgery, my medical-collateral ligament had to be loosened (the equivalent of a Grade 2 sprain). There are some very specific post-op contraindications: I can’t flex the knee beyond 90 degrees in weight-bearing right now, and any of the classic drills that take my hip into external rotation (like a cradle walk) and abduction (split-stance adductor mobs, or lateral lunge) can easily irritate the medial (inside) aspect of my knee. Additionally, when you’re a bit limited in how much you can flex the knee during the gait cycle while in the brace, you tend to “cut off” hip extension on each stride. What does all this mean? The hip on my surgery side feels tighter than normal.
Sure, I can get creative with my hip mobility drills and even do some soft tissue work to settle down some muscles that can’t be lengthened, but the best solution is actually a distal to proximal one: get my knee right! Sure enough, getting the swelling out of the joint early on and hitting all my ROM targets immediately improved the hip symptoms because my weight-bearing strategies improved.
The take-home message here is that before you look to integrate a proximal-to-distal approach, be sure your assessment picks up on any unusually “sticky” joints. And, where appropriate, refer those cases out to someone who can get them “unstuck.”
3. Make your warm-ups more efficient so that you don’t have to “sell” them as much.
Let’s face it: people don’t typically enjoy the warm-up period. It’s without a doubt the “most likely to be skipped” part of any training session. We probably aren’t going to change people’s perspectives on this, but we can change the situation in which they operate. In other words, we can adjust our programming to make it logistically easier to complete for our clients/athletes. One way to accomplish this is to just structure the program in a more convenient context. To that end, here’s how I like to structure a warm-up:
a. Ground-based (e.g., positional breathing drills, supine/quadruped mobility drills)
b. Standing, stationary (e.g., wall slides, bowler squats)
c. Standing, moving (e.g., classic dynamic warm-up drills like lateral lunges, spidermans etc.)
This approach saves the time of having athletes get up and get down over and over again; it’s a more efficient flow.
Once you’ve incorporated this strategy, you can make them even more efficient by considering the location of any equipment – bands, benches, TRX straps, etc. – that they may need to complete the drills. In an individualized warm-up, putting these implements in convenient spots helps athletes keep their body temperature up while they’re moving from one spot to the next.
Finally, you can always use “combination” exercises to attack multiple qualities in the same drill. As an example, an adductor stretch with extension-rotation gets you both hip and thoracic mobility.
I’ll be back soon with another “Programming Principles” installment, but in the meantime, be sure to check out my popular resource, Sturdy Shoulder Solutions if you’re interested in digging in deeper on upper extremity assessment, programming, and coaching.


