Home Posts tagged "Cressey Sports Performance" (Page 9)

Strength and Conditioning Stuff You Should Read: 8/1/20

It's time for another edition of recommended reading/listening from the strength and conditioning world:

Eric Cressey on coaching the individual, building a community of hard work and athlete best practices - I recently joined Lewis Hatchett on the Raising Your Game Podcast for a discussion on a variety of coaching topics.

How to Use the Stage System for Strength, Speed, and Size - Yesterday, I had a conversation with a client after he saw the rep scheme "3x3,1x6" plugged into his program - and it reminded me of this article I wrote about the stage system a while back. I figured today would be a good time to reincarnate it, in case you missed it the first time around.

Breath: The New Science of a Lost Art - I just finished up this (audio)book from James Nestor, and found it to be a really good listen, particularly in the context of the history of breathing training/reeducation.

Top Tweet of the Week

Top Instagram Post of the Week

Sign-up Today for our FREE Newsletter and receive a four-part video series on how to deadlift!

Name
Email
Read more

New Cardinal Red CSP Elite Baseball Development Shirts

We're excited to announce a new color - cardinal red - with our popular Cressey Sports Performance Elite Baseball Development t-shirts (powered by New Balance Baseball). Here's the design:

These shirts are insanely comfortable and run true to size.

Each shirt is $24.99 + S&H. Click the links below to add shirts to your cart:

Small

Medium

Large

Extra Large

XXL

Read more

Exercise of the Week: Bottoms-up Kettlebell Arm Bar

Today's guest post comes from Cressey Sports Performance - Florida coach Derek Kambour.

The Kettlebell Arm Bar is an exercise you will commonly see performed in facilities across the country. Admittedly, it was an activity that we stayed away from for a period, mostly because of the population that we work with and the vulnerable position it could put them in. Many of the high-level pitchers that come to us have experienced anterior shoulder pain. Obviously, these symptoms could be present for a number of reasons, including a loose anterior capsule, labral tear, cranky biceps tendon, nerve-related issues, rotator cuff issues, or a most of other challenges. Regardless of what is causing the symptoms, one of our jobs as performance specialists is to make sure that we are making appropriate exercise selections and not provoking any of these symptoms. What we have found over time with the Kettlebell Arm Bar is that – when executed in a specific manner, at the right time, with appropriate loads – it gives us a lot of return on investment and has not provoked any of these symptoms with any of our athletes.

Many coaches utilize this exercise with their athletes for reflexive shoulder stability (irradiation) and rotary core stability benefits, which can be useful reasons to include them in a program. However, we can also use this activity to accomplish other important training outcomes if it is performed the way that is shown in the video below:

As physical therapist Bill Hartman has done a great job of demonstrating (and be sure to check his stuff out), when we can use internal forces (air pressure, fluid volumes, etc.,) to our advantage in order to help reshape the ribcage and improve scapulothoracic mechanics, that is where we can potentially restore shoulder range of motion without working directly on the joint. Certainly, there are manual interventions that may be necessary, but if we can assist in re-establishing normal joint mechanics with movement alone, I think that is extremely valuable. While many of our throwing athletes possess plenty of external rotation on their throwing shoulder (though we do sometimes see those who have limitations here as well), most will possess very limited internal rotation, especially after a long season. With this movement paired with specific breathing sequences, you can potentially improve shoulder motion in both directions. Traditionally, this movement was thought of as purely a “stability” exercise, but it just goes to show that how you implement or coach the exercise matters.

You may be wondering how heavy this exercise needs to be loaded. My simple answer to this is that if you struggle to breathe during the exercise, there is a good chance it’s too heavy. In that case, keep the goal the goal, and go down in weight. The kettlebell can be held in the normal position (bell is sitting on the outside of your wrists) or, as seen in the video, you can utilize the bottoms-up position to challenge the movement further. We typically like to use the KB Arm Bar in either the warm-up, or paired with medicine ball work for 2-3 sets of 4-6 reps/side.

About the Author

​Derek Kambour serves as a Strength and Conditioning Coach. Prior to joining the staff, Derek completed an internship at CSP-FL in the fall of 2018. Prior to joining the CSP-FL team, Derek coached a variety of athletes and clientele at performance facilities in New Jersey. He graduated from Montclair St. University with a degree in Exercise Science and is a Certified Strength and Conditioning Specialist (CSCS) through the NSCA. Derek is also a competitive powerlifter. You can follow him on Twitter and Instagram.

Sign-up Today for our FREE Newsletter and receive a four-part video series on how to deadlift!

Name
Email
Read more

CSP Elite Baseball Development Podcast: July 2020 Q&A with Eric Cressey

For this week's podcast, in lieu of a guest, I'm going to do a Q&A on a collection of baseball training questions that were submitted by listeners.

A special thanks to this show's sponsor, Athletic Greens. Head to http://www.athleticgreens.com/cressey and you'll receive a free 10-pack of Athletic Greens travel packets with your first order.

Questions Covered

  • What are the best kinds of recovery drills for after pitching?
  • With the lost 2020 season, how should NCAA pitchers adjust their throwing and training preparation for 2021?
  • Do you have any advice for a strength and conditioning coach who is looking to work specifically with baseball players?
  • Should the strength and conditioning program for high school baseball focus on sport-specific exercises or compound exercises?

Sponsor Reminder

This episode is brought to you by Athletic Greens. It’s an all-in-one superfood supplement with 75 whole-food sourced ingredients designed to support your body’s nutrition needs across 5 critical areas of health: 1) energy, 2) immunity, 3) gut health, 4) hormonal support, and 5) healthy aging. Head to www.AthleticGreens.com/cressey and claim my special offer today - 20 FREE travel packs (valued at $79) - with your first purchase. I use this product daily myself and highly recommend it to our athletes as well. I'd encourage you to give it a shot, too - especially with this great offer.

Podcast Feedback

If you like what you hear, we'd be thrilled if you'd consider subscribing to the podcast and leaving us an iTunes review. You can do so HERE.

And, we welcome your suggestions for future guests and questions. Just email elitebaseballpodcast@gmail.com.

Thank you for your continued support!

Sign-up Today for our FREE Baseball Newsletter and Receive Instant Access to a 47-minute Presentation from Eric Cressey on Individualizing the Management of Overhead Athletes!

Name
Email
Read more

Exercise of the Week: Half-Kneeling Kettlebell Windmill

Today's guest post comes from Cressey Sports Performance - Florida coach Derek Kambour.

At Cressey Sports Performance, we utilize several kettlebell windmill variations. A while back, Eric covered the regular standing version HERE. Today, I’d like to cover the half kneeling position, as I think there are some technical elements that should be highlighted in order to get the most out of this exercise.

Often, you’ll see this activity performed similar to the downward portion of a Turkish Get-Up, where the individual is in a half kneeling position, with the back hip in an externally rotated position, and then they will hinge back into that hip as they reach towards the ground, all while holding weight in an overhead position. While there is nothing wrong with this execution – especially if the goal is to challenge the individual’s ability to stabilize load in an overhead position while improving the ability to hinge – I do believe there are some ways we can coach this activity in a specific manner to get more out of it. I originally saw the execution of this exercise from Dr. Pat Davidson, so all credit goes to him for showing how to get more from this activity. This is an awesome transverse plane core exercise that helps individuals learn how to load their hip in the frontal plane. If you are an athlete trying to improve your ability to get in and out of a cut, or a pitcher looking to improve back hip loading or accepting force on the front hip, this could be a great exercise to include. Below is a demonstration that gives you a general understanding as to how we coach this exercise.

When performed in this manner, folks are getting a lot more than just overhead stability benefits. Here are some of the key components of this exercise explained further:

1. Setting up in a solid half-kneeling position is going to be essential when executing this variation. To ensure that the individual is in a good position, we like to have the individual drive the back foot into a wall, especially for those who have never performed this exercise before. The wall allows the individual to feel their hamstring and glute to gain better control of their pelvis on the down side hip. The wall is not always needed, but it can certainly help. The front foot should also be pressed into the ground as well.

2. Once set up in this half kneeling position, the KB can be pressed overhead. It is important to note, this exercise does not need to be loaded very heavy at first. We often start folks with a 15-25lb. kettlebell and they are absolutely smoked by the time they are done with their set. Sometimes, I will have the person I am working with perform this with no load, as it allows them to focus on the more important aspects of the exercise.

3. Before the individual reaches for the ground, they should be shifting into the front hip. Many times, when someone goes to perform this hip shift action, they will lose control of their pelvis and go into an anteriorly oriented position. Be sure that you, or the individual you are coaching, executes the shift while maintaining a subtle tuck of the pelvis.

4. As the individual begins to rotate and reach for the ground, it is important to keep both arms long. While they are slowly reaching towards the ground with the bottom arm/hand, they should be trying to maintain that hip shift without any movement of the front femur. The most common movement fault seen with this exercise is the inability to maintain control the front leg as the hips shift laterally towards the front side. The front leg should not move front to back or side to side, and it may be beneficial to think about pushing the knee in towards the midline. If done correctly, they should feel their adductors working significantly.

5. Most of the time, I will instruct the individual to reach down until the palm of their hand touches the ground, and that is as far as I will have them go. Some individuals are pretty mobile and can get their forearm all the way down to the ground. I’m fine with this as long as everything else checks out and they are feeling the desired musculature.

6. To get even more out of this activity, we can add a respiratory component to challenge this position further. Once the hand reaches the ground, the individual should get a full exhale out, and closing the side of the ribcage that is down. After a full exhale out and maintaining that bottom position, the individual can then inhale into the side of the ribcage that is up (trying to get air into the upper chest wall). After they have achieved maximal expansion in this area, they can exhale out again as they come back up into the starting position.

We will typically have our athletes perform this exercise for 2-4 sets of 6-8 reps per side as an accessory exercise towards the end of the session, or as part of their movement prep before their strength training. Once they’re proficient with it, we might load it up more and use it as part of a first pairing on an upper body training session (similar to how we program Turkish Get-ups). Give it a shot!

About the Author

​Derek Kambour serves as a Strength and Conditioning Coach. Prior to joining the staff, Derek completed an internship at CSP-FL in the fall of 2018. Prior to joining the CSP-FL team, Derek coached a variety of athletes and clientele at performance facilities in New Jersey. He graduated from Montclair St. University with a degree in Exercise Science and is a Certified Strength and Conditioning Specialist (CSCS) through the NSCA. Derek is also a competitive powerlifter. You can follow him on Twitter and Instagram.

Sign-up Today for our FREE Newsletter and receive a four-part video series on how to deadlift!

Name
Email
Read more

CSP Elite Baseball Development Podcast: Antoan Richardson

We're excited to welcome San Francisco Giants First Base Coach and retired MLB outfielder Antoan Richardson to this week's podcast. Antoan speaks about his path from the Bahamas to Vanderbilt to the Big Leagues - and also shares some insights on how we can best prepare baserunners and outfielders.

A special thanks to this show's sponsor, Athletic Greens. Head to http://www.athleticgreens.com/cressey and you'll receive a free 10-pack of Athletic Greens travel packets with your first order.

Show Outline

  • How Antoan became the 6th Bahamian to play in the big leagues and what the process is for young ballplayers in the Bahamas looking to progress their baseball career
  • What the baseball culture of the Bahamas is like, and how the game is growing on this island from the roots of softball
  • Why Antoan is heartbroken when foreign players are married to the idea of signing contracts as the only means to make their baseball dreams a reality and how he is working to educate the youth of the power baseball can have for their future
  • How Antoan became an all-state caliber baseball player in Florida after being cut from his 7th grade softball team in the Bahamas just years earlier
  • How Antoan has used his passion for baseball to be an ambassador for the Bahamas and pave the way for future generations of Bahamians to grow through the sport
  • Why Antoan chose to attend junior college out of high instead of accepting scholarships to play collegiate sports or pursuing early professional baseball pursuits
  • How Antoan earned the opportunity to play at Vanderbilt out of junior college in 2003 and what role he played in laying the foundation for Vanderbilt to develop into the powerhouse it is today
  • What differentiates Vanderbilt baseball and Tim Corbin from other universities in the country and how has the tradition of the baseball program progressed to and sustained greatness over the recent decades
  • How Antoan was able to defy traditional wisdom and reduce the number of times he was caught stealing as he progressed through the ranks of pro ball
  • What lessons Antoan has for young base stealers looking to sharpen their baserunning skills
  • What it was like scoring the game winning run on Derek Jeter’s walkoff hit in his final game as a New York Yankee
  • Why Antoan has learned to value the empathy, adaptability, and individualization needed to find success with each player with whom he works
  • What core competencies Antoan works to establish in the baserunners with whom he works
  • What skills Antoan emphasizes as important for outfielders, and why he stresses owning the first steps and remaining athletic
  • What struggles minorities face in baseball and how coaches can better serve the needs of all their athletes
  • What Project Limestone is, and how individuals can help the next generation of kids in the Bahamas
  • You can follow Antoan on Twitter at @ARichardson242 and on Instagram at @AntoanRichardson242. You can also learn more about the great work he's doing with Project Limestone at www.ProjectLimestone.org.

Sponsor Reminder

This episode is brought to you by Athletic Greens. It’s an all-in-one superfood supplement with 75 whole-food sourced ingredients designed to support your body’s nutrition needs across 5 critical areas of health: 1) energy, 2) immunity, 3) gut health, 4) hormonal support, and 5) healthy aging. Head to www.AthleticGreens.com/cressey and claim my special offer today - 20 FREE travel packs (valued at $79) - with your first purchase. I use this product daily myself and highly recommend it to our athletes as well. I'd encourage you to give it a shot, too - especially with this great offer.

Podcast Feedback

If you like what you hear, we'd be thrilled if you'd consider subscribing to the podcast and leaving us an iTunes review. You can do so HERE.

And, we welcome your suggestions for future guests and questions. Just email elitebaseballpodcast@gmail.com.

Thank you for your continued support!

Sign-up Today for our FREE Baseball Newsletter and Receive Instant Access to a 47-minute Presentation from Eric Cressey on Individualizing the Management of Overhead Athletes!

Name
Email
Read more

Progression Strategies for Back Hip Loading

Today's guest post comes from Cressey Sports Performance - Massachusetts pitching coordinator, Jordan Kraus.

Skill coaches are often faced with the challenging task of addressing mechanical problems that are actually underlying movement inefficiencies. This is especially true with respect to different aspects of the pitching delivery, and today I will be discussing the back hip load. We place a lot of emphasis on mastering this initial move in the delivery because of the many of downstream effects it has. Simply put, if the first move in the sequence is poor, the subsequent moves won’t be very good, either.

The biggest challenge stems from the fact that pitching is a unique skill, and the movement patterns associated with it become very ingrained. It is very difficult to change these patterns within the confines of the mound and baseball in hand, so stepping away from the specialized task of throwing to create context for a new movement pattern can expedite the process.

Efficiently loading the back hip can be challenging because of the different planes of motion involved and the speed associated with a pitching delivery. The three movements we look for in the back hip are flexion, adduction and internal rotation. It’s important to note that not everyone’s load will be the same, but all will have varying degrees of each of these movements.

The following movements can be used to help facilitate positions we want to replicate on the mound. For simplicity, they are broken down into four categories: unloaded, loaded, dynamic, and skill-specific. Within each of the first three categories, the movements progress from sagittal, frontal, to transverse plane movements. The goal of the sagittal plane movements is to control hip flexion while shifting weight posteriorly. Next, we are progressing by shifting our weight posteriorly while moving laterally in the frontal plane. The third movement in each category combines all three planes of motion as we learn to control flexion, adduction and internal rotation. The final category is a medicine ball series that will help bridge the gap between movements in the weight room and the throwing motion.

1. Unloaded: RDL/1-leg RDL > Lateral Lunge > Bowler Squat

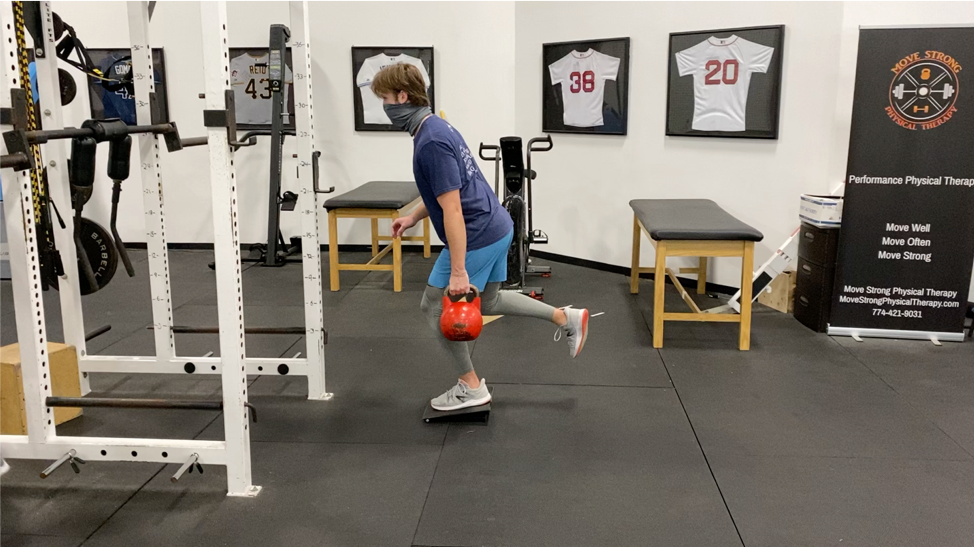
2. Loaded: KB RDL/1-leg KB RDL > KB Lateral Lunge > Rotational Landmine Press/Rotational Row

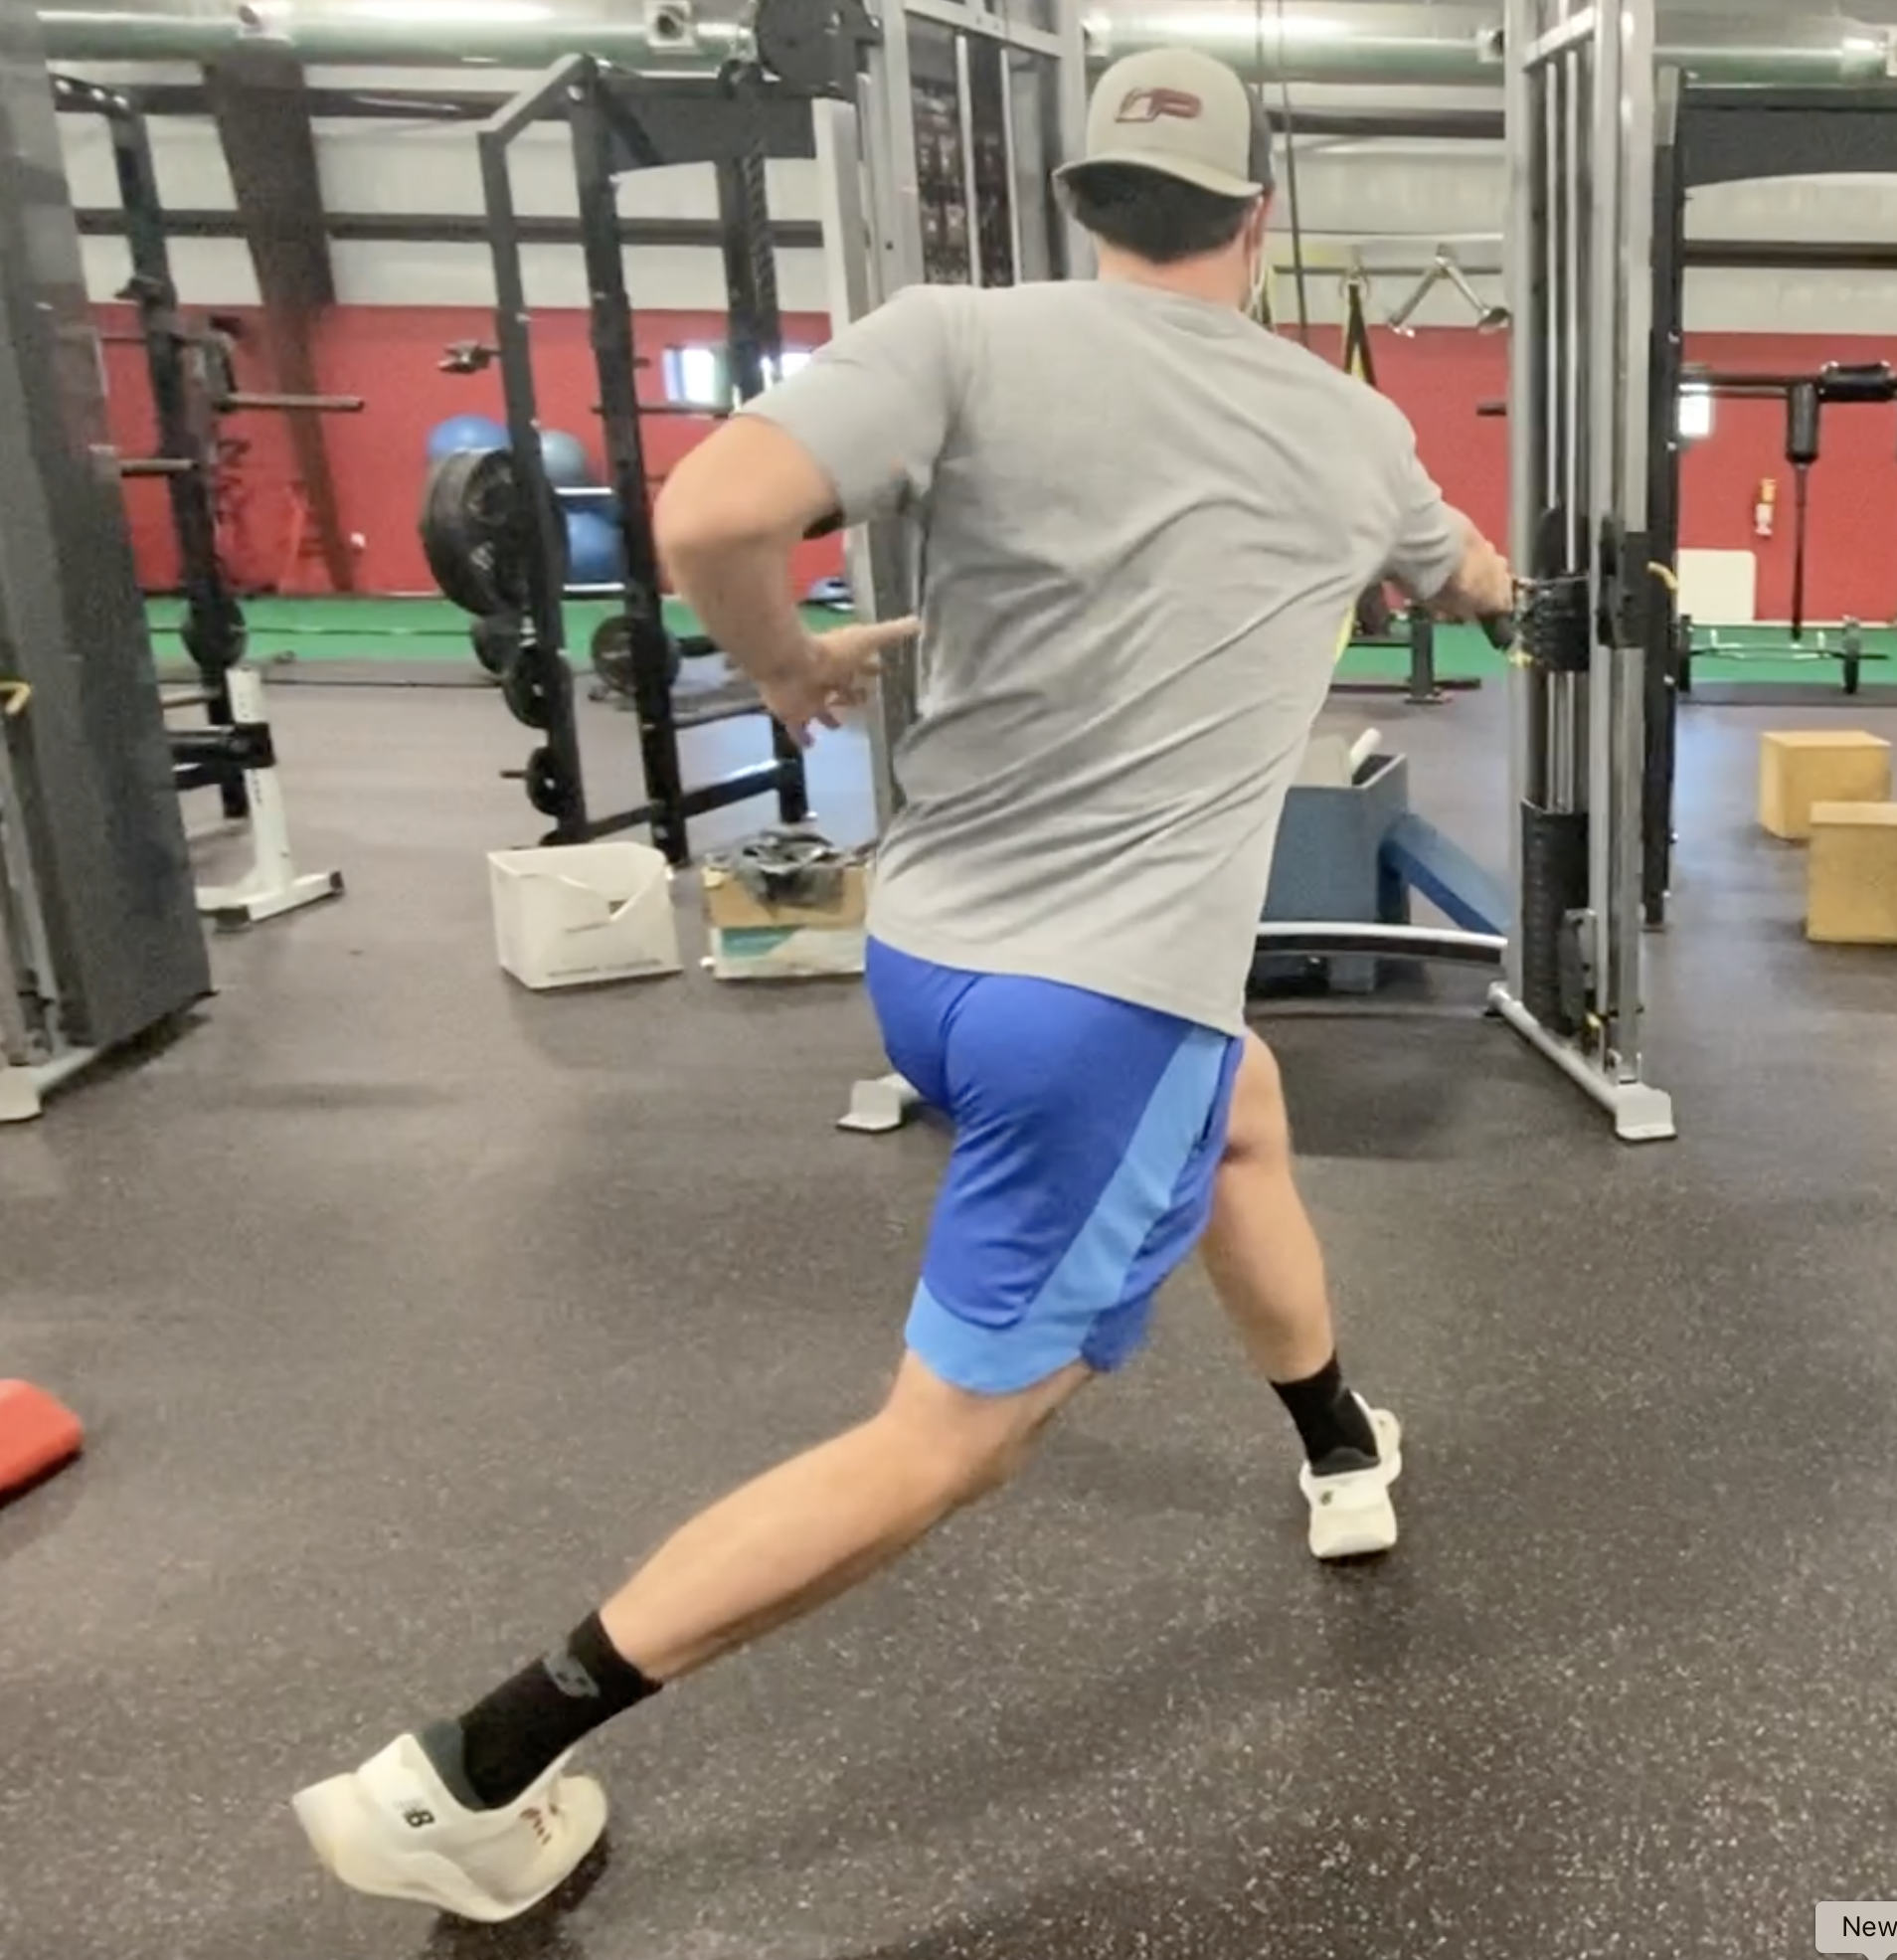
3. Dynamic: Drop Squat 2:1 > Low Box Shuffle w/Stick > Lateral Lunge w/ Fake Medicine Ball Chop

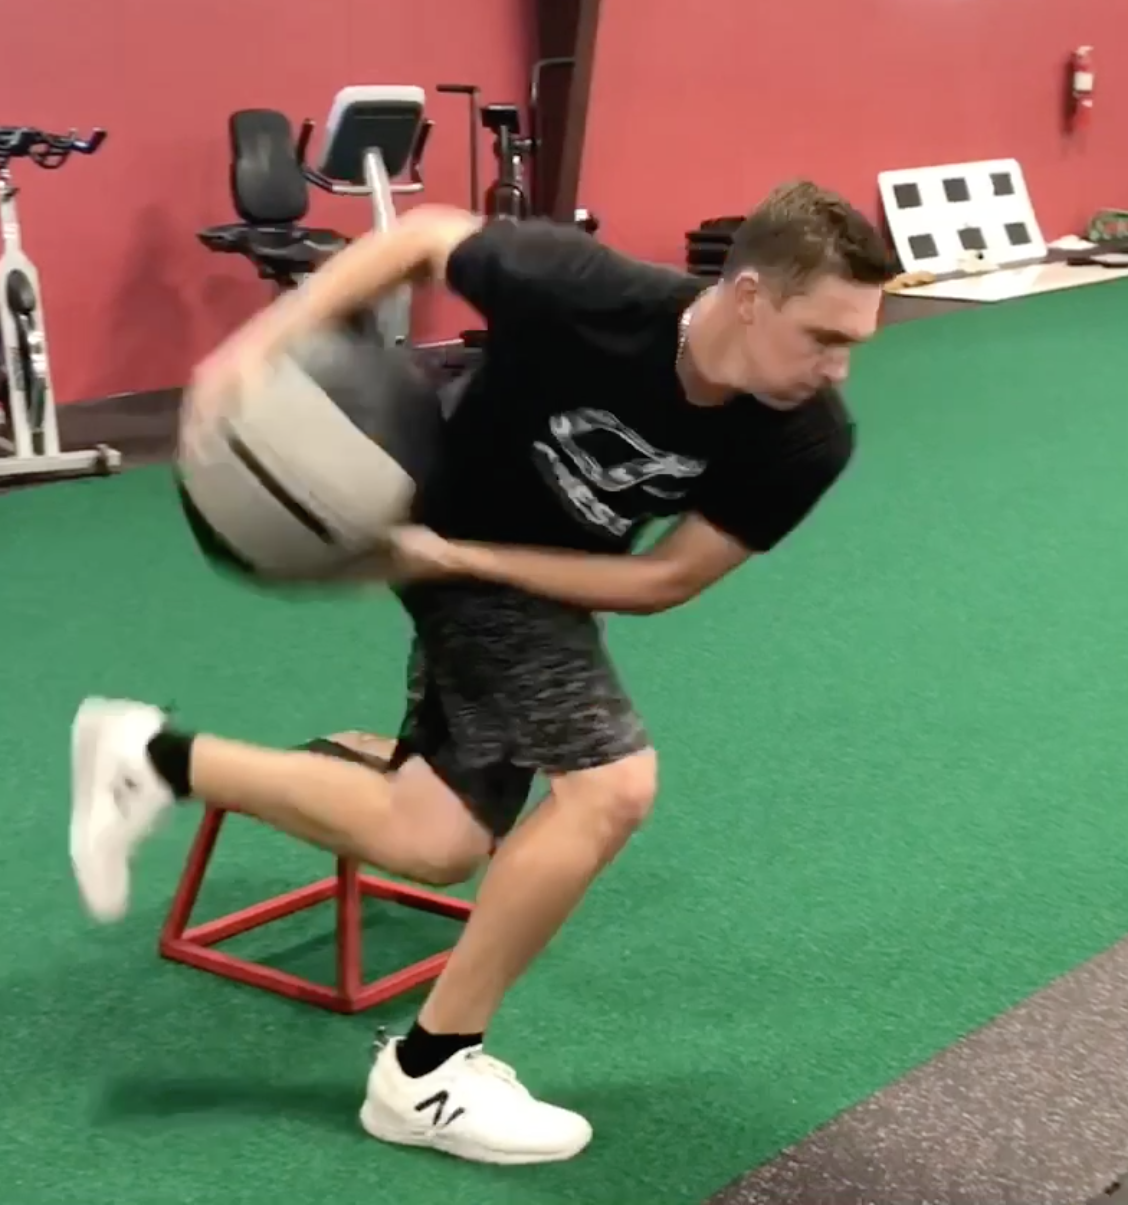
4. Skill-Specific: Rear Foot Elevated Medicine Ball Shotput > Step-Back Medicine Ball Shotput > Knee-to-Knee Medicine Ball Shotput

It’s important to note that there are plenty of other movement options and the progressions for these are not linear. Additional load or increased speed of a movement can sometimes produce a more favorable outcome, so there will always be a level of coaching required for exercise selection. Selection will depend on a variety of factors, including strength, athleticism, mobility restrictions, and individual compensation strategies. Once these movements become proficient, the next step would be to blend the new loading strategy into plyo drills, catch play, and ultimately to the mound. Changing the task can drastically improve motor learning, so don’t be afraid to have pitchers step away from the mound to create better movement patterns.


On a semi-related note, we recently opened up registration for our 2022 Collegiate Elite Baseball Development Summer program at Cressey Sports Performance in Hudson, MA. This is a great developmental opportunity for pitchers who are open to taking the summer off from competitive baseball, but still want to keep throwing and improving. Space is limited, so don't delay in reaching out if you're interested. For more information, click here.

About the Author

Jordan Kraus serves as a Pitching Coordinator at Cressey Sports Performance-MA. You can follow him on twitter and Instagram at @_JordanKraus_, or email him at JordanRKraus@gmail.com.

Sign-up Today for our FREE Baseball Newsletter and Receive Instant Access to a 47-minute Presentation from Eric Cressey on Individualizing the Management of Overhead Athletes!

Name
Email
Read more

Key Considerations for Making the Most of At-Home Training

Today's guest post comes from Cressey Sports Performance - Massachusetts coach, Drew Cobin.

Due to the current status of our country and gyms being closed, a lot of trainers, coaches, and fitness influencers are posting at-home workouts all over the internet. This article will seek to help sort out some of the clutter and help coaches, trainees, and anyone interested to make better at home training decisions.

Now, the first logical question to ask when organizing at-home health/performance training is, what is the goal? This will dictate a lot of the important variables in the at home training program. While just doing something is probably better than nothing, not having a goal in mind will likely lead to mediocrity. This is because without a specific focus, the training strategy will likely be less successful, as it is pulled in too many directions.

It’s kind of like switching majors in college. If the goal is to get a specialized degree, the best course of action is probably to stick to one major and take all the classes that it requires. Getting the degree isn’t going to come easily or quickly, but sticking to one major will definitely lead to steady progress toward the end goal. Training is the same, working towards one goal and staying the course will lead to faster and longer lasting progress.

When choosing an at-home training program, you need to make sure that you consider three important factors: Specificity, Overload, and Fatigue Management/Recovery. Let’s look at each in a bit more detail.

Specificity asks, “Does the program involve exercises, volumes, and intensities that reflect the goal.” So, doing four sets of 50 jumps squats holding a baseball will likely not help that baseball player in search of his baseball performance goal because the exercise itself is not very sport specific, and the repetitions are too high to train for power given the intensity of this exercise.

In consideration of Overload, in order to improve the human system, getting temporarily worse will result in getting better according to Hans Selye’s GAS Model, and the principle of supercompensation. This means that resistance training itself does not build muscle, improve cardiovascular function, or shred body fat. In fact, it is the cessation of training when adaption or the physiological improvement, supercompensation occurs. A good training program will overload the system over time through appropriate periodization or the manipulation of volume and intensity over time allowing for adaption to occur.

Third, we have to account for Fatigue Management and Recovery, since the resistance training or exercise itself does not improve the system; rather, the subsequent tissue recovery and repair does. Too much fatigue can disrupt the system by inhibiting our ability to recover sufficiently. Fatigue is absolutely essential for improvement, but without proper management, it can cause diminishing returns. For example, going too heavy, training to failure too often, or inducing massive amounts of high intensity work can cause an acute or chronic performance decline. With the aforementioned 4x50 jumps squats example, imagine trying to do sprints right after: the sprints will surely be less effective than if you had done something less fatiguing prior. The same can be said for over-fatiguing in a more chronic manner; an example is training to failure multiple days in a row on deadlifts for multiple weeks. In this case, initial acute improvements may be made, but over time, injury may occur and/or performance will decline by neglecting to get enough recovery between high stress training sessions.

So, with that said, making sure the training stimulus is one that allows for quality stress or fatigue distribution daily, weekly, monthly, and even yearly can be crucial in search of maximizing progress. One might ask, is this an exercise that is challenging enough, but allows for proper execution of the rest of the exercises in the program? For example, what might be more effective for strength gain: a) supersetting a high threshold compound strength movement like a deadlift with a low threshold coordination movement like a bear crawl, or b) doing four high threshold compound strength movements in a row back to back, like doing heavy deadlifts, then heavy squats, then heavy bench press, then heavy overhead press? The answer, of course, is the first selection – and then mixing in those higher threshold movements in over the course of the rest of the day or week.

Knowing this, what techniques might be most effective given limited equipment selection at home? Well first, let’s look at three training constants that directly apply to successful training stimuli in application of the GAS model to achieve the desired effects of supercompensation.

Three Ways to Stimulate Hypertrophy (Muscle Growth)

1. Mechanical Tension
2. Muscle Damage
3. Metabolic Stress

Now let’s say building muscle is the goal of an at home training program. The three ways to stimulate hypertrophy or muscle growth should all be included in making a training program effective.

Mechanical Tension represents increasing load on the tissue progressively, or simply using enough resistance. One strategy to do this at home would be to decrease the base of support in order to increase the resistance applied to one specific tissue. For example, in a squat, the prime mover is the knee joint, so in a training cycle, one could start with bilateral squats, progress to split squats, and then finally, single leg squats. This progression will apply more resistance through bodyweight and gravity alone on the quadriceps, glutes, and the stabilizer muscles involved in these movements.

The next order of business is to induce Muscular Damage. The eccentric or lowering phase of a movement will create the most muscle damage. So, we probably want to focus on the lowering phase of the squat, split squat, and single leg squat by spending the most time there. Five seconds or so down during each repetition will likely be a great strategy to induce muscle damage.

Lastly, we want to achieve higher levels of Metabolic Stress, which usually is done through using higher rep ranges. Different strategies such as intelligently designed supersets using not competing muscle groups, and things like 1.5 reps can also be effective for creating metabolic stress. In fact, in athletic performance training programs, achieving metabolic stress can occur in many different ways other than always doing high reps. Strength training occurs in the 1-5 rep range, so if the trainee wants to improve strength, searching for metabolic stress elsewhere may be best in certain situations. Isometrics can be huge for strength capabilities, so pairing an isometric squat variation of appropriate difficulty with a jump or sprint could be a great idea for an athlete while training at home.

Let’s sum it up:

1) Have a goal in mind.

2) Don’t freak out if you can’t train as much.

3) Your strength won’t decline so much that it won’t come back after these next couple of weeks; studies have shown that strength does comes back fairly quickly.

4) Do something fast! Power is the ability to produce force rapidly, and contrary to strength, it does tend to decline quickly. Luckily, power training can be trained easily with just body weight as resistance (sprinting, jumping, landing, shuffling, etc.).

5) Flush out internet programs or workouts by looking for a net positive gain. Look for Specificity, Overload, and Fatigue Management in a program, and look for Mechanical Tension, Muscular Damage, and Metabolic Stress, in a given workout. Then decide if a program or workout will result in a net positive towards your goal.

If learning more and training efficiently during these crazy times sounds intriguing, feel free to reach out to us at Cressey Sports Performance. We’re happy to help out with online programming to get you headed in the direction of your goals, regardless of your equipment limitations. Just drop us an email at csp.trainonline@gmail.com.  

About the Author

Drew Cobin, CSCS serves as a Semi-Private Strength & Conditioning Coach and Strength Camp Associate Coordinator here at CSP. He is a graduate of Central Connecticut State Uni​​​​versity, where he studied Exercise Science and played varsity soccer. Drew has experience coaching in many different avenues, but his great passion is in training for performance. He offers insight into cutting through some of the clutter, and staying on the path towards the goal. You can follow him at @drewcobin on Instagram.

Sign-up Today for our FREE Newsletter and receive a four-part video series on how to deadlift!

Name
Email
Read more

Exercise of the Week: Adductor Slides

Today's guest post comes from Cressey Sports Performance - Florida Director of Performance, Tim Geromini.

One of the more forgotten muscle groups in the lower extremity is the adductor (groin) complex. Often, there is so much focus on glute activation and hamstrings range of motion that we overlook the adductors. As Eric has written in the past (all the way back in 2004!), depending on the population, adductors can get injured because they're either overactive or weak. In other words, they need to be both "long and strong." Enter an exercise that not only works on eccentrically creating range of motion at the adductors, but concentrically strengthening them, too!

Some of the benefits of Adductor Slides - and the associated coaching cues needed to make the most of your efforts:

1. Eccentric Control: The adductors are mostly known to absorb force in change of direction movements as they experience a ton of eccentric stress when an athlete has to cut or adjust his position. This exercise is not a traditional passive stretch as we are actively stretching the adductors into hip abduction. This should be a slow and controlled purposeful movement, keeping the hips in line with the knees. A cue that works well is “pretend there is a band attaching the Valslides together; now stretch that band.” This cue helps you understand to put force into the ground as you spread your knees as far apart as possible (another helpful cue). You are only going to go as low as your range of motion allows, so work within the range you have. Keeping your feet on the ground is a good starting point. As your range of motion and strength increases, try keeping them off the ground to progress the exercise.

2. Concentric Strength: Now that you have a sufficient stretch of the adductors, it’s time to strengthen them driving up into hip adduction. A helpful cue would be “pull the turf together on the way up.” The adductors play a big and often overlooked role in creating rotational power. At CSP, we often talk about shifting your weight from your back hip to your front hip on a medicine ball exercise, on the mound, and even in the cage. In this instance the role of the adductors is to help internally rotate the femur to create power in the lower half. Without sufficient adductor strength, you’re going to leave a lot of power on the table.

3. Anterior Core Strength: Neither of the two benefits listed above work very well if you can’t maintain a neutral spine while doing them. In other words, don't let the lower back arch. It’s important to note that the adductor muscles originate on the pubis (the bottom portion of the pelvis) and are vital in controlling pelvic stability. If you are doing this exercise on your own, it may be helpful to place an object on your low back and make sure it doesn’t fall off as you go through the movement.  Again, think slow on the way down and fast on the way up.

We typically program this exercise for 8 reps either in a warm-up or as a pairing with a rotational med ball exercise. As a regression, you can do one leg at a time while the non-Valslide knee is positioned on the ground/pad.

About the Author

Tim Geromini is the Director of Performance at Cressey Sports Performance - Florida. Prior to joining the CSP team; Tim spent time with the Lowell Spinners (Class A Affiliate of the Boston Red Sox), Nashua Silver Knights (Futures Collegiate Baseball League), Cotuit Kettleers of (Cape Cod Baseball League), and UMass-Lowell Sports Performance. You can contact him at timgero@gmail.com and on Twitter (@timgeromini24).

Sign-up Today for our FREE Newsletter and receive a four-part video series on how to deadlift!

Name
Email
Read more

Exercise of the Week: Birddog Rows

Today's guest post comes from Cressey Sports Performance - Florida Director of Performance, Tim Geromini, with a video assist from CSP-FL coach, Derek Kambour. Tim was one of the contributors on our Cressey Sports Performance Innovations resource, a collaborative effort of the CSP staff. It's on sale for $75 off through Sunday at midnight; just head to www.CSPInnovations.com and enter coupon code APRIL2020.

The Dumbbell Birddog DB Row is a very humbling rowing variation and has been helpful for our clients to lock in their horizontal pulling technique. This exercise doesn’t require as much cuing from us due to the internal feedback the client gets as the set goes on, but it is important to coach the correct set-up position before the client begins the row.

Some of the benefits of the Birddog Row:

1. Core Demands: This rowing variation requires great anti-extension and anti-rotation core control. Once you get the DB off the ground it’s important to pause and establish proper core position so you don’t rock side to side. If you’re having trouble keeping technique its best to lower the weight first and see if this clean up your form.

2. Hip Extension: Adding on to the core component of the row, maintaining a neutral spine and getting quality hip extension add a unique demand no other rowing variation can offer. In clients who are naturally in lumbar extension (arching of the lower back), the contralateral aspect of this row can help separate hip extension from lumbar extension.

3. Slower, Controlled Tempo: One of the main flaws you see in horizontal pulling is excessive range of motion at the top where the shoulder dumps forward into anterior tilt (over-rowing). To perform this exercise well, you have to slow down the rowing portion which gives great sensory feedback leading to better technique. This will also improve scapula protraction at the bottom portion for better shoulder mechanics.

4. Better Arm Path: Because of the alignment with the bench, you naturally have to leave some space between your arm and your ribs otherwise the DB will hit the bench on the eccentric or concentric portion of the row. This self-teaching benefit eliminates keeping your arm tucked in too close to your side.

5. Improved Cervical Position: It's very common in rowing variations to see cervical extension (head tilted up) or flexion (chin to chest) as compensation patterns mostly because there is no balance component to traditional rows. The birddog row has unique balance demands that add needed focus from the lifter. This leads to more of a neutral cervical spine position (double chin) to help improve balance.

We typically program this exercise for 3-4 sets of 6-10 reps per side.

To cover a wide variety of training and coaching concepts, I'd encourage you to check out CSP Innovations; it's on sale for $75 off through Sunday at midnight with coupon code APRIL2020 at www.CSPInnovations.com.

About the Author

Tim Geromini is the Director of Performance at Cressey Sports Performance - Florida. Prior to joining the CSP team; Tim spent time with the Lowell Spinners (Class A Affiliate of the Boston Red Sox), Nashua Silver Knights (Futures Collegiate Baseball League), Cotuit Kettleers of (Cape Cod Baseball League), and UMass-Lowell Sports Performance. You can contact him at timgero@gmail.com and on Twitter (@timgeromini24).
 

Sign-up Today for our FREE Newsletter and receive a four-part video series on how to deadlift!

Name
Email
Read more
Page 1 7 8 9 10 11 30
LEARN HOW TO DEADLIFT
  • Avoid the most common deadlifting mistakes
  • 9 - minute instructional video
  • 3 part follow up series