Home Posts tagged "Foam Roller"

Strength and Conditioning Stuff You Should Read: 2/22/17

It's time for this week's list of recommended reading. Sorry it's a few days late, but hopefully it still helps to get you over hump day! As a friendly reminder, tomorrow is the last day to get 20% off on Jaeger Bands at this link using the coupon code CRESSEY.

A Shoe by the Athletes for the Athletes - This blog at Eastbay discusses the origins of the New Balance Minimus MX20v6 Cressey Trainer. Eastbay carried, but their inventory has pretty much been cleared out (only size 7 remains). New Balance does still have some odds and ends in terms of sizes remaining on their websites, and folks in Canada can get shoes at SportCheck.ca

IMG_7256

Back to McGill - I attended a great one-day course with Dr. Stuart McGill yesterday, and it reminded me to look back on an interview I did with him all the way back in 2006. Even as we look back 11 years, Stu is still tremendously ahead of his times as a research and clinician when it comes to preventing and correcting back pain. We're discussed doing another interview in the near future, and I'm super excited for it. In the meantime, check out this old gem; it's still "on point" and invaluable.

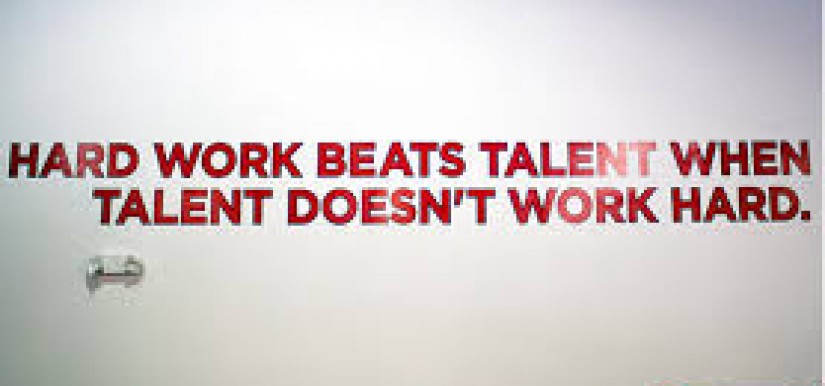
Grit - I'm about 3/4 of the way through this book from Angela Duckworth, and I've found it to be excellent. There are lessons that apply across all industries, but I see particular applications with respect to strength and conditioning, a field where hard work and determination really sets individuals apart on another level. Heck, we even put a reminder of this on the wall at both facilities!

Hard-Work-Beats-Talent-825x386-2

Top Tweet of the Week

Top Instagram Post of the Week 

Sign-up Today for our FREE Newsletter and receive a four-part video series on how to deadlift!

Name
Email
Read more

Making Movement Better: Different Paths to the Same Destination

Lately, I've been posting more training pictures and videos on my Instagram page. The other day, I posted this video, and it led to some good discussion points that I think warrant further explanation:

One responder to the video asked the following:

You had an Instagram post the other day about an athlete not being able to differentiate between hip and lower back extension. I have a client with what seems to be a similar problem and just wondered how you generally go about teaching them the difference.

The answer to this question really just rests with having a solid set of assessments that help you to understand relative stiffness. I was first introduced to this concept through physical therapist Shirley Sahrmann's work. Relative stiffness refers to the idea that the presence or lack of stiffness at one joint has a significant impact on what happens at adjacent joints, which may have more or less stiffness. Without a doubt, if you've read EricCressey.com for any length of time, the most prevalent example of this is a shoulder flexion substitution pattern. 

In this pattern, the "bad" stiffness of the lats (among other muscles) overpowers the lack of "good" stiffness in the anterior core and deep neck flexors - so we get lumbar extension (arched lower back) and forward head posture instead of the true shoulder flexion we desire. Truth be told, you can apply these principles to absolutely every single exercise you coach, whether it's an 800-pound squat or low-level rotator cuff exercise.

As an example, when you cue a wall hip flexor mobilization, you're working to reduce bad stiffness in the anterior hip while cueing an athlete to brace the core and activate the trailing leg glute. That little bit of good stiffness in the anterior core prevents the athlete from substituting lumbar extension (low back movement) for hip extension, and the glute activation creates good stiffness that impacts the arthrokinematics of the hip joint (head of the femur won't glide forward to irritate the anterior hip during the stretch). 

In the upper extremity, just use this back-to-wall shoulder flexion tutorial as an example.The "reach" would add good stiffness in the serratus anterior. The shrug would add good stiffness in the upper traps. The "tip back" would add good stiffness in the lower traps. The double chin would add good stiffness in the deep neck flexors. The flat low back position would add good stiffness in the anterior core. Regardless of which of these cues needs the most emphasis, the good stiffness that's created in one way or another "competes" against the bad stiffness - whether it's muscular, capsular, bony, or something else - that limits overhead reaching.

Returning to our prone hip extension video from above, if we want to get more hip extension (particularly end-range hip extension) and less lumbar extension, from a purely muscular standpoint, we need more "good stiffness" in rectus abdominus, external obliques, and glutes - and less stiffness in lumbar extensors, lats, and hip flexors. As the question received in response to the video demonstrates, though, this can be easier said than done, as different clients will struggle for different reasons.

Sometimes, it's as simple as slowing things down. Many athletes can perform movements at slow speeds, but struggle when the pace is picked up - including when they're actually competing.

Sometimes, you can touch the muscle you want to work (tactile facilitation). Spine expert Dr. Stuart McGill has spoken in the past about "raking" the obliques to help create multidirectional spinal stability. I've used that cue before with this exercise, and I've also lightly punched the glutes (male athletes only) to make sure athletes are getting movement in the right places.

Sometimes, a quick positional change may be all that's needed. As an example, you can put a pad under the stomach to put the lumbar extensors in a more lengthened position. In fact, doing this drill off a training table (as demonstrated above) was actually a positional change (regression) in the first place; we'd ideally like to see an athlete do this in a more lengthened position where he can challenge a position of greater hip extension. Here are both options:

Sometimes, a little foam rolling in the right places can get some of the bad stiffness to calm down a bit. Or, you might need to refer out to a qualified manual therapist to get rid of some "tone" to make your coaching easier. I do this every single day, as I have great massage therapists on staff at both our Florida and Massachusetts Cressey Sports Performance facilities.

manual_therapy_page-300x206-2

Sometimes, a little positional breathing can change the game for these athletes, as it helps them to find and "own" a position of posterior pelvic tilt while shutting off the lats.

TRXDeepSquatBreathingWithLatStretch

The take-home point here is that there are a lot of different ways to create the movement you want; coaching experience and a working knowledge of functional anatomy and relative stiffness just help you get to the solutions faster and safer.

coachingtweet

Sign-up Today for our FREE Newsletter and receive a four-part video series on how to deadlift!

Name
Email
Read more

Coaching Cues to Make Your Strength and Conditioning Programs More Effective – Installment 10

It's time for the first trio of coaching cue suggestions of 2015!

1. Make a straight line from your heels to your head.

I'm a huge fan of inverted rows not only because of the great upper back training they provide, but also because they challenge core control at the same time. Unfortunately, a lot of folks will let the ribs flare up, head to slide into a forward head posture, or knees to hyperextend. All of these are extension-bias compensation strategies that can easily be cleaned up by just focusing on making a straight line from the heels to the head.

Typically, after providing this cue, I'll snap a photo of the posture as a good visual reminder for the athlete, too.

--> Related: 10 Ways to Progress Inverted Rows <--

2. Roll with your forearms, not your hands.

Foam rolling is great, but not if you spend the bulk of your time in bad positions. In my opinion, foremost among these bad positions is doing prone (face-down) rolling while being supported by the hands. The problem is that when you're supported by your hands, you're automatically in a position of heavy lumbar extension (low back arching) - comparable to the upward-facing dog yoga pose. With that said, simply dropping down to support yourself with your forearms is a much better bet for getting your quad and groin rolling in without throwing your back under the bus.

rolling

Keep in mind, of course, that you'll still be in some extension, but it's much closer to the natural lordotic (slight arch) posture we have in normal standing alignment.

3. Keep the head behind the belly button as long as possible.

When we train rotational medicine ball drills, it's important to create a powerful separation of the hip and shoulders. In other words, the pelvis rotates in one direction as the torso rotates in the opposite direction; this stretch helps to create and transfer elastic energy for rotational power. If the torso "leaks" forward early, though, the separation is minimized and force production and transfer is reduced.

One way to prevent this energy leak is to cue an athlete to "stay back" longer. Unfortunately, many athletes don't grasp this vague cue. As such, I like to encourage athletes to keep the head behind the belly button as long as possible. In other words, delay the torso rotation forward a bit longer.

That does it for installment 10. Have a great weekend!

Sign-up Today for our FREE Newsletter and receive a four-part video series on how to deadlift!

Name
Email
Read more

Strength and Conditioning Stuff You Should Read: 11/26/14

I hope everyone is having a great week and is excited for a great Thanksgiving. It might be a holiday week, but it's still super busy at the new Cressey Sports Performance facility in Jupiter, FL. Luckily, I've got some great content from around the web to share with you.

The Cost of Getting Lean - The Precision Nutrition crew gives you the cold hard facts on what it takes to get to and maintain the body composition you desire.

Foam Rolling Isn't Stretching, but It's Still Important - Dean Somerset delves into the potential mechanisms of action for foam rolling.

How to Fit Core Stability Exercises into Strength and Conditioning Programs: Part 1 and Part 2 - I wrote this two-part article back in 2011 when Mike Reinold and I released Functional Stability Training of the Core, the first in the three-part FST series. Since they're all on sale for 25% off this week, it seemed like a great time to bring these posts back from the archives.

For more information on this sale, check out www.FunctionalStability.com. It wraps up this upcoming Monday at midnight.

FST_Complete_Set-300x184

Sign-up Today for our FREE Newsletter and receive a four-part video series on how to deadlift!

Name
Email
Read more

7 Ways to Make Your Strength Training Programs More Efficient

I'm a big believer in pursuing maximum efficiency in our training programs. We want exercises and training strategies that deliver the biggest "bang for our buck," as most people don't have all day to spend in the gym. That said, supersets, compound exercises, and other well-known approaches on this front are staples of just about all my programs.

Unfortunately, sometimes, the typical strategies just don't get the job done sufficiently. There are periods in folks' lives that are absurdly busy and require approaches to kick the efficiency up a notch further. With us opening a new facility right as our busiest season is upon us - and my wife pregnant with twins - you could say that this topic has been on my mind quite a bit these days. With that in mind, here are seven strategies you can utilize to get a great training effect as efficiently as possible.

1. Switch to a full-body split.

Let's face it: you might never get in as much work on a 3-day training split as you do on a 4-day training split. However, you can usually get in just as much high quality work. I've always enjoyed training schedules that had me lifting lower body and upper body each twice a week. However, usually, the last few exercises in each day are a bit more "filler" in nature: direct arm work, secondary core exercises, rotator cuff drills, and other more "isolation" drills. In a three-day full-body schedule, you should really be just focusing on the meat and potatoes; it's the filler you cut out.

Additionally, I know a lot of folks who actually prefer full-body schedules over upper/lower splits. This was one reason why I included 2x/week, 3x/week, and 4x/week strength training options in The High Performance Handbook.


2. Do your foam rolling at another point during the day.

There has been a lot of debate about when the best time to foam roll is. While we generally do it pre-training with our athletes, the truth is that the best time is really just whenever it's most convenient - so that you're more likely to actually do it! If you'd rather foam roll first thing in the morning or at night right before bed, that's totally fine. As long as you get it in, over the long haul, you really won't see a difference if you compare pre-training to another point in the day.

3. Do a second, shorter session at home. (Waterbury, PLP program example)

Remember that not all training sessions have to actually take place in a gym. Rather, you might find that it's possible to get in 1-2 of your weekly training sessions at home. As an example, I have an online consulting client who has a flexible schedule on the weekends, but a crazy schedule during the week. He does two challenging sessions with heavier loading on the weekends (lower body on Saturday and upper body on Sunday). Then, he'll work in some filler work with body weight, band, and kettlebell exercises on Tuesday and Thursday. He's still getting in plenty of work in during the week, but he doesn't have to set aside extra time to drive to and from the gym. Obviously, a home gym alone can make for more efficient programs, too!

4. Move to multi-joint mobility drills.

If you're in a rush to get in a great training effect - and abbreviated warm-up - don't pick drills that just mobilize a single joint. Rather, pick drills that provide cover a lot of "surface area." Here are a few of my favorites, as examples:

Typically, you're going to want to do fewer ground-based drills and more drills where you're standing and moving around.

5. Dress in layers.

Speaking of warm-ups, it'll take you longer to warm-up if you dress lightly - especially as the winter months approach. Athletes always comment that they get (and stay) warm better when they wear tights underneath shorts, or sweatshirts and sweatpants over t-shirts and shorts. Of course, you can remove layers as you warm up.

tights1920404_356731901131704_138980539_n

Additionally, if you're an early morning exerciser, you can expedite the warm-up process by taking a hot shower upon rising. A cup of coffee can help the cause as well.

6. Add in mobility fillers.

If you're going to shorten the warm-up a bit, you can always "make up" for it by working in "fillers" between sets of your compound exercises. I actually incorporate this with a lot of the programs I write, anyway. If you look at our baseball athletes, they're often doing arm care drills in between sets of squats, deadlifts, and lunges. They get in important work without making the sessions drag on really long, but at the same time, it paces them on the heavier, compound exercises so that they aren't rushing.

7. Use "combination" core movements.

Usually, the word "core" leads to thoughts of unstable surface training, thousands of sit-ups, or any of a number of other monotonous, ineffective, flavor-of-the-week training approaches. In reality, the best core training exercises are going to be compound movements executed in perfect form. Overhead pressing, Turkish get-ups, 1-arm pressing/rows/carries, and single-leg movements (just to name a few) can deliver a great training effect. Complement them with some chops/lifts, reverse crunches, dead bugs, and bear crawls, and you're pretty much covered.

There are really just seven of countless strategies you can employ to make your training programs more efficient. Feel free to share your best tips on this front in the comments section below. And, if you're looking to take the guesswork out of your programming, I'd encourage you to check out The High Performance Handbook, the most versatile strength and conditioning program on the market today.

Sign-up Today for our FREE Newsletter and receive a four-part video series on how to deadlift!

Name
Email
Read more

Strength and Conditioning Stuff You Should Read: 3/25/14

It's time for this week's collection of recommended reading, with a Cressey Performance flavor to it.  I grabbed dinner with a bunch of our Marlins, Cardinals, and Mets guys last night in Florida, so it seemed like only the right thing to kick things off with some baseball stuff!

cpfam-BjiV-snIMAA-QIf

Draft Q&A: Eric Cressey, Part 1 - I was interviewed last week by Baseball America on the topics of MLB draft preparation, long-term athletic development, and some of our client success stories.  Be sure to also check out Part 2, as there are some great lessons in here, regardless of whether you work with baseball players or not.

CP Client Spotlight: Meet Stacie! - Here's a great story of a CP client who's made some awesome progress training at CP.  Stacie proves that Cressey Performance isn't just for baseball players!

Are You Foam Rolling All Wrong? - In this Daily Burn interview, CP massage therapist and strength and conditioning coach Chris Howard weighs in on the topic of foam rolling.

Sign-up Today for our FREE Baseball Newsletter and Receive Instant Access to a 47-minute Presentation from Eric Cressey on Individualizing the Management of Overhead Athletes!

Name
Email
Read more

Upper Body Self Myofascial Release Precautions

If you've read just about any of my writing, you likely know that I'm a big fan of various forms of soft tissue work. Obviously, there's foam rolling for our more "diffuse" work, but a lot of people also use a baseball, tennis ball, or lacrosse ball to get a bit more "focal."  While this can definitely be helpful, there are a few precautions you want to take.  Check out this video to learn more:

Sign-up Today for our FREE Baseball Newsletter and Receive Instant Access to a 47-minute Presentation from Eric Cressey on Individualizing the Management of Overhead Athletes!

Name
Email
Read more

5 Ways to Counteract Wearing High Heels

Today's guest post comes from CP coach, Greg Robins.

This week, my girlfriend is off competing for the Miss International title. I am really proud of her, as she is doing so to raise awareness for her charity. She asked me how she could cancel out some of the negative repercussions that come along with wearing heels for seven days straight. It got me thinking, and I decided to take my advice to her and make it into a post for the readers out there who regularly wear high heels - or train females who do so.

It almost goes without saying, but wearing footwear that includes an excessive heel lift (i.e. high heels), greatly alters the alignment of your entire body. When we are misaligned, certain areas of the body will be asked to do more than they should, while other areas, in turn, are unable to fulfill their duties. We recognize this problem and its ill effects with people who function day to day with poor posture and movement habits. When we choose to wear this type of footwear, we are forcing ourselves into a poor position, regardless of where we were prior. To make matters worse, most of us are not in a particularly great position barefoot. The addition of heel lifts, as high as 2 - 4 inches, certainly does not help. 

That being said, high heels are a fashion statement, and sometime ladies just want to look glamorous. I certainly am not one to advocate against wearing something that makes you feel like a million bucks. However, if you don't want to feel like the polar opposite of that the next day, try applying these five tips!

1. Do more self massage.

I recommend keeping a golf ball, lacrosse ball, and (if possible) a foam roller or piece of PVC pipe on hand. As we touched on above, wearing high heels will cause a few muscle groups to work overtime. The idea with all of our tips is to "undo" what you have "done." With that in mind, we need to start with a concerted effort to take down the tone down of these overactive muscles. 

Use a golf ball to massage the bottom of your feet. This can be done by placing the ball underneath your foot while standing. Apply a generous amount of pressure while rolling the ball in various patterns along the underside of the foot. 

IMG_9057

Like wise, you can do a similar thing on the muscles of your calves with either the golf or lacrosse ball. In a seated position, place the ball under your calf and apply pressure while rolling the ball around the back side of your lower leg. 

IMG_9056

Another great spot on which to use the ball is the front side of your upper leg. Attack the hip flexors by using the lacrosse ball and/or foam roller. In a prone (face down) position, use the implements to massage the quadriceps (thigh) as well as the high, anterior (front) of the hips. While I would make these two spots the priority, you would be well advised to work on the outer thigh, and inner thighs as well. Check out our foam rolling progression in the video below. Pay extra attention to the portion targeting the lower extremities.

2. Facilitate the inhibited muscle groups.

Once you have finished with the self massage techniques described above, you will want to "re-ignite" the areas that were inhibited by the mal-positioning of a high heel lift. I like people to start from the core, and work their way out. There are three easy to use activation exercises to get you going. First, you can use a low level breathing exercise. Breathing exercises will help facilitate the diaphragm, and the external / internal obliques. By doing so, we can help "turn on" the mid-section correctly, get you away from an extended bias, and further bring down the tone of your body. A great option is the the deep squat breathing with lat stretch. Check out the video below. 

Next, we can facilitate the mid section a little more aggressively by adding some movement of the limbs while controlling the core. Dead bugs are a viable option here. Check out this video:

Lastly, some easy glute activation is in order. The glutes function in all three planes of motion. Therefore, it is important that we facilitate their function correctly. For lesser trained individuals I would recommend hammering the sagittal plane first and foremost. Supine bridge variations are the best place to start. From there, we can work into a side lying clam variation. Lastly, for the more prepared individuals an exercise such as the bowler squat is a nice way to activate the glutes in all three planes. Check out the videos and pictures below.

3. Stress foot/toe and ankle function.

When wearing heels, the most obviously altered joints are the toes/foot and the ankles. It is important that we address them appropriately. The toes will be constricted by the narrow toe in most of these shoes. Because of this they will no longer function normally during gait. Additionally, the ankles will be placed into a position of plantarflexion permanently. With this in mind, there are a few easy exercises that should be done in order to restore proper function of the foot and ankle. The first would be some low level mobility drills for the ankle, stressing dorsiflexion. Knee break ankle mobs are terrific in this scenario.

Furthermore, some ankle "alphabets" are also a great way to restore function to both the ankle and the foot.

Lastly, I would recommend doing toe pulls as well to wake up the feet, and toes. Check out the video below from Hitting Performance Labs showing us the toe pull exercise made famous by the folks at Z Health.

4. Re-groove a posterior weight shift.

The heel lift causes us to shift our center of mass forward. This can be a big problem, namely for all the reasons we talked about in the opening of this article. In order to combat this, we need to re-groove a posterior weight shift. Basically, the idea is that we need to re-teach our body what right feels like. Eric did a great post on the effectiveness of the left-stance toe touch, you can read it here. For now, make sure that you implement this exercise as often as possible, especially when you find yourself wearing heels!

5. Take a break whenever you can.

Finally, you can offset the problems associated with wearing heels by simply taking them off whenever possible. If you have 10-15 minutes where you can catch a break, do so! If you really want to make progress, use that time to do some of the drills above. 

If you regularly find yourself in heels, I hope this article helps you out. Additionally, if you know someone who wears heels on a regular basis (I know you do!), then please share this with them!

Sign-up Today for our FREE Newsletter and receive a four-part video series on how to deadlift!

Name
Email
Read more

Strength and Conditioning Stuff You Should Read: 4/18/13

Here's this week's list of recommended strength and conditioning reading:

Elite Training Mentorship - My in-service this month talked a lot about the business of fitness and how we developed our baseball niche.  I also uploaded a few articles and exercise demonstrations to complement the contributions from the rest of the ETM crew.  If you aren't checking this great resource out yet, do so!

etmLogo

Fascinating Facts About Sleep - This was a fantastic piece by TC Luoma at T-Nation about the importance of sleep - and you'll definitely learn something.

Foam Rolling and Increased Joint ROM - This was a study summary from Patrick Ward.  It's a great read for those who are skeptical of the benefits of foam rolling.

Also, in light of this week's tragedy in Boston, I'd call this a must-view video.  It's the moment of silence, video tribute, and national anthem from before the first Boston Bruins game after the event.

 Sign-up Today for our FREE Newsletter and receive a four-part video series on how to deadlift!

Name
Email
Read more

Quick and Easy Ways to Feel and Move Better: Installment 19

Compliments of Cressey Performance coach Greg Robins, here are this week's tips to make you just a little more awesome.

1. Consider assigning rest intervals, or using "active rest" to better facilitate the desired training effect.

Assigning rest intervals is a topic of hot debate. Many coaches are against it, some are strong advocates for it, and many don't pay much attention to it at all. My stance, as it tends to be with so many strength and conditioning topics, is "situationally dependent."

For many athletes (particularly younger or less experienced ones), assigning rest intervals simply adds an unnecessary variable. Why? It's largely because the primary goal with these athletes is developing strength and muscle mass. These goals are pretty easily achieved in novice populations. They have little to no training experience and moving weight is going to cause these adaptations, generally regardless of the amount of rest they take between sets.

In more experienced athletes, though, different strength qualities must be trained in order to further advance the transfer of training to sport improvement. In these cases, the amount of rest can definitely alter the training effect, even when moving loads of the same intensity. In his text, Special Strength Training Manual For Coaches, Yuri Verkhoshansky outlines a few basic parameters in regards to this philosophy.

Consider an example: moving a load of 70-90% of one-rep max for as many as 3-10 total repetitions over 4-8 sets, with rest intervals of 3-4 minutes, yields a training effect geared more towards explosive strength development.

Moving a similar load (70-80%) for 6-12 total repetitions over the course of 3-6 sets, with rest intervals of 1-2 minutes, yields a training effect more geared towards maximal strength and muscular hypertrophy. In both cases, the load and set/rep scheme is basically the same. However, by giving the athlete time to recover (3-4 min), we allow them to apply a near maximal output against the resistance every set. This greatly alters the result of the training.

Verkoshansky goes on to provide a number of examples where rest is the most altered variable differentiating between working on explosive capabilities rather than maximal strength, hypertrophy, or localized muscular endurance. Keep this in mind when you utilize exercises in an effort to develop explosive strength, such as jumps or throws. If your goal is to make athletes more explosive, you need to make them rest. At Cressey Performance, we do this by pairing exercises such as med ball throws with mobility drills, which forces an athlete to take more time between sets. This approach has commonly been referred to as "active" rest.

2. Teach people how to be coached.

Does this sound familiar? Your client or athlete is in the middle of a set. He or she is on rep 2 of 5 and you call out a coaching cue: "chest up!" All of a sudden, they turn their head - right in the middle of the repetition - and ask, "what?"

Needless to say, this isn't a great situation. Luckily, it is one that is easily avoided if you take the time to coach the "little" things right from the get-go. Some of you might be reading this and saying: "Duh, Greg." Unfortunately, this kind of thing happens ALL THE TIME. In fact, I bet the majority of you don't touch on the nuances of lifting and getting coached with your clients until an event like this takes place. Do everyone involved a favor: before you teach them anything concerning technique, teach them how to be coached. Make sure they understand that at no point during a lift should they turn their head, talk, or stop midway through, unless instructed to do so. A mentor of mine used to start every new client by getting them in a mock squat position and moving to various spots around them, asking if they could hear him. It was meant to prove that in order to be coached, they didn't need to move their head. Again, it seems rudimentary, but it's very important.

3. Roll your adductors on an elevated surface.

Many of you already roll out your adductors (inner thighs). However, in most cases, it is primarily done on the ground. While doing so on the ground is definitely beneficial, you will find the position to be somewhat awkward. Additionally, it is tough to apply enough pressure on the ground to actually get a good effect. Check out this video to see how we utilize an elevated surface to get into a better position; you can also utilize a med ball instead of a foam roller to improve the training effect.

I realize many gyms don't have this luxury, but you will find that using a weight bench also works, but might feel somewhat awkward. Instead of placing the opposite foot on the ground, just place the opposite knee on the ground instead to make up for the lack of surface height.

4. Go ahead, eat some chocolate!

Who doesn't like to indulge in some chocolate, and a good cry?  Okay, well at least the chocolate, right? In his popular book, The 150 Healthiest Foods On Earth, Dr. Jonny Bowden makes a point to include dark chocolate. Thank goodness, because that stuff is delicious! The best part is that consuming the right kind of chocolate is actually great for our health as well. For starters, cocoa is rich in flavonoids. These are compounds found in plants that help protect the organism from various toxins. When we consume the plant, we also receive the benefits of these compounds.

It is interesting to note that the flavonoids found in cocoa help synthesize nitric oxide. Every meathead knows that nitric oxide helps increase blood flow, that's why they crush NO workout products like nobody's business.  Well, that and they think they're going to make them hyooooge. Seriously, though, the flavonoids ability to modulate nitric oxide has a great effect on decreasing cardiovascular issues (such as high blood pressure) and can help to improve insulin sensitivity. Seek out real chocolate bars, not the kind you find in a mini mart. Make sure it's at least 60% cocoa or more to get these benefits. Furthermore, while the fat content in real dark chocolate is primarily good fat, it does contain a fair amount of "bad" fat, so it is best consumed in moderation.

5. Volunteer or donate to charity.

This blog has never been about politics, nor will it ever be.  However, with the recent releases of tax returns from both candidates in the presidential race, it's pretty awesome to see both Romney and Obama donating approximately 20% of their income in 2011 to charity.  I figured this could be the first blog to highlight something that's not negative about either candidate!  Hopefully more Americans will follow their lead on this front - or at least volunteer their time if they don't have the resources to contribute financially.  Remember, these tips are about ways to feel better - and that includes the psychological benefit you'll receive from helping others.

Sign-up Today for our FREE Newsletter and receive a four-part video series on how to deadlift!

Name
Email
Read more
Page 1 2 3
LEARN HOW TO DEADLIFT
  • Avoid the most common deadlifting mistakes
  • 9 - minute instructional video
  • 3 part follow up series