Home Posts tagged "Hip Mobility"

The Best of 2022: Guest Posts

I've already highlighted the top articles I put out at EricCressey.com in 2022, so now it's time for the top guest posts of the year. Here goes…

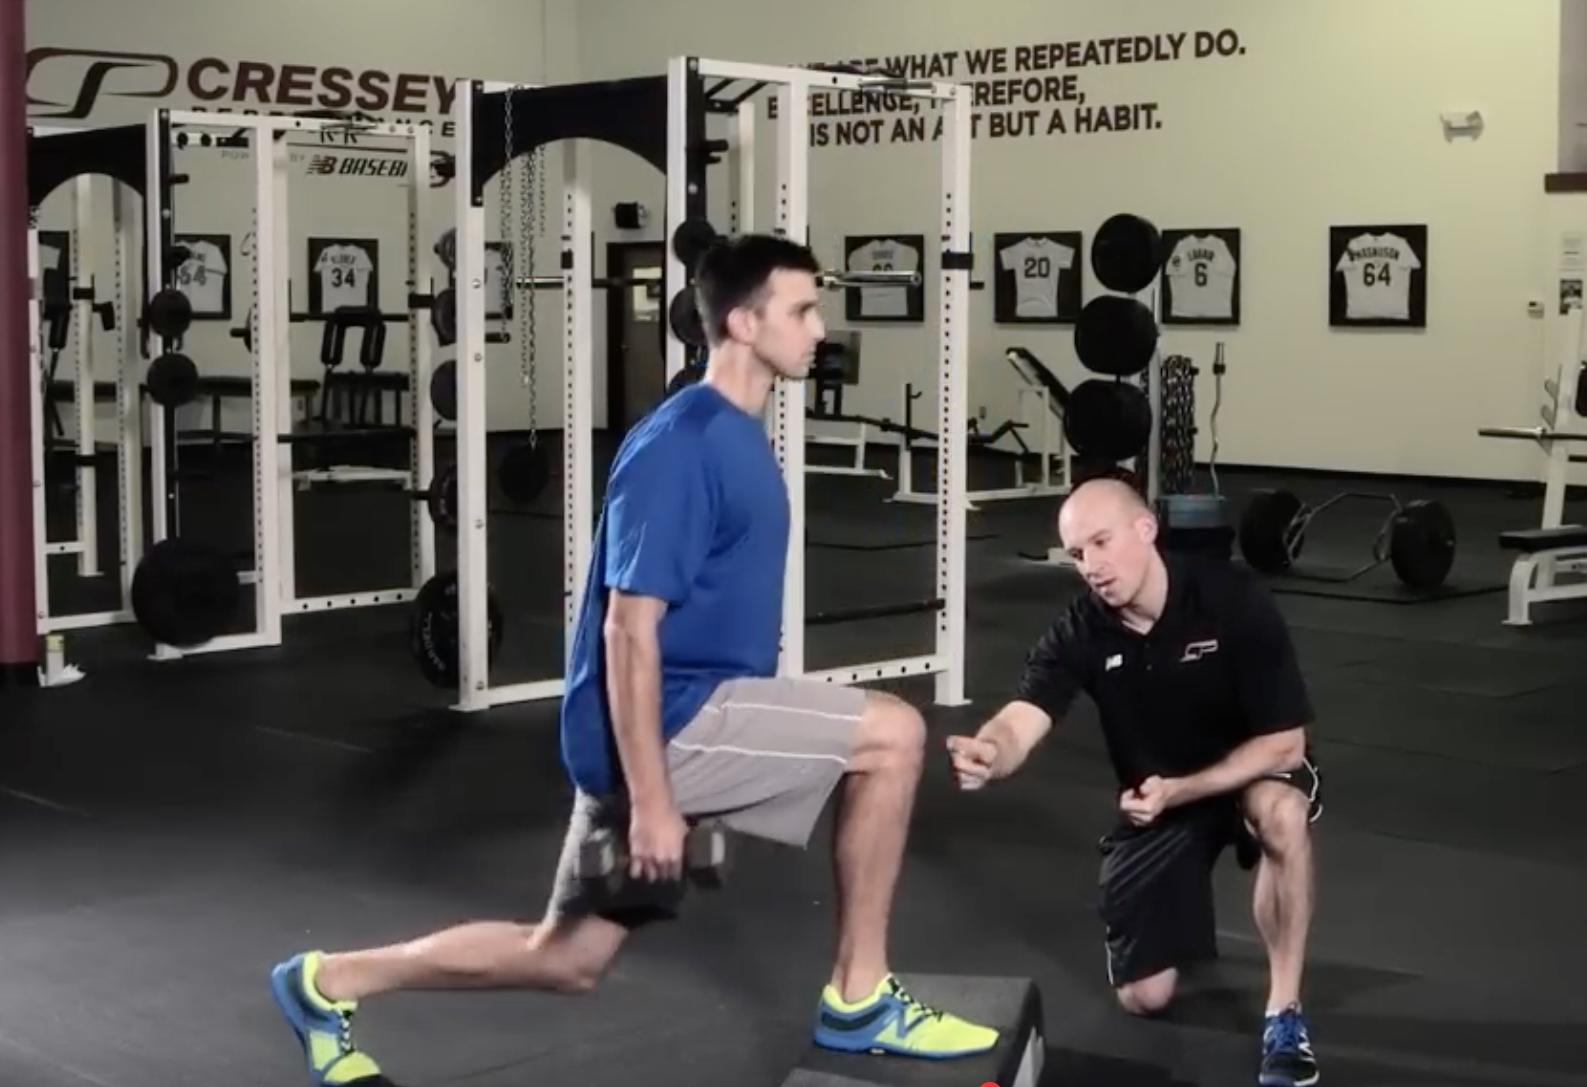
1. Exercise of the Week: Barbell Drop Split-Squat - Cressey Sports Performance - MA coach Ethan Dyer introduced a single-leg progression that delivers some extra benefits over classic lunges and split squats.

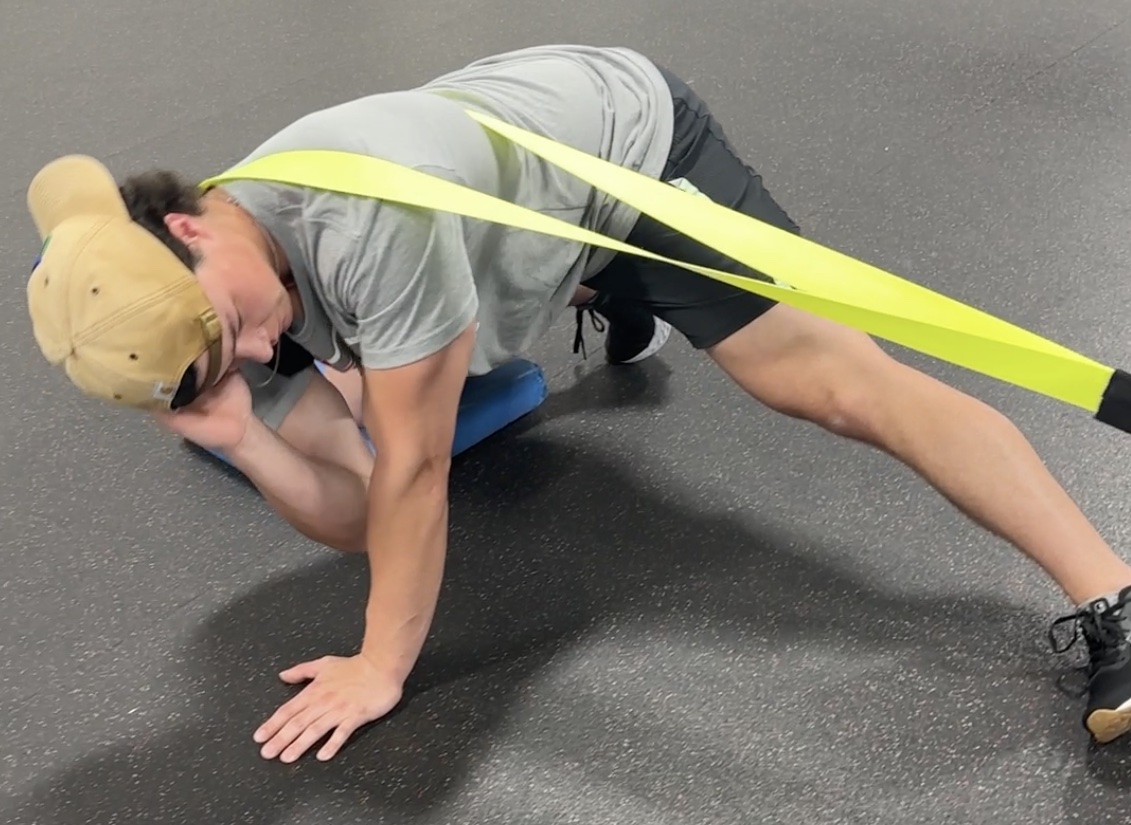
2. 5 Warm-up Options to Improve Hip Extension - The ability to access hip extension while the opposite hip flexes is crucial in sprinting, throwing, hitting, and a myriad of other athletic endeavors. In this article, Cressey Sports Performance - Florida coach Dylan Lidge outlined a few dynamic ways to challenge hip extension in a warm-up.

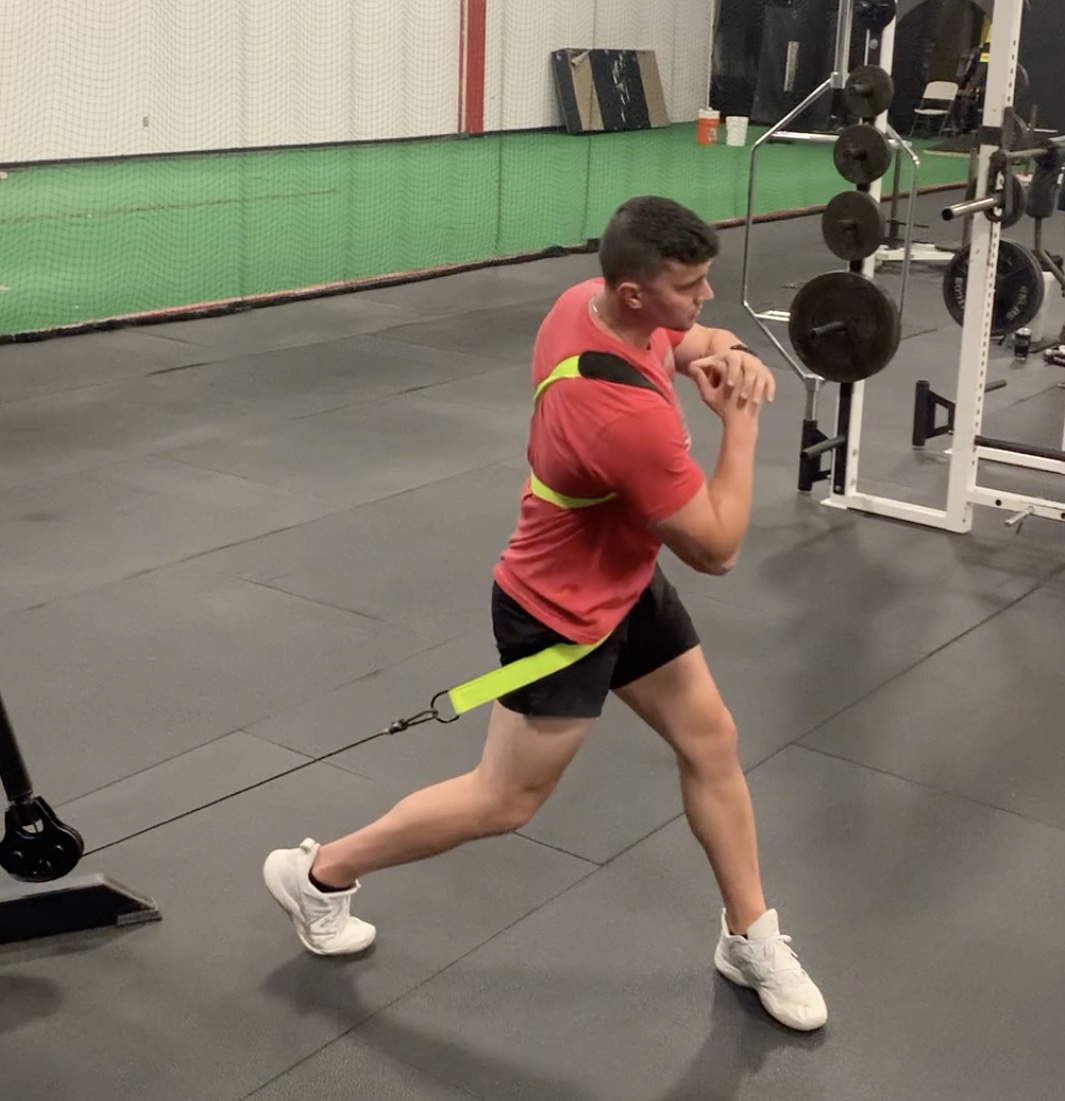
3. 5 Drills for Dynamic Trunk Deceleration - Cressey Sports Performance - Florida coach Eduardo Valle shared five deceleration drills that are helpful for just about any type of athletes, but especially in the rotational realm we live in on a daily basis.

4. 4 Training Principles to Make the Most of Your Speed Work - There's a heavy bias toward contralateral pressing and rowing in today's strength and community world, and as Ethan Dyer (again!) shared in this article, we need to give ipsilateral options some love.

5. Wall March Variations for the Win - Wall marches are drills that have been used commonly over the years in the strength and conditioning and track and field communities. Unfortunately, many coaches don’t appreciate how much you can build on the basic wall march to teach a number of different movement competencies. In this article,  Dylan Lidge shared some of our favorite variations on this classic drill.

I'll be back soon with more highlights from 2022.

Sign-up Today for our FREE Newsletter and receive a four-part video series on how to deadlift!

Name
Email
Read more

5 Warm-up Options to Improve Hip Extension

Today's guest post comes from Cressey Sports Performance - Florida coach, Dylan Lidge.

The ability to access hip extension while the opposite hip flexes is crucial in sprinting, throwing, hitting, and a myriad of other athletic endeavors. To ensure true hip extension, the heel, knee, pelvis, rib cage and head need to be stacked. Here are few dynamic ways to challenge hip extension in a warm-up.

Side-Lying Hip Extension Iso Holds to Wall - You should be able to draw a straight line from the bottom knee to the ear. Keep full foot contact onto the wall. Aim for a 30 second hold.

DB Goblet Hip Flexion End-Range Lift-offs - The goblet load keeps the athlete in a stacked position and is a great way to get the core activated. The athlete should “push the floor” under them and “stay tall” to ensure the glute extends the hip. Aim for a 5 second hold.

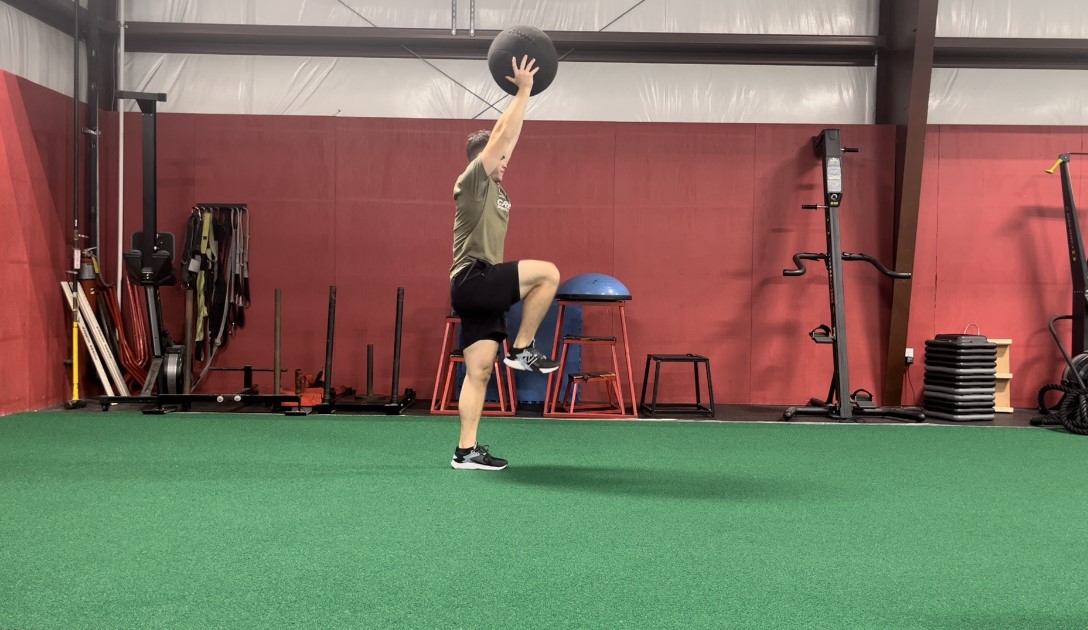
Arms Overhead High Knee March with Med Ball - The med ball challenges the athlete to go into hip extension and shoulder flexion without compensating. Control the pace for 15yds.

Split Squat Iso Hold - Back Heel Pressed to Wall - The back heel into the wall helps the athlete utilize their glute and hamstrings for hip extension. Hold for 30 seconds.

2-arm KB Racked High Knee March - Cue the athlete to exhale at the top of each rep. The kettlebells challenge the athlete to establish good core stiffness in a stacked position. Perform 8 reps on each side.

About the Author

Dylan Lidge serves as a Strength and Conditioning Coach at Cressey Sports Performance - Florida. Prior to joining the staff, Dylan completed an internship at CSP-FL in the summer of 2020. He graduated from the University of Illinois Urbana-Champaign with a B.S. in Kinesiology. He is currently studying at the University of Illinois-Chicago for his MS in Kinesiology with a concentration in Biomechanics. At UIC he holds a position as a teacher's assistant in an exercise technique course, as well as an instructor for a personal fitness course. In 2019, he interned with the UIC Strength and Conditioning staff assisting with the baseball team. Dylan has coached baseball at the collegiate, high school, and youth levels.

Sign-up Today for our FREE Newsletter and receive a four-part video series on how to deadlift!

Name
Email
Read more

Random Thoughts on Sports Performance Training: Installment 39

It's time for this month's installment of my random thoughts on sports performance training. In light of this week's $50 off sale (ending Sunday night) on Mike Boyle's outstanding resource, Complete Youth Training, I thought I'd focus this edition on the training of young athletes.

1. Warm-ups are important in youth sports, too.

If you've read this blog over the years, you've surely appreciate that I'm a big advocate for high quality warm-ups as a means of optimizing subsequent performance and reducing the risk of injury. However, I have to admit that most of my writing in this regard has been focused on more advanced - and older - populations, whether it's in baseball, strength training, or any other athletic discipline. Meanwhile, some of the youth sports warm-ups you'll see are far from comprehensive - and that's if they're actually present at all.

Fortunately, I now have a chance to correct this oversight by highlighting a recent meta-analysis, "Effectiveness of Warm-Up Intervention Programs to Prevent Sports Injuries among Children and Adolescents." You can check out the full text HERE. The brief synopsis of a ton of hard work by Ding et al. is that across 15 meticulously-selected studies of 21,576 total athletes (ages 7-18), a 15-20 minute warm-up reduced injury by 36%.

Beyond the obvious benefits of staying healthy, what's interesting about this outcome to me is that a variety of different warm-up initiatives worked to deliver this injury reduction. In older, more trained populations, more of the benefits are likely coming from increases in body temperature and, in turn, tissue extensibility. Conversely, in a younger, more untrained population we see in this meta-analysis, you're probably getting more chronic protection from injury because the warm-ups are delivering actual training effects: improved balance, added strength, optimized landing mechanics, and a host of other factors.

This makes me think that we can always benefit from "microdosing" important training initiatives with our athletes, and warm-ups are one avenue through which coaches can do so. It's interesting to consider whether the benefits would have been as pronounced if the drills were done at different times, but adaptation is adaptation, and the warm-ups are probably the best way to guarantee accountability in the group environment.

2. Ground-to-Standing Transitions may be the lowest hanging fruit for young athletes.

One of my closest childhood friends grew up on a farm. I'll never forget the first time I went to help him with baling hay; we basically walked/rode around a giant field for six hours, picking up and stacking these on the back of a truck.

I didn't bother to look up the weight of each until now, but apparently it ranges from 40 to 75 pounds. And, it would explain why my entire body was sore for about a week. Perhaps unsurprisingly, that same friend was a good three-sport athlete and state champion in wrestling. Obviously, the farm taught him how to consistently work hard. However, I can't help but think that the fact that most of those physical tasks - from baling hay, to feeding animals, to digging - all involve low to high force transfer - which isn't much different than a lot of athletic endeavors. If you don't live on a farmer, what are some good ways to challenge this dynamic in training beyond just the Turkish Get-up?

As you can see, these patterns can be trained at low and high speeds, with and without external load.

3. Global strength can be a means to accessing other patterns and reducing injury risk.

In another recent study, Relationships between Hip Strength and Pitching Biomechanics in Adolescent Baseball Pitchers, Albiero et al. delivered some interesting findings that aren't altogether surprising. Now, please keep in mind that I don't think that some non-weight-bearing dynamometer strength tests provide the most accurate reflection of functional carryover to performance, but in this particular study, they help to verify things that we probably already know:

a. Improved hip extension strength in throwers (shockingly) improves hip extension in the pitching delivery.

b. More hip extension strength is correlated with increased hip-shoulder separation.

c. Good hip-shoulder separation helps athletes translate pelvis rotational torque to the upper extremity.

d. Not surprisingly, previous research has demonstrated that increased hip-shoulder separation has previously been associated with higher pitching velocity and decreased humeral rotation torque and valgus elbow load.

The take-home message? Young pitchers need to get strong into hip extension to throw hard and stay healthy - and this benefit is likely delivered through hip extension's impact on "setting up" hip-shoulder separation. There's definitely a point of diminishing returns on hip extension ROM/strength and these benefits won't be further conferred on advanced pitchers, though.

Closing Thoughts

I could go on and on about lessons learned in training young athletes (and I might, at a later date), but in the meantime, I'd strongly encourage you to check out Mike Boyle's resource, Complete Youth Training. I loved this product as both a strength and conditioning coach and a parent. Mike did a tremendous job of outlining the problems in the current youth sports landscape while also including practical solutions to these concerns. You can learn more - and get $50 off through Sunday at midnight - HERE.


Sign-up Today for our FREE Baseball Newsletter and Receive Instant Access to a 47-minute Presentation from Eric Cressey on Individualizing the Management of Overhead Athletes!

Name
Email
Read more

Wall March Variations for the Win

Today's guest post comes from Cressey Sports Performance - Florida coach, Dylan Lidge.

Wall marches are drills that have been used commonly over the years in the strength and conditioning and track and field communities. Unfortunately, many coaches don't appreciate how much you can build on the basic wall march to teach a number of different movement competencies.

This closed chain exercise can be used in warm-ups as a more dynamic movement. As a great "bang for your buck" warm-up, it provides glute activation, hip flexion/extension, ankle mobility/stability, foot position awareness, and even scapular protraction/upward rotation. It also teaches an athlete the feeling of a stacked position, which is key for producing force efficiently. Not to mention, this is an excellent way to teach athletes sprint mechanics, primarily during acceleration.

To perform the Glute Wall March, stand upright with your palms against the wall at shoulder height. Push the wall away as if you are at the top of a push-up. Next, take a few steps back to get into a forward lean while keeping your heels on the ground. This should be around 45 degrees, as this position allows an athlete to produce more horizontal force into the ground, which is required during acceleration. From there, lift both heels off the floor and transition to the toes of the feet (just like doing a calf raise). Flex one hip and allow the femur to raise until it is perpendicular to the torso. The shin angle of this leg should match the torso angle. Dorsiflex the ankle to match the angle of the femur. Meanwhile, the opposite leg should be straight. We see "triple extension", or extension through the hip, knee and ankle; this will create a straight line from the head to the heel and reaffirm the "stacked"position. Cue the athlete to push into the wall with high intent. In order to push the wall, the athlete must put force into the floor or "drive the floor away."

Here are some key benefits:

Glute Activation

Pushing the floor fires the glute, which pulls the hip into extension. The Glute Wall March puts the athlete in hip extension they will get to on the field. Owning hip extension in this position is a great way to prep an athlete to perform on the field or in the gym, and protect against excessive arching through the low back, which may create spine discomfort/injuries.

Hip Flexion

The core stability the wall provides assists an athlete during hip flexion, which is when we often see compensations in posture, such as excessive lumbar flexion and extension. Especially with athletes who display poor lumbopelvic control, this position can set them up to own their hip flexion.

Ankle Stiffness

Ankle stiffness is necessary for athletes to display elasticity while running or changing direction. If you're looking for a drill to improve ankle stability or to improve your "bounce" during plyometrics, give this a try.

Foot Orientation

The orientation of the foot on the floor is in late stance during the Glute Wall March. This is a great way to build an arch for those who have flat feet. An adaptation many pitchers develop is a flat arch in order to access pronation as they drift off the rubber. Overall, late stance is able to bias supination, which can help counter those in excessive pronation.

Scapular Protraction/Upward Rotation

The serratus anterior is important for driving the "rotation" aspect of scapular upward rotation via its protraction capabilities. Athletes, especially those who throw overhead, need to be able to get the scapula "around and up" the rib cage in order to in order to both create a good ball-socket congruency at lay-back, and also to reach thee arm overhead and finish out in front.

Running Mechanics

The Glute Wall March allows an athlete to feel the position they need to be in during the acceleration phase of a sprint. During acceleration, athletes must apply horizontal force into the ground. This requires a forward lean. As the glute wall march is closed chain exercise, it provides stability for the athlete to feel the necessary forward lean during acceleration.

Fortunately, we have several variations we can use to bias our training toward different benefits. Here they are:

Glute Wall March Isometric Holds

Isometric holds are a great way to get an athlete to feel a position. Typically, we'll program three five-second holds on each side - although you could also do 30s/side if you're looking to really reap the tendon health benefits of this drill.

Glute Wall March ISO - Supinated Forearms

This has all the benefits of a glute wall march iso hold, but it's an easy way to sneak in a forearm stretch in a population that often lacks elbow extension and forearm supination.

Glute Wall March 1-2's

Once an athlete understands what a stacked position should feel like, progressing to this variation can allow them to put more force into the floor. A common cue is to pretend the legs are "pistons of an engine." This promotes the feeling of leg drive during acceleration.

Wall Assisted Load and Explode

This dynamic variation can help an athlete feel more intent of driving the floor away. It's a great way to help an athlete use the ground to produce force while maintaining a stacked position.

As you can see, these drills deserve a place in your training programs, whether it's warm-ups, arm care, movement training sessions, or as a filler in between power training or strength exercises!

About the Author

Dylan Lidge serves as a Strength and Conditioning Coach at Cressey Sports Performance - Florida. Prior to joining the staff, Dylan completed an internship at CSP-FL in the summer of 2020. He graduated from the University of Illinois Urbana-Champaign with a B.S. in Kinesiology. He is currently studying at the University of Illinois-Chicago for his MS in Kinesiology with a concentration in Biomechanics. At UIC he holds a position as a teacher's assistant in an exercise technique course, as well as an instructor for a personal fitness course. In 2019, he interned with the UIC Strength and Conditioning staff assisting with the baseball team. Dylan has coached baseball at the collegiate, high school, and youth levels.

Read more

The Best of 2020: Strength and Conditioning Videos

With my last post, I kicked off the "Best of 2020" series with my top articles of the year. Today, we'll highlight the top five videos of the year.

1. Birddog Rows -This is one of our favorite horizontal pulling variations. Check out this great write-up on the drill from CSP-FL Director of Performance, Tim Geromini.

2. Half-Kneeling Kettlebell Windmill - This drill comes to you courtesy of Cressey Sports Performance coach Derek Kambour. The Half-Kneeling Kettlebell Windmill is an awesome full-body exercise that delivers several important benefits. Learn more in this write-up.

3. Adductor Slides - This is an awesome exercise for adductors that are both long and strong. Check out this full write-up to learn more about how we use this drill.

4. Bottoms-up Kettlebell Arm Bar - The Kettlebell Arm Bar is an awesome exercise that delivers several important benefits, but we've admittedly taken some time to warm up to it. Learn more here.

5. Bowler Squat to J-Band Y - This exercise is the brainchild of physical therapist Eric Schoenberg, who works out of Cressey Sports Performance – Florida. When I first saw him implementing it with a patient, I immediately thought, “How have I never thought of it?” It actually combines two of my favorite exercises: the bowler squat and the J-Band Y. In doing so, we get an awesome arm care exercise that integrates single-leg balance and hip mobility. Learn more here.

I'll be back soon with the top guest posts of 2020!

Sign-up Today for our FREE Newsletter and receive a four-part video series on how to deadlift!

Name
Email
Read more

Exercise of the Week: Supine Bridge w/Reach

The supine bridge with reach has been a popular mobility drill for us for close to a decade now, but I realized that we haven't highlighted it in an online feature to give it the love it deserves. The video is actually part of The High Performance Handbook video library.

I love this drill because it not only gives us the terminal hip extension we get with many glute activation exercises, but also an element of thoracic mobility. In many athletic endeavors (including pitching, as you see below), the thoracic spine must continue to rotate as the hips extend.

This drill enables us to not only train some of the muscular recruitment patterns we want, but also challenges the fascial system by getting us a more multi-planar, proximally initiated challenge. You also get a nice blend of elasticity because of the rhythmic nature of it, and can easily interject variety by changing the angle at which you reach.

We'll work this into a warm-up with a set of five reps on each side, or mix it in as a "filler" between medicine ball sets. Give the supine bridge with reach a shot to keep your mobility work engaging, progressive, and productive!

Sign-up Today for our FREE Newsletter and receive a four-part video series on how to deadlift!

Name
Email
Read more

Exercise of the Week: Adductor Slides

Today's guest post comes from Cressey Sports Performance - Florida Director of Performance, Tim Geromini.

One of the more forgotten muscle groups in the lower extremity is the adductor (groin) complex. Often, there is so much focus on glute activation and hamstrings range of motion that we overlook the adductors. As Eric has written in the past (all the way back in 2004!), depending on the population, adductors can get injured because they're either overactive or weak. In other words, they need to be both "long and strong." Enter an exercise that not only works on eccentrically creating range of motion at the adductors, but concentrically strengthening them, too!

Some of the benefits of Adductor Slides - and the associated coaching cues needed to make the most of your efforts:

1. Eccentric Control: The adductors are mostly known to absorb force in change of direction movements as they experience a ton of eccentric stress when an athlete has to cut or adjust his position. This exercise is not a traditional passive stretch as we are actively stretching the adductors into hip abduction. This should be a slow and controlled purposeful movement, keeping the hips in line with the knees. A cue that works well is “pretend there is a band attaching the Valslides together; now stretch that band.” This cue helps you understand to put force into the ground as you spread your knees as far apart as possible (another helpful cue). You are only going to go as low as your range of motion allows, so work within the range you have. Keeping your feet on the ground is a good starting point. As your range of motion and strength increases, try keeping them off the ground to progress the exercise.

2. Concentric Strength: Now that you have a sufficient stretch of the adductors, it’s time to strengthen them driving up into hip adduction. A helpful cue would be “pull the turf together on the way up.” The adductors play a big and often overlooked role in creating rotational power. At CSP, we often talk about shifting your weight from your back hip to your front hip on a medicine ball exercise, on the mound, and even in the cage. In this instance the role of the adductors is to help internally rotate the femur to create power in the lower half. Without sufficient adductor strength, you’re going to leave a lot of power on the table.

3. Anterior Core Strength: Neither of the two benefits listed above work very well if you can’t maintain a neutral spine while doing them. In other words, don't let the lower back arch. It’s important to note that the adductor muscles originate on the pubis (the bottom portion of the pelvis) and are vital in controlling pelvic stability. If you are doing this exercise on your own, it may be helpful to place an object on your low back and make sure it doesn’t fall off as you go through the movement.  Again, think slow on the way down and fast on the way up.

We typically program this exercise for 8 reps either in a warm-up or as a pairing with a rotational med ball exercise. As a regression, you can do one leg at a time while the non-Valslide knee is positioned on the ground/pad.

About the Author

Tim Geromini is the Director of Performance at Cressey Sports Performance - Florida. Prior to joining the CSP team; Tim spent time with the Lowell Spinners (Class A Affiliate of the Boston Red Sox), Nashua Silver Knights (Futures Collegiate Baseball League), Cotuit Kettleers of (Cape Cod Baseball League), and UMass-Lowell Sports Performance. You can contact him at timgero@gmail.com and on Twitter (@timgeromini24).

Sign-up Today for our FREE Newsletter and receive a four-part video series on how to deadlift!

Name
Email
Read more

“Coil” in the Pitching Delivery: Friend or Foe?

I came across this awesome still-frame of Nationals pitcher Patrick Corbin on the Nationals instagram the other day. This positioning at the top of his leg lift offers an important reminder of how the transverse plane can be your biggest ally or enemy in the pitching delivery.

As you can see, Corbin has some "coil" to his leg lift, which creates more internal rotation on the trailing hip right as he starts to progress into his hip load (hinge/flexion). This pre-tensioning allows him to store a little extra elastic energy as he heads down the mound toward front foot plant. It also can provide a bit more deception to make the hitter's job more challenging. And, perhaps most importantly, it sets up more of a "sweeping" slider, similar to what we see with pitchers like Chris Sale and Steve Cishek. All good, right?

Well, the challenge is that being this rotational can also give some athletes problems. It's a slightly more high maintenance delivery because you have to take all that transverse (rotational) motion and convert it into a more linear motion at ball release so that you are getting through the baseball, not just around it. And, if you can't stop this rotation at the hips, it gets transferred up to the spine. This is where optimizing strength, mobility, and timing of the lead hip is essential: it's a torque converter (rotational to linear).

Understanding this should make you realize that just coaching knee extension on the front leg isn't a useful strategy; it ignores the hip. And, just calling it lead leg blocking is insufficient, as "blocking" doesn't appreciate the rotational component that the lead hip can take on. That's why we talk a lot about "front hip pull-back" and select exercises that challenge it to accept forces in all three planes of motion.

Sign-up Today for our FREE Baseball Newsletter and Receive Instant Access to a 47-minute Presentation from Eric Cressey on Individualizing the Management of Overhead Athletes!

Name
Email
Read more

5 Great Kettlebell Exercises for Baseball Players

Today's guest post comes from Seattle-based physical therapist, Dan Swinscoe. Enjoy! -EC

Kettlebells have come a long way since they were used as weights on scales in the open air markets of eastern Europe about two hundred years ago. For exercise purposes, they’ve been called everything from an ancient Russian tool against weakness to a cannonball with a handle. One thing is for sure, though: since Pavel Tsatsouline introduced them to the US about 20 years ago, they have become staples in most gyms and rehab centers, including my own.

Physical therapist Gray Cook once said, “Dumbbells will make you strong, but kettlebells will make you efficient.” It’s the shape that makes them great. Because of the offset handle, when gravity acts upon the bell, you are forced to control it in two planes of motion, not just one (as with a barbell or dumbbell). It’s for this reason that they are one of my favorite tools to rehabilitate and train baseball players.

Which exercises will be the best for you depends on your individual needs – which are determined by a good assessment. However, my list below should have you pretty well covered – even if many good exercises didn’t make the list. In particular, I’m leaving out the single arm and double arm swing on purpose because they are so well known. I think they are awesome and I recommend them, but with this article I am hoping to bring some lesser known but invaluable kettlebell exercises to light. The KB snatch is also a great and popular exercise, but I don’t teach it to my pitchers.

Based on research from OnBase University, no matter how they throw or what pitch they’re throwing, pitchers have to do five things well to be successful. They need to 1) control their upright posture, 2) stride 85% of their height, 3) interact with the ground, 4) control their core, and 5) control their arm. Not every pitch is perfect and no pitcher is perfect, but the more we improve those five things, the better the performance and the more protected they are against injury.

Because injuries to pitchers are more common than to position players, I am biasing my list to what pitchers need most. Here are my top five kettlebell exercises to help the pitcher.

1. Pivot Lunge/Pivot Clean.

This is a great drill for training leg strength and control over momentum (as needed for pitching). We speak in terms of the lead leg, but we have athletes go both directions. Master the skill with the pivot lunge before progressing to the pivot clean. Once the athlete knows how to do both, we usually program it so that they combine them in one set. As an example, for a set of 10, the first five reps are pivot lunges and the next five reps are pivot cleans – and then switch sides. This is a unique advantage to the kettlebell. Lunges are okay with a dumbbell, but once you begin cleaning, the KB is distinctly better.

Trains: stride, upright posture, ground interaction, core control, arm control):

2. Turkish Get-up with Screwdriver

This exercise has a lot going on. To help simplify things, we first teach them separately. When we isolate the screwdriver, we teach it first supine (face up), then progress to side-lying, and then into the side plank position. Each version is slightly more challenging than the previous one because each version adds another body segment to have to control. The TGU and the screwdriver each have value on their own. We will combine them once the fundamentals are mastered and the athlete has demonstrated the ability to handle the complexity of this challenge. More than anything else, this exercise trains the player to improve rotator cuff control of the ball on the socket. However, it also demands scapular control and challenges the cross body patterning connecting that shoulder to the opposite hip via the core. Oblique abdominals and serratus anterior are huge with this drill. Once the movement is mastered, the load can be progressively increased so strength can be gained.

Trains: upright posture, stride, interaction with ground, core control, arm control)

3. Offset Kettlebell Front Squat

With this exercise, we get a nice challenge to scapular stability on the side holding the kettlebell, especially as the bell gets heavy. However, the real benefit of this squat version is how we also get contralateral stability challenges in the frontal plane for both the core and hips (in addition to the usual sagittal plane challenges with other squats). I especially like this style of squat because the challenge is very high with weight that seems small compared to barbell squat variations. This way, I get high muscle stress with low joint stress. For this reason, it’s my #1 squat choice for players when training in season.

Trains: upright posture, interaction with ground, core control, arm control


4. Dynamic Rows

This exercise has the athlete in a hinge position, which challenges the posterior chain. However, while maintaining that hinge, rotation of the torso is accelerated and decelerated bilaterally. The dynamic nature is an additional challenge from standard rowing exercises. It also forces the rotator cuff and scapula stabilizers to work and work quickly.

Trains: upright posture, core control, arm control

5. Open Half-Kneeling Hip Mobility

Improving stride length is something a lot of pitchers need to do. Improving this mobility so that it sticks can sometimes be a challenge. I think the reason this drill works so well is because of the load of the kettlebell. The weight of the bell assist the player into “depth,” and because he’s doing this actively, the weight seems to give the nervous system more to feel. The gains seem to stick. Players also seem to universally like how it feels to them. Any exercise that is liked gets done more often. This one feels good.

Trains: upright posture, stride

I hope you find these kettlebell exercises useful. If this is your first exposure to kettlebell training I would recommend you seek professional coaching when you are able. Keep in mind some of these exercises take time to master. But like other investments they are worth the payout in the end.

A special thanks to Cardinals pitcher Ian Oxnevad (@ioxnevad) and University of Washington commit Cole Fontenelle (@cole.fontanelle) for their modeling services.

About the Author

Dan Swinscoe, MPT, CSCS is a physical therapist in Issaquah, WA. He practices at Peak Sports and Spine Physical Therapy and teaches his own class, Kettlebells for Clinicians. You can follow him on Instagram (@danswinscoe) and email him at baseballrehab@gmail.com.

Sign-up Today for our FREE Baseball Newsletter and Receive Instant Access to a 47-minute Presentation from Eric Cressey on Individualizing the Management of Overhead Athletes!

Name
Email
Read more

5 Non-Traditional Exercises for Catchers

Today's guest post comes from Cressey Sports Performance - Florida Director of Performance, Tim Geromini. Tim takes the lead with our catchers at CSP-FL, so I'm excited that you'll get a chance to take a glimpse into the expertise he brings to the table each day. Enjoy! -EC

With spring training right around the corner, most of the media attention is on the pitchers coming in to camp, but what about the guys catching them? The demands of catching a full season are unique and with that in mind, here are 5 non-traditional exercises we use with our catchers at Cressey Sports Performance.

1. Catcher Pop-up to Shotput

Although nothing can truly simulate working on technique like being in pads and actually being on the field, you’ll see a number of things in this exercise that look similar to what a catcher might do in a game situation. We start by getting into the catcher’s stance with a runner on base and have them close their eyes. I will then roll or place the ball to a random spot, forcing them to react when I clap my hands and they open their eyes. From there, the goal is to get to the ball as fast as possible and in a position to throw the ball as hard as possible into the wall. The reason we have them close their eyes and find the ball is to work on reaction time and identifying a loose ball. In game situations, a catcher doesn’t always know where the ball is after the initial block. One of the main benefits of the exercises is working on hip mobility and being strong getting from the crouch position to an upright throwing position. We usually program this for 3 sets with 3 reps per side with a 6-8 pound med ball.

2. 1-leg Kettlebell Switches

A lot of focus for catchers is centered around hip mobility, as it should be. However, losing sight of ankle stability is a mistake. Enter the 1-leg Kettleell Switches. In order to execute the exercise properly and get the most out of it, I recommend being in just socks or barefoot. The kettlebell doesn’t have to be heavy at all for this to be effective; most of the time, I start athletes with 10 pounds.

As you can see, the first movement is a hip hinge with a slight knee bend. From there, we cue the client to “grab the ground” with their feet and make sure the toes stay down. Go as wide with your arms as you can while maintaining balance, and switch the kettlebell from side to side. Your goal is to keep your foot from deviating into pronation/supination and your hips to stay level. From the side view, you want to make sure the athlete maintains a neutral spine. You may notice that if your client has a flatter foot, this can be more challenging to stay away from the foot pronating in. Likewise, if your client has a high arch, it can be challenging to maintain the big toe staying down.

We usually program this as part of a warm-up or paired with an explosive lower body exercise. We'll do 3 sets of 8 reps per side.

3. High Tension Ankle Mobilization

A Functional Range Conditioning (FRC) inspired exercise, the high tension ankle mobilization is working on taking your ankle through end-ranges of dorsiflexion with control of that range. It is important to go through this exercise slowly, as rushing through it generally doesn’t lead to as much tension or control of your range.

Start by getting into a good half-kneeling position, making sure not to sit your hips into abduction or adduction. From there, imagine pushing your foot through the floor and slowly take your knee as far over your middle toes as you can without your heel coming off the ground or the ankle pronating in. Then, slowly lift your heel off the ground maintaining your knee staying out in front of your toes as much as possible. Once you go as far as you can then slowly return while driving your foot through the floor. Now that you are back to the original starting position with your knee over your toe pause, the lift your toes towards your shin and start to lift the front of your foot off the ground, still pushing your heel through the ground. Once you can’t go back anymore, slowly return to the starting position.

Because this exercise requires a lot of tension and effort, we usually program this for 2-3 reps. You can put this in a warm-up or pair it with an ankle stability exercise such as the 1-leg kettlebell switch. If you deem the client has sufficient ankle mobility, this exercise isn’t always necessary and the focus can be more on stability.

4. Seated 90-90 Hip Switches w/Hip Extension

Another drill of FRC origin, seated 90/90 hip switches are a great hip mobility exercise, but often are not performed correctly if they are rushed. What do we get out of this exercise? Hip internal rotation, external rotation, flexion, extension, abduction, and adduction...all while maintaining a neutral spine. It doesn’t get any better than that!

Before prescribing this exercise, make sure to check your client’s hip range of motion and medical history first. If your client has femoroacetabular impingement or some other pain in their hip, this may not be the best fit for them.

The key coaching cues are to keep your hips as far separated as possible during the exercise and maintain a neutral spine. If you notice your lumbar or thoracic spine flexes, then use your hands on the ground as support. We usually program this exercise for 3 reps per side.

5. Deep Squat Anti-Rotation Press

There are many variations of the anti-rotation press (better known as the “Pallof Press”), but this version gets as specific to catching as any of them. Make sure the cable or band is set up at sternum height. When you press out, make sure your hips and feet stay neutral (don’t rotate toward one side). From the side view, you want to make sure the spine is neutral. You can hold this for breaths, time, or reps.

Wrap-up

These are just a small piece of the puzzle that is training catchers, but hopefully it gets your mind working to innovate and individualize for these athletes!

About the Author

Tim Geromini is the Director of Performance at Cressey Sports Performance - Florida. Prior to joining the CSP team; Tim spent time with the Lowell Spinners (Class A Affiliate of the Boston Red Sox), Nashua Silver Knights (Futures Collegiate Baseball League), Cotuit Kettleers of (Cape Cod Baseball League), and UMass-Lowell Sports Performance. You can contact him at timgero@gmail.com and on Twitter (@timgeromini24).

Sign-up Today for our FREE Baseball Newsletter and Receive Instant Access to a 47-minute Presentation from Eric Cressey on Individualizing the Management of Overhead Athletes!

Name
Email
Read more
Page 1 2 3 5
LEARN HOW TO DEADLIFT
  • Avoid the most common deadlifting mistakes
  • 9 - minute instructional video
  • 3 part follow up series