Home Posts tagged "Hip Thrust"

The Best of 2019: Strength and Conditioning Articles

With 2019 winding down, I'm using this last week of the year to direct you to some of the most popular content of the past 12 months at EricCressey.com, as this "series" has been quite popular over the past few years. Today, we start with the most popular articles of the year; these are the pieces that received the most traffic, according to my hosting statistics.

1. The Most Important Coaching Responsibility - Coaches are some of the most important influences in young athletes' lives on a number of fronts. In this post, I focused on what I believe to be the single most important responsibility of a coach.

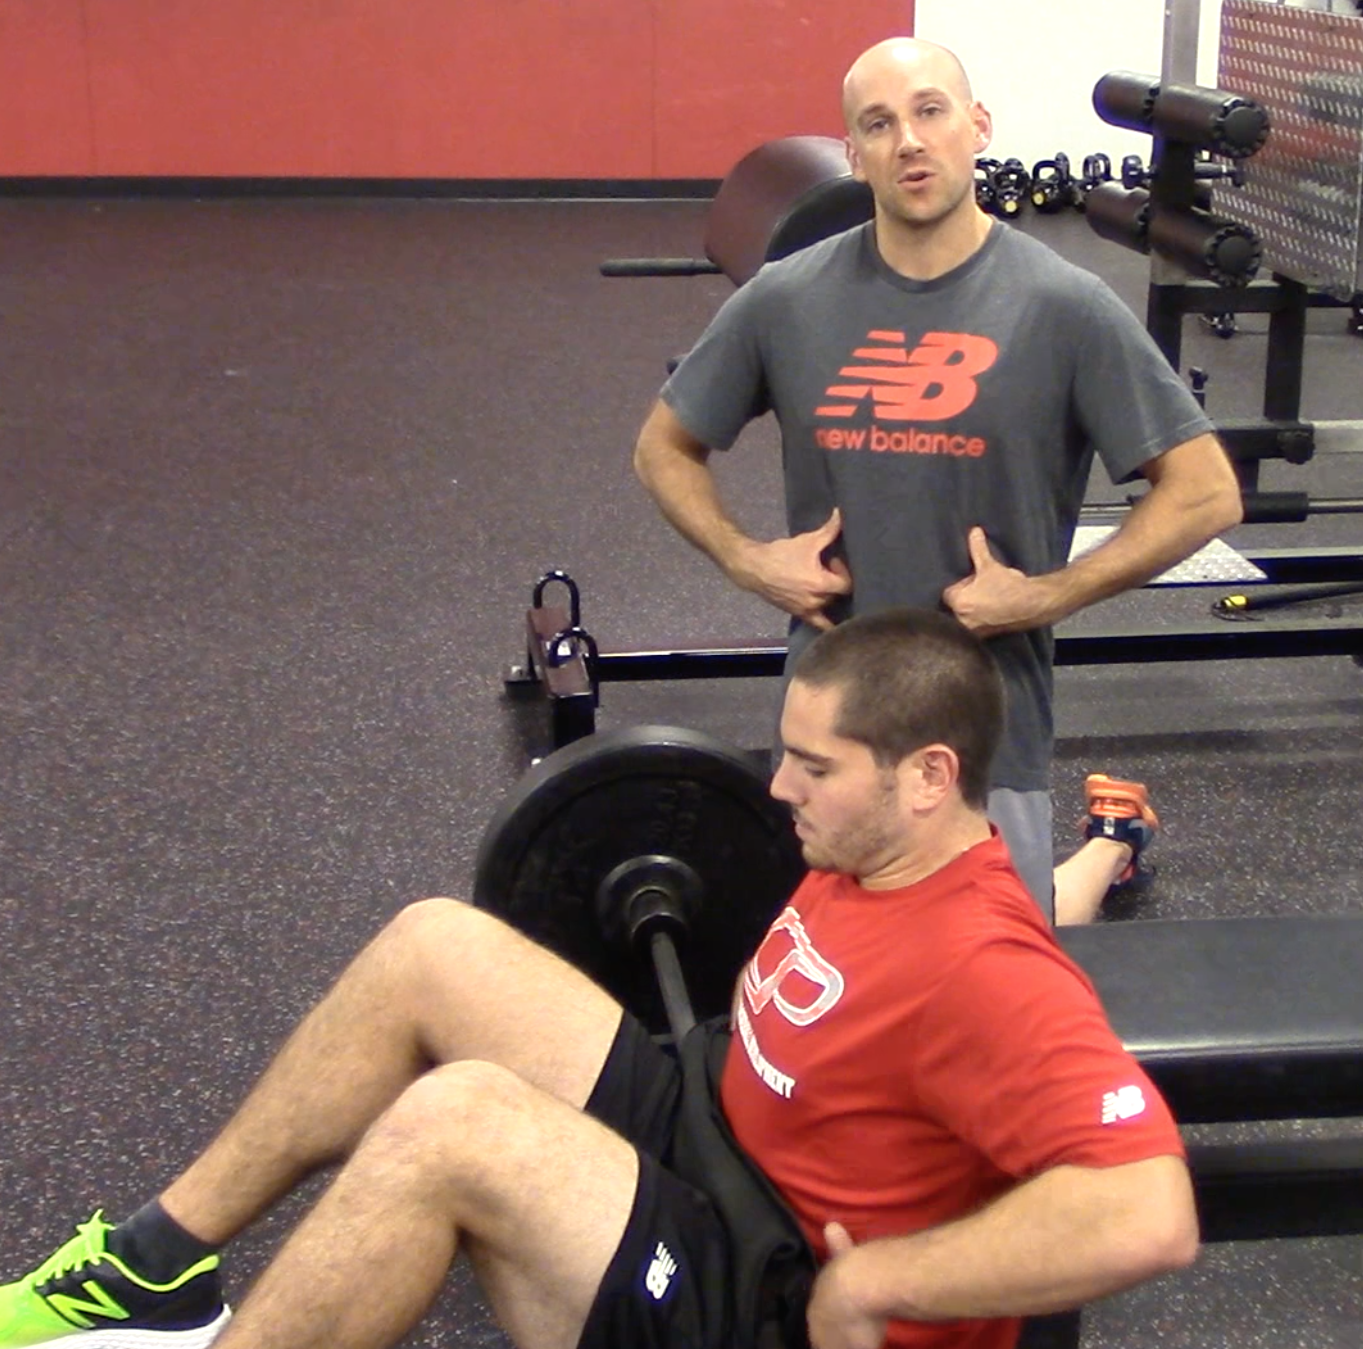
2. 3 Thoughts for Getting the Glutes Going -This was a big hit with all the functional anatomy nerds out there.

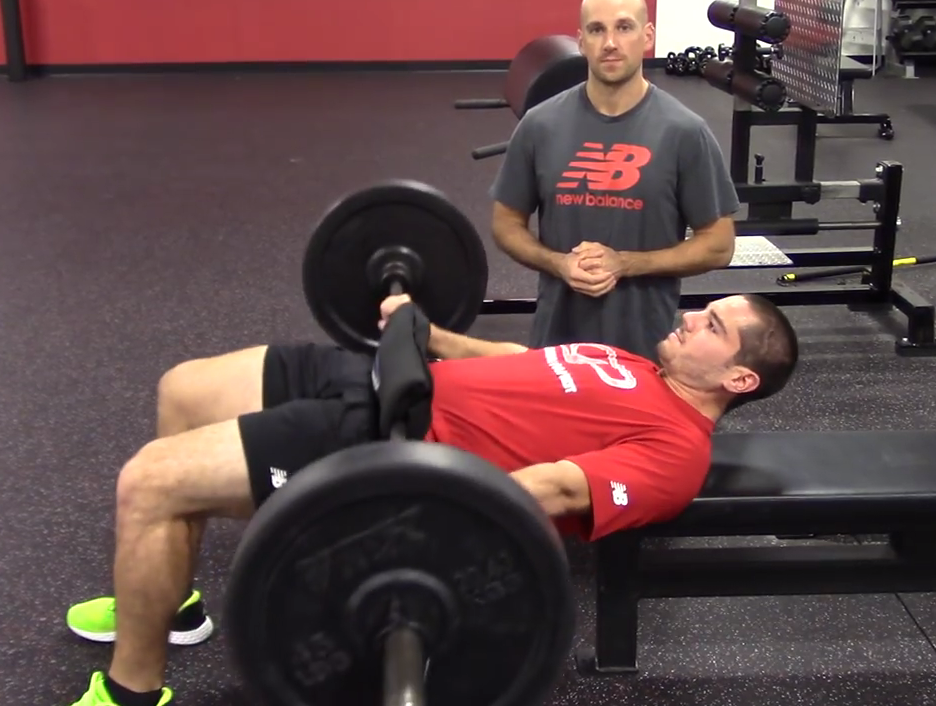
3. The 4 Most Common Barbell Hip Thrust Technique Mistakes - I’m a fan of barbell hip thrusts. Like most exercises, though, there are some common technique pitfalls. Check them out in this article.

4. Mid-Week Movement Miscellany - This was a collection of random thoughts on movement that unexpectedly proved to be a big hit. I might have to turn it into a regular series.

5. Why Fitness Industry Hiring is Different Than What You Think It Is - The fitness industry is different than other industries on a number of fronts, and approaches to hiring are one such example. Here's why.

I'll be back soon with another "Best of 2019" feature. Up next, the top videos of the year!

Sign-up Today for our FREE Newsletter and receive a four-part video series on how to deadlift!

Name
Email
Read more

The 4 Most Common Barbell Hip Thrust Technique Mistakes

As I've written previously (see In Defense of the Hip Thrust), I'm a fan of barbell hip thrusts (and supine bridges). Like most exercises, though, there are some common technique pitfalls. This week, on my Instagram, I featured the four most common mistakes I see in this regard. Check them out: 


View this post on Instagram


This is my second installment of this week's series on coaching cues for the barbell hip thrust. Today, we'll focus on weight distribution through the foot. 👇 Often, you'll see individuals go up to the balls of the feet and toes when they're at the top position. This can occur because the individual has either set up with the feet too far away from the hips, or because a quad-dominant individual is actually trying to extend the knees to lift the weight. 🤔 In the former instance, the quick fix is to move the heels a bit closer to the body in the starting position so that the knees end up at a 90-degree angle at the top position (hip extension w/knee flexion). In the latter instance, it can help to a) tell the athlete to go barefoot (more heel contact = more posterior chain recruitment) or b) imagine grabbing the floor as if you're trying to pick up a basketball with your arch. 👍 Thanks to @nickcioffi_14 for the demo and @pete_dupuis for the design work. #cspfamily #hipthrust #glutebridge

A post shared by Eric Cressey (@ericcressey) on


View this post on Instagram


This is my third installment of this week's series on coaching cues for the barbell hip thrust. Today, we'll cover head/neck posture. 👇 Often, you'll see individuals go into a forward head posture at the top position. As a result, they wind up jacking up their neck when they're trying to train the lower body. This can occur because the individual has tried to preserve the line of sight from the starting position even though the torso angle has changed due to the hip extension further down. 👎 A quick "make a double chin" cue usually cleans it up, especially with athletes who've built up a lot of context for neutral neck posture with other exercises. If it doesn't, however, I like to just put the palm of my hand an inch in front of their face on warm-ups as an external focus cue; if they make contact with it, they're slipping into forward head posture. 👍 Thanks to @nickcioffi_14 for the demo and @pete_dupuis for the formatting. #cspfamily #hipthrust #glutebridge

A post shared by Eric Cressey (@ericcressey) on


View this post on Instagram


This is my fourth and final installment of this week's series on coaching cues for the barbell hip thrust. Today, we'll look at hip/spine positioning at the finish position. 👇 Often, you'll see individuals substitute extension of the lumbar spine (lower back) for hip extension, especially at the top position. The gluteus maximus is a terminal hip extensor, which means that those last 10 degrees of hip extension are crucial. It's very easy to load up a lot of weight and come up short on this exercise - or just find bad motion through the wrong place (spine). 👎 The correct finish position has a straight line from the knees to the top of the head, with the glutes activated in the top position. When done correctly, this exercise should lead to zero lower back discomfort (or soreness the next day). 👍 Thanks to @nickcioffi_14 for the demo and @pete_dupuis for the formatting. #cspfamily #hipthrust #glutebridge

A post shared by Eric Cressey (@ericcressey) on

Sign-up Today for our FREE Newsletter and receive a four-part video series on how to deadlift!

Name
Email
Read more

Strength and Conditioning Stuff You Should Read: 9/19/17

I hope you all had a good weekend. My wife and I spent a few days in Washington, DC as tourists and baseball fans, and then I gave a shoulder seminar in Virginia before we headed home on a very delayed flight last night.

Let's kick of the week with some recommended reading and listening I covered on my trip. Before we get to it, though, just a friendly remind that September 22 (Friday) is the early-bird registration deadline for the Cressey Sports Performance Fall Seminar in Hudson, MA. You can find details HERE.

Now, let's get to the recommendations:

Complete Single-Leg Training - This is Mike Robertson's brand new resource, and I'm working my way through it right now. All early signs point to it being absolutely outstanding. You can save $50 this week on the introductory discount.

EC on the Pacey Performance Podcast - I joined Rob Pacey on his podcast to talk everything from rotational power development to movement assessments.

From Impossible to Inevitable - This book is largely focused on the growth of larger companies, but there are quite a few pearls of wisdom in there for folks in the fitness industry. It was a good listen; I especially liked the section on niche development.

Top Tweet of the Week

Top Instagram Post of the Week

Sign-up Today for our FREE Newsletter and receive a four-part video series on how to deadlift!

Name
Email
Read more

In Defense of the Hip Thrust

I've been a fan of barbell hip thrust and supine bridges for approximately seven years now. I'd encourage you to give my What I Learned in 2012 article a read, as it describes how our usage of these drills came about (and does so in an entertaining manner) following a meeting I had with Bret Contreras in 2009. Suffice it to say that initially, I was not a fan of these drills, but in-the-trenches experimentation eventually brought me around.

Recently, there has been some controversy over the utility of hip thrusts, as some newer research publications (here and here) have demonstrated that hip thrust training does not improve sprinting speed. Bret Contreras, the man who popularized the hip thrust, has written a detailed response to these publications. For the record, I think he's handled the situation admirably, and I commend him for all his work adding to the body of knowledge so that we can all have these discussions in hopes of fine-tuning our strength training programs.

That said, not surprisingly, these research findings have created an opportunity for hip thrust critics to say "I told you so" - and several articles have emerged to highlight its lack of efficacy on this front. That said, I found Doug Kechijian's article, 'Science' and the Barbell Hip Thrust, to be the best of the articles that have recently emerged. Doug doesn't utilize the hip thrust, but used this current situation as a means of discussing how we view exercise selection on the whole. I'd strongly encourage you to give it a read.

While I must admit that I wasn't particularly surprised at the lack of carryover to sprinting performance, I don't think it's time to throw the baby out with the bath water just yet. Why? As I've often said:

[bctt tweet="Want to put an exercise in a program? You must be able to quickly and easily justify its inclusion."]

In this case, I still have plenty of justifications for including hip thrusts and supine bridges in our programs. I don't think they're ever a perfect replacement for a squat or deadlift, but I do see a role for them in special circumstances, and as assistance exercises. In today's post, I'll outline why I still find these drills to have great utility.

1. Zero Back Pain

Yes, you read that right. In close to a decade of using these drills with clients, athletes, and our coaching staff, I've never seen anyone injured during a hip thrust or supine bridge. For how many other exercises can you say that? Certainly squats, deadlifts, kettlebell swings, or even single-leg work. In hindsight, it's shocking that a drill that looks like it could be harmful (and this was my initial reluctance to include it) actually has such an excellent record on the safety front. Obviously, we're matching it to the individual and coaching technique, but this is still an impressive observation.

Moreover, I've sold more than 8,000 copies of my flagship product, The High Performance Handbook. It includes barbell supine bridges in phase 2, and barbell hip thrusts in phase 3. This is 8,000+ people who've performed these exercises without my supervision, and I've never had a single email from anyone about an injury. Conversely, I've answered a ton of emails over the years from customers who need modifications because squatting and/or deadlifting aren't drills they can perform pain-free. I think this is remarkably telling; hip thrusts have stood the test of time in terms of safety concerns.

Finally, I've actually seen quite a few individuals who couldn't squat or deadlift pain-free actually perform barbell hip thrusts and supine bridges with zero pain over the course of years. They've bolstered a training effect that otherwise would have been markedly attenuated.

2. Hip thrusts allow us to train the posterior chain without deadlifts in a population that may not do well with scapular depression and downward rotation.

One thing we know about throwing a baseball is that it makes you very lat dominant and tends to drive scapular downward rotation.

As I discuss in this video, scapular upward rotation is incredibly important for throwers.

Sometimes, we'll see athletes who sit in so much scapular depression or downward rotation that we choose to avoid lat dominant exercises and heavy carries/holds in their programs. So, drills like deadlifts, farmer's walks, KB swings, and dumbbell lunges are out of the mix. When you lose deadlifts from a program, you realize that you've lost a big bang exercise for training the posterior chain. Barbell hip thrusts have been a huge help to us in this regard, as they give us a bilateral option for training the posterior chain. Otherwise, it'd be just safety squat bar (SSB) squats and single-leg work, the goblet set-up, belt squats, and glute-ham raise (GHR) variations. And, a lot of people don't have a SSB, belt squat, or GHR!

Interestingly, I can actually think of several instances over the years where we dropped deadlifting from a pitcher's program - and replaced it with hip thrusts - and his shoulder pain went away. I don't think improvements like this happen in isolation, but I have no doubt that it contributed to the reduction in symptoms.

3. Hip thrusts prioritize terminal hip extension, which is actually far more important to baseball success.

I want you to watch these videos of the hips during the baseball swing (and while you're at it, check out Jeff Albert's great guest post for me: Hip Extension and Rotation in the Baseball Swing).

What I'm hoping you noticed is that while hip extension is incredibly important (for both the front and back legs), there is very little of it occurring in terms of actual range of motion. The same can be said of the pitching delivery; very rarely would a pitching come close to being a 90 degrees of hip flexion on the back hip.

Tim Collins early in his career was the most extreme hip flexion I've seen, and he's not even all the way down to 90 degrees:

In other words, hips thrusts and supine bridges reflect the shorter range of hip flexion/extension motion we see in hitting and pitching than they do for a higher amplitude movement like sprinting.


Source: Darren Wilkinson

To be clear, I'm not saying that squats and deadlifts don't train this range (especially when accommodating resistances like bands and chains are utilized); I'm just saying that hip thrusts and supine bridges train it exclusively and may provide some extra carryover.

4. Hip thrusts allow us to train the lower body without a grip challenge.

Load of gripping can also be an issue during the baseball season. Guys obviously get plenty of it from their upper body work, but when you add in the stress of throwing on the flexor tendons, more work on lower body days can push some pitchers over the edge in terms of forearm symptoms. This can also be an issue during post-operative elbow scenarios, as some surgeons can "beat up" the flexor tendon a bit more during Tommy John surgeries. With these athletes, we'll often plug hip thrusts in to replace deadlifts for 4-8 week spans.

5. Hip thrusts help to maintain a training effect in post-operative elbow and shoulder situations.

Building on my last point, we utilize barbell hip thrusts and supine bridges a lot with our post-op clients. If we are talking about a Tommy John surgery, you aren't using a safety squat bar until two months post-op, or deadlifting until closer to five months (and even then, the loading has to be severely restricted). Conversely, provided they have someone to load plates for them, these athletes can hip thrust as early as 4-6 weeks (assuming we aren't dealing with a lower extremity graft site), and loading appreciably by weeks 8-10. That's a huge deal.

Shoulder surgeries are a bit slower to come around, but you're definitely able to hip thrust well before you use the safety squat bar or integrate deadlifts. In short, if you want bilateral loading in a post-operative situation, hip thrusts below right up there in the discussion with glute-ham raises - and serve as a good complement to sled dragging with a belt/harness and various single-leg drills.

6. Hip thrusts don't create much delayed onset muscle soreness.

It's hard to really overload the eccentric (lowering) component of a hip thrust - and this may be one reason why it doesn't carry over to sprinting as much as a squat would. However, this non-soreness-inducing quality can actually be of benefit, as we often want to avoid it with in-season athletes or those trying to achieve a higher volume of work in their training programs. This is actually a perk of several deadlift variations, too.

7. Hip thrusts are a safe way to get in higher-rep sets.

In the quest to put on some muscle, high-rep squatting and deadlifting often wind up getting pretty ugly by the end of the sets unless they're regressed in some fashion (e.g., goblet squats). And, on a personal note, any time that I deadlift for more than eight reps, I get a massive headache that lasts about three days. I've found that higher rep barbell supine bridge (moreso than hip thrusts) are a good option for sets of 12-15 at the end of a session to kick in some extra volume safely. It's pretty darn hard to screw this up, you know?

Thoughts on Loading

On several occasions, I've heard folks criticize barbell hip thrusts and supine bridges because even seemingly untrained individuals can use so much weight. It's a valid assertion - but only to a point.

My experience has been that many individuals moving big weights are really short-changing themselves on the last 5-10 degrees of hip extension. They're either stopping short or getting lumbar extension (moving through the lower back). Often, when you fine-tune the technique and make them hold for a count at the top, they'll have to reduce the weight significantly. As a rule of thumb, though, I view the risk:benefit ratio with hip thrusts as being comparable to that of deadlifts in an athletic population; going heavier than 495 pounds probably isn't worth the risk or time involved. You're better off changing the tempo (longer pauses at the top) or switching to a different (and possibly more technically advanced) exercise that doesn't "come naturally" to the lifter. In short, find a different window of adaptation instead of just trying to move big weights through a short range-of-motion.

As an interesting aside to this, my deadlifts are actually significantly stronger than my hip thrusts. It's likely a function of "getting what you train," but I think it's an interesting argument against the idea that even weak people can automatically move big weights.

Last, but not least, remember that relatively untrained people can often push a lot of weight on sleds on turf, and rack pulls are usually substantially heavier than one's deadlift. Does that make them useless, too?

Closing Thoughts

New research is always warranted in any field, but particularly in strength and conditioning, a dynamic industry that has changed remarkably over the past few decades. In many cases, it takes a lot of time and experimentation to understand just how something fits (or doesn't fit) in our training approaches. Personally, I always come back to the "justifying the inclusion of a lift" question I noted earlier in this article. My experience has been that barbell hip thrusts and supine bridges have stood the test of time in this regard - and done so safely. I view them much more as an assistance exercise, as opposed to something that would ever replace squats or deadlifts. However, in the special circumstances I've outlined above, I think they will continue to fill in nicely.

Sign-up Today for our FREE Newsletter and receive a four-part video series on how to deadlift!

Name
Email
Read more

5 Common Hip Training Mistakes

Today's guest post comes from Dean Somerset, the co-creator of the excellent new resource, Complete Hip and Shoulder Blueprint. It's on sale at a $60 off introductory discount. I really enjoyed going through the product and highly recommend it. In the meantime, without further ado, I'll turn this over to Dean. -EC 

dean-4

I’ve been fortunate enough to work with a broad array of people and hips, ranging from post-total hip replacement to pro hockey players and Olympic athletes in multiple sports. I’ve seen general fitness folks with normal aches and pains, and even people missing the odd hip here and there.

The good thing about training a broad range of clients is that you get to see what happens when a population isn’t homogenous. Imagine if I only trained total hip replacement clients. I would have zero idea of how a hip worked if it wasn’t made of titanium and ceramic. I would also never move through internal rotation and flexion without fear or popping that hip out of its socket. If I only ever trained hockey players, I’d never know life without groin pulls or femoroacetabular impingement (FAI).

This also helps me to see what kinds of things work really well across different populations without issue, as well as the concepts that seem to stick well through all phases of training, while also seeing what stuff falls completely apart across different outcomes and inputs.

While there are a lot of potential variables and details to consider with each of the specific and non-specific populations I outlined above, there are also some simple and consistent things that you can take away from them all that makes my life as a trainer much easier. These things also help to deliver better results all around, and I wanted to share some of my failures and realizations to help your training as a result.

#1: Don’t assume symmetry.

When I started training, every text or manual said to have feet pointing in the same direction to prevent “imbalances.” The belief was if you do anything different between left and right sides, you’re going to develop these nefarious things that will limit your progress and ruin your life, so to speak.

While preventing poor performance or development is entirely admirable and a massive goal of any training program, it’s somewhat inaccurate to say standing in a symmetric stance prevents asymmetry. This is especially true if there’s a degree of asymmetry in the structure of the hips, knees, or feet.

Zalawadia et al (2010) showed that the angle of anteversion or retroversion of the femur could be significantly different from left to right, sometimes more than 20 degrees worth of difference!

anteversion

What this means is your left or right leg might point in a different direction simply due to the angle differences between the two structures. Moreover, it means putting them both into a symmetric stance would actually push one into a different alignment with the hip socket or femoral neck angle relative to the pelvis, which would actually CREATE imbalanced tension through both sides of the hip.

This means if someone is standing in a symmetric stance and doing something like a squat, but feel one hip doing something funky, it could be because they have some structural issues (or maybe they have some other soft tissue stuff), but it’s not working in symmetric stance. If turning one foot out into a new position makes them feel awesome and helps them get stronger and more stable, it might be worth chasing that rabbit down the hole.

#2: Stretching isn’t always the answer.

Piggybacking on the concept of structure, there’s a lot of range of motion limitation that could be attributed to bone-to-bone contact compared to a muscles ability to stretch through a specific length.

D’Lima et al (2000) found that hip flexion ROM could be as low as 75 degrees with 0 degrees of both acetabular anteversion (whether the hip socket points forward) or femoral anteversion (when the neck of the thigh bone points either forward or backwards), but as high as 155 degrees, with 30 degrees of both acetabular anteversion or femoral anteversion. An increase in femoral neck diameter of as little as 2mm was able to reduce hip flexion range by 1.5 – 8.5 degrees, depending on the direction of motion.

These ROMs are pretty much the absolute limit of ability in these individuals, because accessing a range beyond this bone-to-bone contact is like me trying to find more space in my bedroom by pushing my face through a wall. Sure, I could technically do it, but something bad will likely happen by trying. Another way to achieve the range would be by moving from an adjoining segment once the first one is used up. If I go to tie my shoes, but run out of hip range of motion somewhere around my knees, I’ll round my back to get the job done.

dean-5

For many of the people I was working with in our Complete Shoulder and Hip Blueprint resource, as we were trying to improve their mobility to help them do stuff like squat deeper or tie their shoes, they would hit a physical wall and not be able to get through that regardless of what soft tissue modality or active smashing we could do to the area. It also didn’t matter how much time we spent working on static or active stretch modalities. I can swing my face around the room in the earlier example all day long, until I get to a wall. I can’t swing my face through that wall all that easily.

The big question then comes to how much of that free space between their bones ramming into each other can they access and use. If you can get your knee to your chest when on your back, but squat looking like a new-born deer with legs going everywhere and looking like you’re going to fall over at any moment, there’s a mismatch. And, we need to help you access that range a lot more effectively. This can also be position and direction specific.

Often active range of motion will be more beneficial in creating a usable ROM that’s within that individual’s aptitude of control versus static stretching, which will help people make muscles longer, but may not help them use them in a specific position or direction.

#3: Don't forget that vertical and horizontal force vectors are similar, but different – and both make you better.

Let’s say I’m training a 16 year-old basketball player and a 65 year-old grandmother who has some hip arthritis. Both of them would require some training in how to perform a hip hinge in one way or another, but they would occasionally do the movement in the same way. They would start the movement by rounding their low back and essentially think of getting their chest closer to the floor versus sitting their hips back without initiating through the low back. They have completely different morphologies and training histories, but they access the movement the same. In other words, they could benefit from a different type of training environment to see the development of that hinge, especially if I’m looking to load it up without smashing out their spines.

In many ways, the deadlift is the same as a hip thrust or glute bridge in that the movement is supposed to be initiated from the hips with stable feet and minimal movement from the lumbar spine. The big difference between the two is the direction of force application through the spine and hips, as well as the volume of torque development at the initiation and conclusion of the rep movement. A deadlift produces the greatest torque at the bottom of the movement when the hip is flexed and the least at the top when standing tall, whereas a hip bridge produces the max torque at the end of the extension. There’s also more shear force through the spine at the start of the movement versus throughout the movement on the hip thrust due to the placement of load and length of lever arm.

DLBottom-272x300

What this means is that if you’re looking to train hip extension – but deadlifts are problematic for the rounding of the spine or shear force on the spine (especially for someone with any potential discogenic issues or spinal pathology) – a deadlift may not be an ideal option compared to a hip thrust. If someone can’t or shouldn’t do a deadlift with vertical force development or tolerance, but they can hip thrust without issue, we’re going to hip thrust until their face explodes and glutes shred their denim. The shorter lever length working on the spine means they can expose the hips to more load with less force on the spine, and, in turn, generate a training effect without potential limitations of vertical loading. For the two hypothetical clients above, the ability to pull the weight from the floor isn’t as important as developing a training effect while minimizing injury risk.

#4: Don't focus too much on posterior chain and forget hip flexion movements.

Some of the most common exercises – squats, deadlifts, lunges – tend to focus on forms of hip extension, but very few programs involve some form of hip flexion work. While it’s difficult to access the end ranges and create some high force like you can with some stupid heavy deadlifts, you can still work on training the ability to access that range with some degree of control.
 

A word of warning: these absolutely suck to do, but you should still do them.

Rapid and high force hip flexion is a massively beneficial movement for any athlete who requires running or change of direction movements, and also for anyone who has to preload before performing rapid hip extension, which means pretty much everything. It’s not something that should take the place of any extension-based exercise, but using it to help create some balance between front and back can give a lot of benefits. You don’t need to go 50/50 with posterior and anterior exercises, but throwing the odd one in every now and then can pay big dividends. Think one set for every five sets of posterior chain work in a week.

#5: Don't forget that only two people NEED to deadlift from the floor.

The pre-set bar height for a deadlift is the radius of the plates, which means you have to grab that 1-1/8” bar sitting 8.75 inches from the flat ground. This is fine for someone if they’re 5-feet-tall and have the mobility to do anything they want, and even for the limber 6-foot-tall individuals out there who can get their knees to their chest without problem. But what about the guy who is 6’8” with a long torso, or the girl who is 5’8” and has a retroverted acetabulum? Both can’t grab that bar without running out of hip flexion range of motion about a hands length above the bar, meaning to get there they now have to flex their spine. This typically shouldn’t be a problem, but any forced flexion with uncontrolled motion under load could be disastrous.

We can see people who use this lumbar flexion mode to make up for a hip limitation by looking at their low back when they’re flexed. If they’re using their low back to initiate the movement, you’ll see a distinct arching out of their low back at the segment that’s moving, as well as some significant hypertrophy of their erector spinae at that group compared to the rest of their spine.

If I’m worried about keeping someone’s low back happy, having them pull from the floor and seeing them initiate the movement with their lumbar spine versus from their hips could be a starting point of failure. This could be via in limiting performance by using tonic versus phasic muscles, or via increasing the relative strain on a sensitive spinal segment that eventually becomes irritated.

[bctt tweet="Only competitive powerlifters and Olympic lifters are REQUIRED to deadlift from the floor."]

Everyone else isn’t required to do this, except on the internet where random rules are made up to test people’s manhood/womanhood all the time.

For most lifters, using a slightly higher surface to pull from (either a rack pull or elevating the weights with some mats or onto other plates) can make the difference between lifting with discomfort from the floor or feeling absolutely flawless and strong with no pain or problems. When training people who don’t make their livelihoods on a powerlifting or Olympic lifting platform, that’s a big win.

elevatedDL

These are all concepts covered in the new video resource from Dean and Tony Gentilcore, Complete Shoulder & Hip Blueprint. This video series contains 11 hours of HD video, offers NSCA continuing education credits, and can help trainers, therapists and exercise enthusiasts alike take their training knowledge to the next level. To sweeten the deal, the product is on sale for $60 off the regular price as an introductory special through this Saturday at midnight. Click here for more information; you'll really enjoy checking it out (because I sure did!).

chp

Sign-up Today for our FREE Newsletter and receive a four-part video series on how to deadlift!

Name
Email
Read more

How Lower Body Exercises Can Impact Upper Body Function

A while back, I published a blog called Making the Case for Training in the Post-Surgery Period. In short, it discussed how we are almost always dealing with athletes who are training during their rehabilitation periods. In many cases, this is strictly working around the issues while they're going through physical therapy.

In writing these programs, one recognizes that it's actually far easier to write a program for a post-op lower body issue than it is for a post-op upper body scenario. Very simply, because most strength and conditioning exercise selections work "from the ground up," there are many more ways that lower extremity exercises can impact upper body drills than vice versa. Today, I'll outline some examples.

1. Grip work.

There is grip involvement in deadlifts, various dumbbell single-leg exercises, and even squatting exercises that require an athlete to grasp the bar. Particularly in the case of elbow issues, too much grip work can become a real problem. For example, in the 4-8 month period after Tommy John surgery, it's not uncommon for athletes to experience discomfort in the common flexor tendon region - and it usually has to do with the cumulative stress of gripping during strength training and rehab work on top of the intensification of the throwing program. Some doctors have surgical approaches that are a bit "rougher" on the flexor tendon, too. In these scenarios, you're best off working predominately with lower body drills that don't involve a lot of grip work.

2. Front rack position with acromioclavicular (AC) joint issues. 

When you want an AC joint issue to calm down, there are really three big rules: 

a. Avoid reaching across the body (horizontal adduction, like a cross-body stretch)

b. Avoid reaching behind the body (full extension, like in a dip)

c. Avoid direct pressure to the area (particularly because it has very little muscle mass to cushion it)

Gray326-4

With respect to "C," the front squat set-up is an absolute no-no. The pressure on the bar across the shoulder girdle can really take an upset AC joint and make it markedly worse. And, since this is in many cases an injury that we’re just “waiting out,” simply training through it will only makes things worse long-term.

HandsFreeRack

Therefore, deadlift variations, single-leg variations, and back squats (assuming no other related problems) are likely better bets. That said, we generally use the safety squat bar and giant cambered bar exclusively with those who present with AC joint problems.

3. Back squat position with internal impingement.

Internal impingement (also known as posterosuperior impingement) is a broad diagnosis most common in overhead throwing athletes. In the late cocking phase of throwing (or swimming, tennis, etc.) - which involves external rotation and abduction - the humeral head tends to translate superiorly (up) and anteriorly (forward) relative to the scapula.

layback

These issues are magnified by poor scapular control, weakness of the rotator cuff, insufficient thoracic mobility, loss of tissue extensibility around the shoulder girdle, and in some cases, structural changes. The end result is that the biceps tendon, labrum, rotator cuff, glenohumeral ligaments, or nerves that pass the anterior aspect of the shoulder get irritated. The term "internal impingement" really just explains the pain-provoking position, not the specific diagnosis. Generally speaking, the pain is purely mechanical in nature; it won’t bother an athlete unless the “apprehension” position (full external rotation at 90+ degrees of abduction) is created.

Just about every overhead athlete is constantly "flirting" with internal impingement problems, so my feeling is that it's best to just avoid this "at-risk" position in the weight room - and that's why we don't back squat any of our overhead throwing athletes. And, we certainly wouldn't use a back squat with anyone with symptomatic internal impingement.

backsquat

4. Giant cambered bar with scapular anterior tilt, humeral anterior glide, and forward head posture.

The giant cambered bar is an awesome option for avoiding the "at-risk" abducted, externally rotated position that often gives overhead athletes problems, but it can create a problem with athletes who are prone to scapular anterior tilt, humeral anterior glide, and/or forward head posture. Because of the positioning of the hands, the elbows are driven a bit behind the body, which can cause the shoulder blade to dump forward and "ball" to glide forward on the socket. You may also see the head shoot forward.

That said, these faults can be easily minimized with good cueing. However, I wouldn't recommend using this bar with an athlete who has a big predisposition toward any of the three issues.

5. Scapular depression from holding heavy weights in the hands.

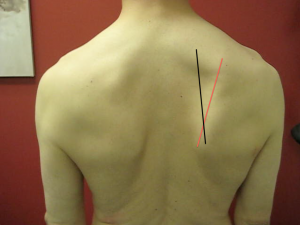
The deadlift can be an awesome exercise for improving poor posture - but not in all cases. Specifically, whenever we have an athlete who sits in too much scapular depression and downward rotation (more info on that HERE), we'll avoid holding really heavy weights in the hands for lower body training.

ScapularDownwardRotation-300x225-2

Our goal is to teach the shoulder blades to sit a little higher at rest, and functionally get higher when the arms need to go overhead. We don't want all our lower body work competing against that. During this time period, it's best to go with squatting variations, barbell supine bridges/hip thrusts, DB/KB goblet set-ups, sled work, the front squat grip, glute-ham raises, and anything else your imagination yields - as long as it doesn't tug the shoulder blades down.

There are many more considerations for how lower body work impacts upper body function, but these are definitely the five I most frequently encounter that you should keep in mind. If you're interested in learning more, I'd encourage you to check out my popular resource, Sturdy Shoulder Solutions.

Sign-up Today for our FREE Newsletter and receive a four-part video series on how to deadlift!

Name
Email
Read more

3 Barbell Hip Thrust Coaching Cues

We utilize both barbell hip thrusts and supine bridges on a regular basis in our programming. Popularized by Bret Contreras, we started utilizing these exercises in 2011 - and haven't looked back since.

They're great alternatives to squatting and deadlifting for those with a history of back pain, and can be awesome options for training the posterior chain in those with upper body conditions that may be exacerbated by certain squat and deadlift variations. They don't create a ton of soreness, so they can be awesome in-season exercises for athletes. And, they'll build bigger, stronger glutes that seem to carry over better to athletic performance because of the horizontally directed force (as opposed to the vertically directed force we see with squats and deadlifts). In short, I think they're awesome on a number of fronts - and they're here to stay.

While even the most inexperienced athlete can pick these drills up relatively quickly, that's not to say that there aren't a few common technique mistakes for which you need to watch out. Check out this video to learn how to correct these issues:

Sign-up Today for our FREE Newsletter and receive a four-part video series on how to deadlift!

Name
Email
Read more

Squats vs. Hip Thrusts: Which is Better?

Today's guest post comes from Bret Contreras, author of the recently released 2x4: Maximum_Strength.

Many strength coaches, personal trainers, and strength athletes claim that the squat is the best exercise for promoting gluteal muscle development. Recently, the hip thrust has stumbled onto the scene, and its reputation for building impressive backsides has gained traction.

There is currently no published research examining the gluteal hypertrophic effects of squatting or hip thrusting, yet anecdotally we’re aware of their glute-building potential. While nobody can say for sure right now which is best for gluteal growth between the squat and the hip thrust, I hope that by the end of this article, you’ll be convinced that both exercises should be employed for optimal glute development.

2x4Header1

Hypertrophy Science

According to hypertrophy researcher, Brad Schoenfeld, there are three primary mechanisms to muscle growth. The most important mechanism appears to be mechanical tension. A close second in terms of importance appears to be metabolic stress. Finally, we have muscle damage, which appears to be of slightly lesser importance. As it currently stands, we don’t know for certain how to optimize these three stimuli in our programming in order to maximize muscle growth. The way I see it, until more is known, we should do our best to hit every base in our training. Therefore, we want to perform exercises that create the most tension in the glutes, produce the most metabolic stress in the glutes, and create reasonable amounts of damage in the glutes. How do squats and hip thrusts fare in regards to the three mechanisms of muscle growth?

Let’s take a deep look at what happens biomechanically and physiologically in the glutes when we squat and hip thrust.

Gluteal Biomechanics During the Squat

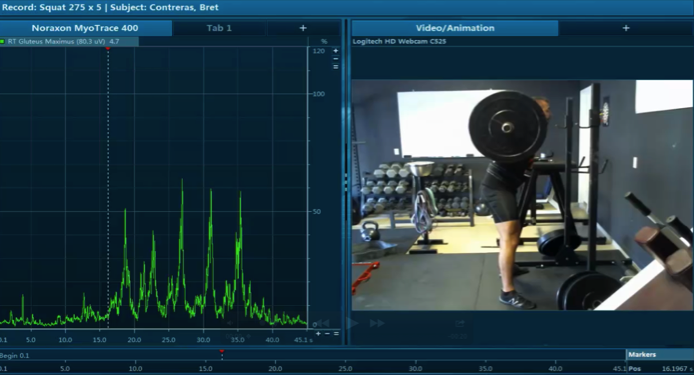
Let’s say you have the bar loaded up to around 80% of your one-rep maximum (1RM). You set up and take the bar off out of the rack. The upper glutes help stabilize your pelvis as you walk the bar backward. Once you get set, the glutes calm down. Now you start descending. Glute activation during the eccentric phase is very low – around 20-30% of maximum voluntary contraction (MVC). At the bottom position, the point where everyone thinks is so amazing for glute activation, is where the glutes actually reach their lowest activation during the rep – around 10-20% of MVC. I realize that this hasn’t been mentioned in any journal. It’s something I’ve noticed over the past year with the last fifteen or so individuals I’ve tested in EMG. These are highly experienced squatters, including several Arizona state record holders in the squat.

Now, before you call me crazy, please not that a similar phenomenon is seen in the erector spinae as they’re stretched under load; this has been deemed the lumbar flexion relaxation phenomenon. As the glutes are stretched out, their activation diminishes. This could be related to the passive-elastic force that they produce in this position, or some other reason, possibly related to the changing sarcomere length or the changing muscle moment arm length.

At this point, you explode out of the hole. This is where the glutes do their thang – during concentric actions. Glute activation will reach around 80-120% of MVC as you rise upward, peaking around halfway up, and gradually diminishing before you reach the top. You pause for a brief moment, and then resume the next repetition.

Mean activation is fairly low – around 50-70% of MVC – since the top portion of the squat is rather unloaded for the glutes, and since there is usually a considerable pause in between reps as the lifter takes a deep breath, resets, and gets tight, and since the glutes don’t fire very hard eccentrically during the lift. Because of this, you won’t feel a pump or a burn in the glutes when you squat, since blood in the gluteal region has plenty of time to escape during the set. However, you will develop glute soreness in the days following the workout, due to the fact that the glute fibers are stretched eccentrically to long muscle lengths while being activated, albeit at low levels. But this is only true for the lower gluteal fibers; the upper fibers of the glutes will generally fire at around 30-40% of MVC during a heavy squat.


Gluteal Biomechanics During the Hip Thrust

Now let’s discuss the hip thrust. Just as in the case of the squat, let’s say you’re using around 80% of 1RM. The bar is placed onto the hips. The body is wedged into place. Before the lift begins, the glutes are silent. The lifter then thrusts the hips upward until full hip extension is reached. During this concentric shortening, peak activation will typically reach around 120-200% of MVC, and this level of activation will be elicited in both the upper and lower gluteal fibers. The peak is reached at full hip extension, as the glutes reach their shortest muscle length. This could be due to the changing sarcomere length or the changing muscle moment arm length.

On the way down, the eccentric EMG activity mirrors the concentric activity, gradually diminishing until the bottom of the range of motion is reached. The movement is quickly reversed. Due to the rapid movements and consistent tension on the glutes, mean activation during the hip thrust is extremely high – around 100% of MVC. Due to the high levels of activation and constant pumping of repetitions, levels of metabolic stress are very high as well. Incredible “glute pumps” and burning will typically set in from multiple sets of hip thrusts. However, since the glutes are not fully stretched at the bottom of the hip thrust, muscle damage will not be very severe.


Theoretical Imposed Adaptations

As you can see, the squat and the hip thrust are actually quite different in biomechanics. Let’s examine some commonalities and differences.

Both exercises make for excellent glute exercises due to the bent knee position, which shortens the hamstrings and places more burden on the glutes for hip extension (when the hamstrings are shortened, they cannot produce maximum force due to active insufficiency).

Both exercises require dual actions out of the glutes. In a squat, the glutes must fire to create hip extension torque, but they must also fire in order to create hip external rotation torque to prevent knee valgus (caving in of the knees). In a hip thrust, the glutes fire to create hip extension torque, but they must also fire in order to create posterior pelvic tilt torque to prevent anterior tilting of the pelvis and lumbar hyperextension.

Squats can be limited by back strength, which is not the case for hip thrusts. Squats require more balance and coordination, whereas the hip thrust is very stable and simple to perform. The hip thrust is generally limited by glute strength, meaning that the set reaches failure when the glutes can no longer raise the hips. Squats move the hips into deeper hip flexion.

Let’s see which exercise outperforms the other in various biomechanical and physiological categories in the chart below.

chart 1

As you can see in the hypothetical chart, the squat outperforms the hip thrust in 2 of the 7 categories, whereas the hip thrust outperforms the squat in 5 of the 7 categories.

The Verdict

Now, it doesn’t take a genius to imagine how combining the squat and the hip thrust would elicit greater adaptations than performing either exercise alone. In terms of imposed neural adaptations, the hip thrust requires more neural drive to the glutes, but there may be neural benefits to including squats due to the myotatic “stretch” reflex. In terms of mechanical adaptations, the two movements target different ranges of motion and therefore different gluteal muscle lengths, which likely lead to different mechanical adaptations as far as fascicle length and pennation angle are concerned. For full range gluteal strength, a more complete neurological stimulis, and full development of the upper and lower gluteal fibers, you’ll want to perform both the squat and the hip thrust. Either exercise alone won’t suffice. The good news is that we don’t have to choose between squats or hip thrusts for maximal glute development; we should perform both movements.

Squats elicit moderate levels of activation while promoting tolerable levels of gluteal muscle damage. Hip thrusts maximize tension and metabolic stress on the glutes and do a better job of hitting the upper fibers. The two exercises combine to produce one heck of a glute hypertrophy stimulus.

If you're looking for a great resource to take your strength training program to the next level, I'd highly recommend Bret's 2x4: Maximum_Strength. It's on sale this week at a great introductory price.

Cover-258x300

Sign-up Today for our FREE Newsletter and receive a four-part video series on how to deadlift!

Name
Email
Read more

Quick and Easy Ways to Feel and Move Better: Installment 44

Today, Greg Robins is back with five tips for your nutrition and strength and conditioning programs.

1. Regress TRX fallouts.

At CP, we often use TRX fallouts in our programming. They are a phenomenal choice for training the anterior core in an “anti-extension” fashion. That being said, they can also be quite difficult for many people. The good news is that these bad boys are easily regressed by moving to your knees, rather than the feet. In order to do these seamlessly make sure to adjust the straps so the handles hang to just below your waist, or slightly further for those with longer arms.

kneelingfallout

2. Do paused deadlifts.

Paused deadlifts are an awesome way to work on proper technique. I’ll be honest with you, though, the first time I saw them my initial reaction was “that can’t be safe!” In fact, I chalked it up as one of those powerlifting staples that would definitely make you brutally strong, but only at a very high risk of injury. In reality, any exercise has a high risk if done incorrectly, and this variation is not something I would advocate just anyone try, or prescribe to their clients/athletes.

That being said, I don’t think it’s inherently dangerous. In fact, I don’t think it’s dangerous at all when executed well. In an effort to correct my own bad habit of coming forward in the deadlift, I decided to give them a shot. I was frustrated because my deadlift had seemingly regressed, and weights that generally felt fast were becoming a grind.

My very first rep sent me way forward and I bailed out and dropped the bar. I was only using about 45% of my 1RM. Reality check; my initial pull from the ground was awful. Through training this variation I was able to re-learn where my weight needed to be upon breaking the bar from the ground, and in about three weeks of using this lift after my regular work sets I was right back to pulling the weight I had before my technique relapsed.

If you have issues staying back in the deadlift, hit a sticking point around mid shin, or just want to do “authenticity” check to your deadlift, I highly recommend these. Here is a video of a set of three from a recent training session.

3. Use a bar pad when incline pressing.

Putting a bar pad on to squat is foolish. If there is a good reason you can’t have steel pressing into your back, then choose a better way to load the exercise. There is, however, a good use for this cylindrical piece of foamy goodness. One would be to pad the hips during barbell supine bridges; that’s old news. Another is to cut out a little range of motion on the bench press, specifically an incline barbell bench press. 

Before you call me as soft as the foam pad of which I speak, hear me out. Incline pressing is a great pressing exercise, but there’s one thing I don’t like about it: it tears apart the front of my shoulders. Because the inclined torso position increases range of motion, you won’t find to many people barrel chested enough to pull the lift off, chest to bar, without getting a considerable amount of humeral anterior glide in the shoulder joint. See the picture below:

IMG_9000

One way to avoid this is by creating an arch in the back to meet the bar before this becomes a player, in a similar fashion to the flat bench press:

IMG_9001

My problem with this is that: 1) the more you arch on an incline press, the less it becomes an “incline press,” and 2) the incline press can be strategically used to supplement the bench press because it removes some of the added help from leg drive and hard arching.

Instead, adding the bar bad to the middle of the bar will effectively cut a good 1.5 inches off the range of motion. This way, we can press a little more safely. It’s nice to not have to think about cutting it short, and focus on pressing the weight, knowing that when the pad touches the chest we have hit an appropriate distance. If you have a “fat” bar this would also be a nice choice to use when you incline press.

4. Remember that mayonnaise can actually be a solid condiment.

Mayo gets a bad rep. Somehow, it has become synonymous with being fat. That might be because, well, it is fat! That’s also why I like it as a condiment. Most condiments are packed with sugar, and if you’re looking to keep the sugar to a minimum, you might be running out of ways to sauce up your grub.

Unfortunately, store bought mayo is generally full of crap. Additionally it’s usually made with less than ideal ingredients. However, with a little searching you can find some brands that keep the ingredients very basic (egg yolks, oil, lemon, vinegar). Alternatively, you can easily find a solid recipe online with a quick search for “real mayonnaise recipe.” I suggest you find one that uses olive oil.

5. Make sure you have the right bench height for hip thrusts.

Sign-up Today for our FREE Newsletter and receive a four-part video series on how to deadlift!

Name
Email
Read more

Strength and Conditioning Stuff You Should Read: 6/3/13

It's time for this week's installment of recommended strength and conditioning reading:

Half of College Grads Are Working Jobs That Don't Require A Degree - This article ran at Forbes.com the other day, and while it doesn't speak directly to the fitness industry, I thought it drew some interesting parallels to this old two-part series of mine:

----> Is An Exercise Science Degree Really Worth It? - Part 1
----> Is An Exercise Science Degree Really Worth It? - Part 2

Functional outcomes following revision ulnar collateral ligament reconstruction in Major League Baseball pitchers - It's well documented that UCL reconstructions (Tommy John surgeries) have a very high success rate when it comes to returning to previous (or better) levels of competition.  However, they've been around long enough that surgeons are sometimes seeing the same throwers back again for a second UCL reconstruction on the same elbow. Guys like Joakim Soria and Brian Wilson are the most recognized examples of late. As would be expected, the results aren't quite as good the second time around, but there is still a solid success rate, and it's better among relief pitchers than starters.

EverythingElbow

(if you're interested in learning more about the injury mechanisms for UCL tears as well as my experiences working with post-op Tommy John cases, be sure to check out my Everything Elbow in-service)

Rack Hip Thrusts - This was a short, but very useful article by Ben Bruno over at T-Nation.  If you've ever had problems with the set-up on barbell hip thrusts, it's a must-read.  Plus, I found it wildly entertaining that Ben referred to the male reproductive anatomy as "tackle."

Sign-up Today for our FREE Newsletter and receive a four-part video series on how to deadlift!

Name
Email
Read more
Page 1 2
LEARN HOW TO DEADLIFT
  • Avoid the most common deadlifting mistakes
  • 9 - minute instructional video
  • 3 part follow up series