Home Posts tagged "mobility exercise" (Page 2)

The Best of 2014: Guest Posts

I've already highlighted the top articles and videos I put out at EricCressey.com in 2014, so now it's time for the top guest posts of the year. Here goes…

1. The 5 Biggest Mistakes Women Make With Their Training Programs - With this great post from Molly Galbraith, for the second year in a row, my top guest post related to the topic of strength training for females. I think it's safe to say that I need to feature more female-specific content moving forward!

Molly-22(1)

2. 5 Strategies for Quickly Increasing Your Mobility - This post from Dean Somerset only ran a few weeks ago, but quickly became one of the biggest hits of the year.

3. 5 Ways You've Never Used a Barbell - Greg Robins shares some outside-the-box thoughts on how to get the most of barbell training beyond "the basics."

zercher

4. Squats vs. Hip Thrusts: Which is Better? - Nobody geeks out about glutes like Bret Contreras, and this article is a perfect example.

5. The 5 Most Common Errors Athletes Make With Yoga - Dana Santas goes to great lengths to apply yoga "the right way," and in this article, she talks about where many athletes and yoga instructors go astray.

I'll be back soon with the top strength and conditioning features from 2014. In the meantime, have a safe and happy new year!

Sign-up Today for our FREE Newsletter and receive a four-part video series on how to deadlift!

Name
Email
Read more

The Best of 2014: Strength and Conditioning Articles

With 2014 wrapping up soon, I’ll be devoting this week to the best content of the year, based on traffic volume at EricCressey.com. I’ll kick it off today with my five most popular articles from the past year.

1. 5 Things I've Learned About Mobility Training - This article only just ran about three weeks ago, but it still was the biggest hit of the year. Given the popularity, I suppose I should have written it a long time ago!

yogapush

2. Why We're Losing Athleticism - This was my favorite article that I wrote in 2014, and was especially popular among parents.

3. Should You Wear Olympic Lifting Shoes? - What started as a Q&A ended up being a lengthy post that kicked off a great discussion.

4. 6 Reasons Anterior Core Stability Exercises are Essential - We all know core control is incredibly important, but who knew an article about why would be a hit, too?

Gray392

5. The 10 Laws of Meatball Mastery - If you like meatballs, this article is for you. And, if you don't like meatballs, this article is still for you, as you'll surely find a recipe you like - and hopefully a lot more clarity for how to truly enjoy life.

I'll be back soon with another "Best of 2014" feature. Up next, the top videos of the year!

In the meantime, you might be interested to know that Rick Kaselj just put the entire Muscle Imbalances Revealed series on sale at a huge 60% off discount to celebrate Boxing Day. I'm a big fan of this series, so if you haven't seen it, I'd encourage you to take advantage of this opportunity here. You'll learn a ton!

Sign-up Today for our FREE Newsletter and receive a four-part video series on how to deadlift!

Name
Email
Read more

5 Strategies for Quickly Increasing Your Mobility

Today's guest post comes from Dean Somerset, the creator of the excellent resource, Ruthless Mobility, which is on sale through the end of the day today for 60% off. Dean is a tremendous innovator and one of the brighter minds in the fitness industry today, and this article is a perfect example of his abilities. Enjoy! - EC

Mobility is one of those nebulous concepts that get thrown around the fitness industry a lot. You either have it or you don’t, and if you’re one of those lucky Tinman stiff-as-a-board folks who can’t touch their toes without a yardstick, you’re told to stretch and do more mobility work, which seems akin to carving out Mount Rushmore with nothing more than some sandpaper. We might be here a while if all you have available to you is simply stretching to make your mobility improve.

What we forget to do is ask a very simple question: Why do you feel tight in the first place? Muscles are incredibly dumb and won’t contract on their own. They’re usually told to contract, and they’re good soldiers that do what they’re told. You could cut a muscle out of the body and hook it up to a car battery and have it contract until either the proteins are ripped apart or until you turned off the battery. Also, muscles can’t get confused, so let’s stop using that term while we’re at it, shall we?

Typically a muscle will tense in response to a few different things. The first is the desire to produce movement, which means the normal shortening response happens and people awe and admire the massive weight EC pulls on a daily basis.

The second is as a protective means. A joint that may be unstable or a step away from being injured could cause the body to contract muscles around it in a protective “casting” method that restricts movement in the joint and calls up muscles that may cross more than one joint. An example of this would be the psoas tensing in response to anterior lumbar instability. The runners with chronic hip flexor pain and a forward lean when they pound the pavement, but who stretch their hip flexors (usually poorly and into spinal extension) 3 times a day for 20 years and still have tight hip flexors are a prime example of this. They stretch but don’t improve stability, so the psoas continues to hate life.

tg15773342335_c8a42ba7e5_z

The third is in response to nervous system tone, specifically sympathetic and parasympathetic tone. Sympathetic is best exemplified by that one kid who is always bouncing and tapping their foot, can’t seem to sit still, and always wants to run and jump everywhere, whereas parasympathetic would be the stoner who looks perennially half asleep. If you’re constantly jacked up like a cheerleader on a mixture of crack and RedBull, flexibility won’t be a strong suit of yours, even though you could probably pull a tractor with your teeth or scare old women and small children.

The Ultimate Warrior was definitely NOT parasympathetic, nor was he likely to be hitting the splits anytime soon, but he could always bring the house down.

If you’re constantly a ball of stress, your muscles will be in a constant state of “kind of on,” which is to say their contraction is like lights on a dimmer switch. They’re not all the way on, but they’re not off either, they’re just “kind of on.” Being all jacked up all the time might sound cool, but in reality it tends to cause some issues if you can’t turn it down once in a while.

Lastly, and one of the most simple of all, is alignment. If you have a muscle held in a stretched position, it’s going to reflexively increase tension to prevent the muscle from stretching too far and potentially creating an injury.

I know it’s kind of counterintuitive that a chronically stretched muscle would be tight, but consider the effects of something like low back erector muscles and posterior pelvic tilt. If your pelvis is tucked under like Steve Urkel (I’m dating myself here, but it’s a fun game trying to confuse the 20 year olds), the erectors are already on stretch without having to do anything, plus they’re contracting to keep your spine from sliding further into extension. Trying to touch your toes will result in embarrassing results.

So now that you know why muscles can be tight, we can work on them and produce much better results.

Strategy #1: Change your breathing.

One of the first things I usually see when someone tries to stretch into a bigger range of motion than they’re used to is that they wind up holding their breath. This works against you in two ways. First, when you hold your breath, you crank up your sympathetic system, which drives more neural tone to all muscles of the body and causes reflexive tensing. Second, by not breathing you pressurize the entire thoracic spine: all of the intercostal muscles between your ribs, your diaphragm, and even your obliques tense to help increase intrathoracic pressure against that held breath. This causes muscles to hold tension even more.

In many instances, people will hit an end range of motion while holding their breath, and I tell them to breathe. They, in turn, gasp like they just surfaced from diving with Jacques Cousteau, and wind up getting another few inches into their range.

When trying to get range of motion, long deep inhalations and exhalations where you reach on the exhale makes a massive difference. The length of the breath increases stimulation of the vagal nerve, which is responsive to the heart and drives cardiac rate and parasympathetic stimulation into the medulla oblongata, and as a result muscle tension reduction through the whole body. Lower heart rates means a less energy demanding system, which is commonly results in lower arousal, meaning less tense muscles at rest.

Here’s a simple breathing drill you could do to help increase your overall mobility through your shoulders and hips.


Timely to give Eric a baby breathing exercise, huh?

Try this out: Test your toe touch ability and range of motion bringing your arms up over your head. Make a note of both how far you get and also how easy they both felt. One way to gauge overhead range is to stand against a wall, then bring your arms up overhead without arching your low back, and either mark the wall or make a mental note as to how high you bring your arms. Try the breathing drill and then retest your mobility and see whether it resulted in any changes.

Strategy #2: Build stability to create mobility.

As I noted earlier with respect to stability, if a joint is perceived as unstable and potentially about to be injured, the body will clamp down muscles around it. One way to see this in a graphic manner is to look at hip rotation and core function.

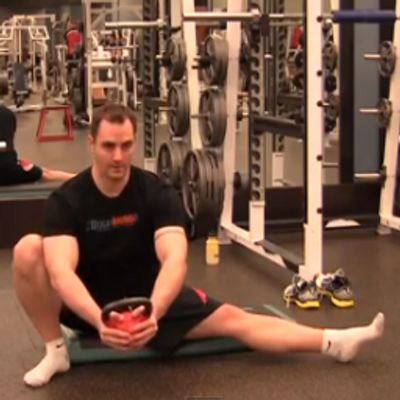
Try this out and see what happens: From a seated position, turn your hips side to side and see whether you have good rotational range of motion through both external rotation (where you look at the inside of your knee) or internal rotation (where you look at the outside of your knee). If you find you have poor external rotation, try doing a hard front plank and then retest. If you find you have a poor internal rotation, hit up a side plank and see what happens. Here's the test:

Here's the front plank:

Here's the side plank:

If you noticed a big increase in mobility, you likely had your hips putting on the brakes and donating some stability up to the lumbar spine. By reinstating some of that stability, the hips opened up and had lots of freedom since they weren’t working double time anymore.

Strategy #3: Change alignment from the bottom up.

Foot position can play a massive role in how well you move. Most people who tend to be flat footed wind up with tibial internal rotation, which results in internally rotated femurs. This rotation increases tension through the anterior hips and up the chain further which reduces the range of motion for overhead movements. It also reduces the force production capability through the legs, which makes you less awesome.

If you roll to the outside of the foot, more supination, you increase tension through the posterior aspect of the hip and pushes you into more external rotation, which reduces the amount of internal rotation your have available, and also reduces your ability to move freely down into hip flexion.

Use this little test and see what happens: stand up and roll your feet so that you put most of your weight on the inside, in line with the big toe, and bring your arms overhead and then touch your toes. Make a not of how high and low you go and also how easy they felt. Then roll to the outside of your feet, more weight on the baby toe side of the foot, and see what the movement results are looking like. You might find it’s different in each example, and will showcase how foot position can affect your overall mobility.

Strategy #4: Change alignment from the top down.

Neck position can play a HUGE role in not only arm movement but also hip mobility, and it plays down in a couple of simple anatomical means. For the shoulder, every muscle that holds the shoulder to the body and keeps it from falling down, is held up by the neck. If the neck is in a forward head posture, muscles like the sternocleidomastoid, scalanes, levator scapulae, and upper traps will be all jacked up. If you stand with your head jammed into the back of your neck, you’ll have some smashed up pteryhyoid and stylohyoid muscles, which will alter (not necessarily improve or decrease, but alter) the ability to move the arms around.

Sternocleidomastoideus

Secondary to this, head position will play a role in hip mobility due to the anatomical link to the spinal chord. The chord has the ability to slide up and down in the spinal canal in order to adjust for different positions. Since the nerves can’t stretch, they accommodate range differently by moving along with the rest of the body. When you’re in standing and you tuck your chin to your chest, the spinal chord moves up in the spinal canal. When you look up, your give some slack to the chord and it moves slightly lower.

What this means is that if you were to bend down to grab a bar for something like a deadlift, and you tucked your chin, your available range that the spinal chord could allow movement to occur before it was stretched would be less than if you had a neutral neck, and much less than if you were to look ahead slightly. Additionally, if you have any restrictions through areas like the sciatic arch, it will prevent movement of the nerve through this area and make your range of motion somewhat limited.

Try this out: stand tall and tuck your chin to your chest, then try to touch your toes. Right after, keep your head level with the horizon and try to touch your toes again and see where the change in range of motion comes from. If you noticed a pronounced change, it's time to get cracking on "packing the neck" during your training and everyday life.

Strategy #5: Clean up cranky fascial lines.

This is where some voodoo starts creeping in. The body is more than a collection of individual muscles that all connect to bones and do stuff. They have lines of action where multiple muscles along specific pathways will contract and relax together to produce movement. These pathways are visually represented through the work of Thomas Myers in his outstanding book Anatomy Trains, but can be shown in real time with some simple tricks.

One fun fascial line to work with is the spiral line. It’s a really cool powerful series of tissues and muscles that runs from one foot around the spine and connects to the opposing shoulder, both on the front and the back. By “tuning” fascia in the leg, you can see some pretty immediate changes in range of motion at the shoulder.

I showcased this with a live demo in a recent workshop in Los Angeles, where a participant had some shoulder issues. I had Tony Gentilcore of Cressey Sports Performance fame stretch him into external shoulder rotation, then applied some light pressure to his opposing adductor group to simulate what he would do with foam rolling. Within 5 seconds, he started to get more external rotation, all without me doing anything at his shoulder and with Tony only holding his arm in a position and letting gravity pull him down.

valgus

Try this out: If your shoulders are restricted through external rotation (like laying back to throw a baseball), foam roll your inner thigh, spending time hating life and breathing deep to try to get them to reduce tension and pain, then retest the shoulder external rotation. If you’re restricted through internal rotation, try rolling out your IT bands and see what happens.

Wrap-up

These methods aren’t guaranteed to work for every single person, but they are simple tricks that seem to work well with a lot of people. The good thing is if one of them works really well for you, you could use it on a regular basis to keep your mobility high and to use it in a new way you never had before.

Note from EC: If you're looking for more mobility tips and tricks - and the rationale for their inclusion in a program - I'd encourage you to check out Dean's fantastic new resource, Ruthless Mobility. Your purchase includes lifetime updates and continuing education credits. Perhaps best of all, it's on sale for 60% off through the end of the day today (7/4).

full-package


 Sign-up for our FREE Newsletter to receive a video series on how to deadlift!

Name
Email
Read more

5 Things I’ve Learned About Mobility Training

It's been 15 years since Mike Robertson and I introduced our Magnificent Mobility DVD set. This popular DVD set certainly helped a lot of people, but as with all aspects of the incredibly dynamic strength and conditioning and rehabilitation fields, we've learned a lot about mobility over the past decade. In other words, there are a lot of things I do differently with my training programs these days. I mean, seriously, I looked like I was 12 years old in this video.

mm

Very simply, mobility is one's ability to reach a desired position or posture. Because many folks erroneously confused it with flexibility (range of motion at a specific joint), the industry as a whole trended toward labeling all mobility issues as true shortness of tissues that crossed the joint(s) in question. As the years have progressed, though, we've smartened up to realize that folks may struggle to get to specific positions because of joint structure (e.g., femoroacetabular impingement), insufficient stiffness at adjacent joints (e.g., poor core control "presenting" as bad hip mobility), density (rather than just length) of the aforementioned tissues that cross the joint, and a host of other factors. To be more succinct, mobility is dependent on much, much more than just tissue length!

1. Soft tissue work is important, even if we don’t know exactly why.

I'm honestly entertained when I hear someone insist that foam rolling is the devil, and we should never do it. People feel and move better after they do it, and it always seems to improve the quality of mobility initiatives that take place subsequently.

I certainly don't think it's truly mechanically breaking down scar tissue, but it's absolutely transiently reducing stiffness in the targeted tissues via one or more of a number of other mechanisms. Just because we can't explain them in complete certainty doesn't mean that "good" isn't being done.

2. Breathing can reduce bad stiffness and establish good stiffness.

This point could also be called, "The yoga folks have been right about breathing for a long time."

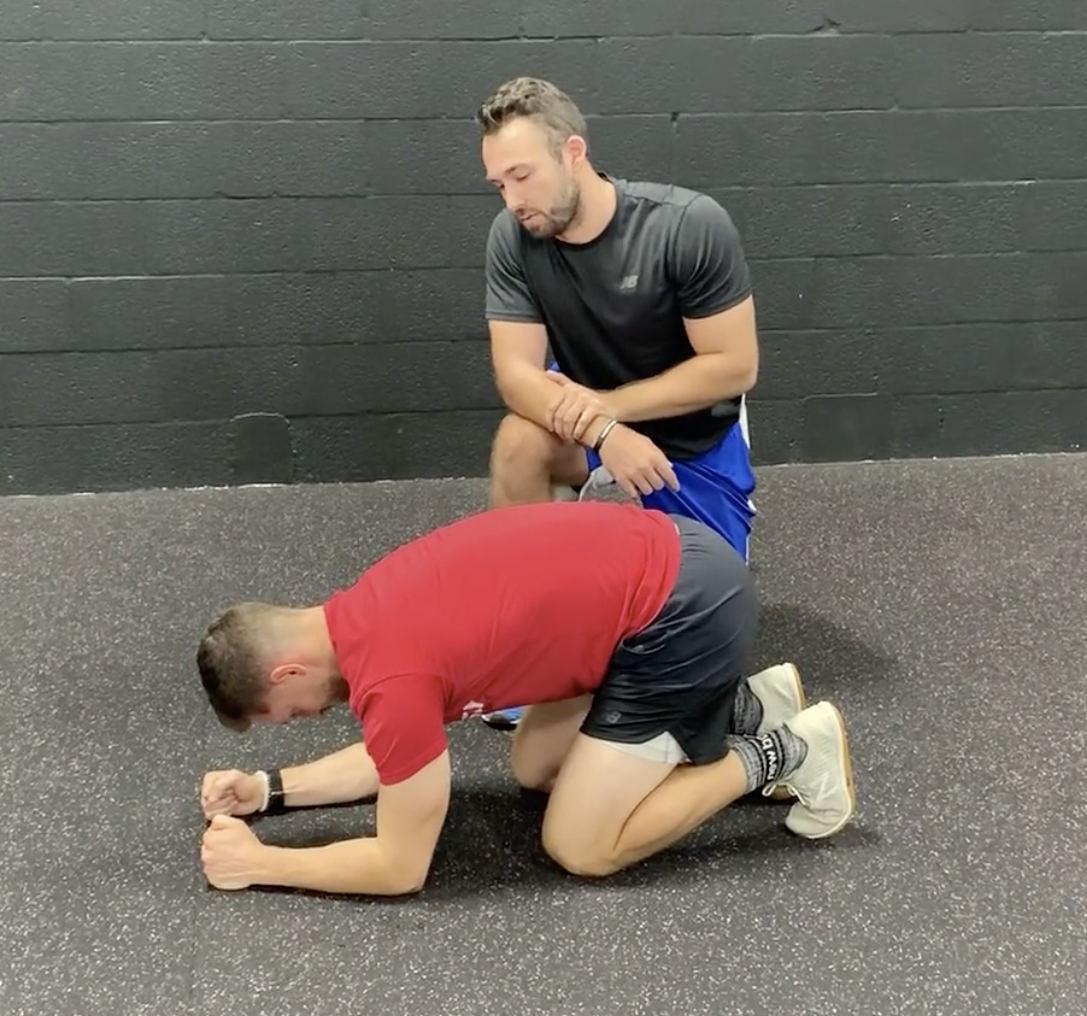
It's not uncommon to incorporate positional breathing drills that will transiently improve both flexibility and mobility. To me, that's an indicator that we're both reducing bad stiffness and establishing good stiffness. As an example, take all fours breathing in a flexed position:

I've utilized this with athletes and seen supine shoulder flexion range of motion increase by 10-15 degrees in a matter of 15-20 seconds without actually stretching the shoulder anywhere near its end-range. Additionally, scapular upward rotation (which takes place against gravity) usually improves a bit, presumably because of both the increased recruitment of serratus anterior (which helps preserve the convex/concave relationship of the rib cage and scapula) and reduced downward pull of the lats. Again, this is very much a theory, but it's consistently being tested with great results in our training each day. And, it's much easier than doing loads of manual therapy and time-consuming static stretching (although there are still places for both of those initiatives).

yogapush-300x168

3. Not everyone conforms to the joint-by-joint approach.

The joint-by-joint approach was first introduced by Gray Cook and developed further by Mike Boyle. The concept is very sound: the body is a system of joints/segments that alternate in the need for mobility or stability. For instance, the ankles need mobility, the knees need stability, the hips need mobility, the lumbar spine needs stability, the thoracic spine needs mobility, the scapula needs stability, etc. This all makes a ton of sense, especially in the general population that is more predictable.

However, there are some glaring exceptions to this rule. You'll see folks with hypermobile hips, and excessively stiff lumbar spine segments. You'll observe thoracic spines that are so flat/extended that they shouldn't be mobilized, and shoulder blades that are so locked down that they demand more mobility training to achieve optimal function. Shoulders and elbows can really go either way.

The point is not that the joint-by-joint approach doesn't hold water; it's actually a tremendously useful paradigm I use on a daily basis. Rather, the point is that you can't "one-size-fits-all your mobility approaches." Everyone needs something slightly different, and every joint really needs a combination of mobility and stability.

4. A lot of people mistake laxity (or, worse yet, instability) for mobility.

Building on my last point, you'll find a lot of people who have so much congenital laxity that they don't need any stretching. Their mobility training is really a matter of attention to soft tissue quality and stability training.

elbow10365821_744096285641478_6191697364410130329_n

The problem with these folks is that they can often "cheat the tests." For example, they might have unbelievably perfect overhead squats and shoulder mobility to the naked eye, but if you actually pair these tests up with stability-oriented screens, they may fall well short of what you'd deem "acceptable" movement.

Instability - or an acquired, excessive joint range of motion - is even more problematic. This is where folks will literally "blow out" their normal anatomy to acquire a desired range of motion. An example is the anterior shoulder capsule in throwers; they'll do whatever they can to get the arm back to help generate range-of-motion to support velocity production. Eventually, the shoulder can get so loose that the active restraints (rotator cuff and biceps tendon) can't effectively hold the ball on the socket, and pain occurs with throwing.

layback

In consideration of both laxity and instability, just because you can get to a position does not mean that you're sufficiently stable in that position.

5. Building and maintaining mobility is like managing a bank account.

It goes without saying that it's easier to maintain mobility than it is to lose it and get it back. Everyone uses the analogy of babies and young children having freaky range of motion and perfect squat patterns, but losing them as time progresses. The assumption is that this occurs because they "make enough deposits:" targeted mobility work and a wide variety of activities throughout their days. Certainly, this is an issue, but I'd argue that it's because of excessive withdrawals, too.

Withdrawals could be sports participation where eccentric stress or direct trauma to tissue beats them down. It could be lifestyle factors like alcohol or tobacco use that negatively impact tissue quality. It could be pushing through faulty movement patterns until bone spurs result. What we take out is just as important as what we put in.

We all start with some money in the bank as children, but it's up to us to have more deposits than withdrawals in this mobility account over the course of the lifespan.

These are really just a few of many observations I've made over the years; there are countless more that could turn this article into an entire novel! With that said, if you're looking for both some governing principles on this front - and specific examples across the entire body - I'd recommend you check out Functional Stability Training.

Sign-up Today for our FREE Newsletter and receive a four-part video series on how to deadlift!

Name
Email
Read more

The 5 Most Common Errors Athletes Make With Yoga

Today's guest post comes from yoga expert, Dana Santas. Dana has built up an impressive client roster of professional athletes and teams, and it's no surprise, given how educated she is in applying yoga the right way. Enjoy! -EC

DanaSantas-211x300

Yoga is a popular topic in the sports world these days. Undeniably, yoga can offer some amazing benefits for athletes. However, those benefits can only be realized when it’s taught correctly and adapted specifically with the goal of increasing sports performance. Otherwise, at best, yoga can be marginally helpful in sports, and, at worst, can actually be dangerous.

These are the five biggest mistakes I see athletes, coaches and trainers making with yoga:

1. Viewing Yoga as a Harmless “Stretch Class”

The most prevalent misconception about yoga that I encounter is that it’s best used for “stretching.” In my opinion, yoga applied for sheer flexibility has no place in sports. Flexibility without stability is nothing more than a recipe for injury. If you only use yoga to “stretch out” athletes without understanding and addressing the cause of the tension, you’re only applying yoga for temporary relief and can actually do more damage than good. A perfect example is the typical complaint: “I need to stretch my hamstrings because I can’t touch my toes.” When the hamstring tension is caused by an anterior pelvic tilt pulling the hamstrings into a lengthened yet inhibited position, attempting to stretch the hamstrings without correcting the pelvic tilt will only lead to tearing the hamstrings.

APT-250x300

Most tension in athletes is caused by dysfunction or compensatory movement patterns. Fix the pattern and you release the tension--without unnecessary static stretching (like in the hamstrings example above).That’s why I never call what I do “increasing flexibility.” Is it a byproduct? Certainly. But I focus on using yoga for mobility, which--to me--means increasing stable, functional range of motion.

2. Not Understanding the Differences (and Dangers) of Yoga Styles

Saying “I do yoga” is like saying “I drive a car.” Really, what kind? There’s a big difference between a Hyundai and a Ferrari. When it comes to yoga, the variety of styles goes on and on...Hatha vs. Ashtanga vs. Bikram vs. Yin vs. Power vs. Blah Blah (everyone is making up their own version); I even have my own style! Athletes, coaches and trainers have to take the time to educate themselves about the techniques and rationales of the different styles before jumping into a class.

Personally, I believe some styles should be entirely contraindicated for athletes. I realize I’m going to piss off all the hot-yoga disciples by saying this, but one such style is Bikram, where the heat is turned up to an obnoxious 105 degrees. Yes, I know this is popular with athletes because they love to sweat. Great--push yourself properly in 75 degrees to sweat (or go to the sauna), but steer clear of a yoga style that teaches its instructors to shout commands like “lock your knees” while you slip and slide in sweat over the course of 90 minutes. Of the 26 poses used in Bikram, there are two I don’t think most athletes should attempt because of stress on the knees (Reclined Hero) and cervical spine (Rabbit). Another style that I’m not crazy about – Yin yoga – is widely marketed to athletes. The deep, static stretches of Yin are intended to stretch out the connective tissue--including ligaments. I don’t agree with encouraging athletes to stretch out areas that provide joint stability.

PirateCityYogaTraining-275x300

3. Not Vetting The Yoga Instructor

Most people don’t realize that yoga instruction is almost entirely unregulated. As such, there's no law requiring any specific certification to teach yoga. So, anyone can buy a certification online. Consequently, there isn’t a requirement for any anatomy training at all. In fact, even the current gold standard of certification through Yoga Alliance only includes a limited number of anatomy hours, which can be entirely comprised of energy anatomy (chakras, nadis, etc.) rather than muscle and joint function.

Despite this, yoga teachers are encouraged to manually adjust their students in postures. If you’re asking yourself how anyone without anatomy and biomechanics training can properly adjust someone into alignment in complicated yoga poses, you’re contemplating a very valid question. What happens when ill-advised instructors adjust students in classes? Well, injuries aren’t uncommon. One of my MLB clients suffered a cervical spine injury when an instructor in a gym placed a strap around his neck and did “traction” to help him “rest comfortably” while supine at the end of class. Yikes!

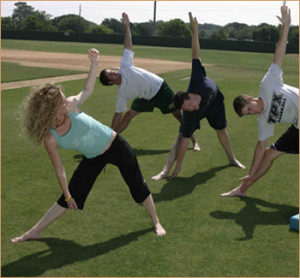
Danateam-triangle-300x278

4. Trying to Become a Yogi

Simply learning to do a particular style of yoga as a form of cross training is like a baseball player playing basketball in the off-season. He may benefit from the cardiovascular exercise and even improve his agility, but nothing he does playing basketball is specific to him becoming a better baseball player. And, it could even put him at a greater risk of injury as he feeds into existing dysfunctional patterns within the movements of the new sport. The same logic applies to athletes learning to be yogis.

Consider this: a MLB player came to me as a new client after practicing yoga the two previous off-seasons. His movement across the transverse plane was poor and his right SI joint was jammed due to pelvic rotation left to right. He knew how to do yoga sun salutations (albeit while employing myriad compensatory movement patterns), but he lacked the ability to shift appropriately into his left hip and tap into core power and hip mobility for powerful, fluid rotation. He was a left-handed DH, not a yogi, and should’ve approached his yoga practice as such. Consequently, I designed a custom yoga practice for him that focused on establishing the ability to properly shift into his left hip while increasing fluid movement of his pelvis and hips supported by integrated core strength. That’s the kind of yoga he needed!

Another point I have to make about athletes not striving to become yogis is regarding learning advanced inversions and arm balances. Yes, standing on your head looks really cool, but, can easily cause disc herniations when done incorrectly. And arm balances are awe-inspiring, but offer no benefit to athletes (especially throwing athletes) that outweigh the risks. When pressed by clients to teach these poses, I ask them: “Are you an athlete who wants to reach the top of your game or would you rather join Cirque du Soleil?”

DrewDana

5. Wasting Hours in Yoga Classes

The standard format for a yoga class is a 60- to 90-minute class. With grueling training and game schedules, athletes have limited time to get the best possible training and have any semblance of a life outside of their sport, so every second counts. In my opinion, spending an hour-plus in a generic yoga class is not time well spent.

When taught athlete- and sport-specifically, yoga can be applied in a variety of ways that require little time commitment (i.e., a yoga mobility warm-up can be done before a workout or game, restorative yoga and/or deeper stretches can be done after games and/or on off days, yoga moves used as corrective exercise or functional training can be added into workouts in between sets of complementary moves). My clients’ in-season programs never include anything more than 20 minutes at a time and are also broken down into individual movements intended for integration into other parts of their strength and conditioning programs.

The bottom line is that all of these mistakes and potential dangers can be avoided by practicing due diligence. When athletes are smart about why and how they add yoga to their training, they can use it tap into another level of function, awareness and control that will help them move, breathe and focus in ways that directly translate to enhanced sports performance and decreased injury.

About the Author

Dana Santas is creator of Radius Yoga Conditioning, a yoga-based mobility and sports-training style designed specifically to help athletes move, breathe and focus in ways that enhance performance and decrease injury. Nicknamed the “Mobility Maker,” she's currently the team yoga trainer for the Tampa Bay Lightning, Pittsburgh Pirates, and Philadelphia Phillies, as well as sports mobility consultant to more than half a dozen other teams and hundreds of MLB, NHL, NBA, NFL and MLS pros. You can learn more about her and get information about her upcoming workshop in Waltham, MA at www.RadiusYoga.com.

Sign-up Today for our FREE Baseball Newsletter and Receive Instant Access to a 47-minute Presentation from Eric Cressey on Individualizing the Management of Overhead Athletes!

Name
Email
Read more

The Best of 2012: Strength and Conditioning Videos

In continuing with our “Best of 2012″ theme to wrap up the year, today, I’ve got the top EricCressey.com videos of the year.

1. Four Must-Try Mobility Drills - This video was part of an article I had published at Schwarzenegger.com.  You can check it out here.

2. Cleaning Up Your Chin-up Technique - It's one of the most popular exercises on the planet, but its technique is commonly butchered.  Learn how to avoid the most common mistakes.

3. 8 Ways to Screw Up a Row - Rowing exercises are tremendously valuable for correcting bad posture and preventing injury, but only if they're performed correctly.

4. My Mock/Impromptu Powerlifting Meet - After being away from competitions for a while, I decided to stage my own "mock" powerlifting meet just to see where my progress stood.  I wound up totaling elite (1435 at a body weight of 180.6) in about two hours.

5. Cressey Performance Facility Tour - We moved to a new space within our building back in August, and this was the tour I gave just prior to the doors opening.

Those were my top five videos of the year, but there were definitely plenty more you may have missed. Luckily, you can check them out on my YouTube Channel.

I’ll be back tomorrow with another “Best of 2011″ feature. 

Sign-up Today for our FREE Newsletter and receive a four-part video series on how to deadlift!

Name
Email
Read more

Mobility Exercise of the Week: Alternating Lateral Lunge with Overhead Reach

It's been a while since I introduced a mobility exercise of the week, so I figured I'd introduce a new one that we use with a lot of our athletes nowadays.

The alternating lateral lunge with overhead reach gives you all the benefits - adductor length, hip hinge "education," and frontal plane stability - that you get with a regular lateral lunge variation.  However, by adding in the overhead reach, you get a greater emphasis on optimal core stabilization and mobility and stability at the shoulder girdle.

In this position, we'll coach different athletes with different cues.

If it's an athlete who is stick in an exaggerated lordotic posture, we'll cue him to engage the anterior core and keep the ribs down as the arms go overhead.

If it's a "desk" jockey who is very kyphotic, we may have to actually cue him "chest up" because he's so rounded over; we have to bring him back to neutral before we even worry much about the anterior core involvement.

If it's a high school athlete who has really depressed shoulder blades, we will actually cue him to shrug as he raises the arms to complete scapular upward rotation in the top position.

Conversely, if it's a client is already very upper trap dominant, we may have to cue a bit more posterior tilt of the scapula during the overhead reach.

In other words, this is a great example of how you can take a good exercise and make it even more effective, especially if you individualize coaching cues as much as possible.  Try it for a set of five reps per side as part of your warm-up and let me know how it goes!

Looking for more mobility drills like this?  Be sure to check out Assess and Correct: Breaking Barriers to Unlock Performance.

Sign-up Today for our FREE Newsletter and receive a four-part video series on how to deadlift!

Name
Email
Read more

Quick and Easy Ways to Feel and Move Better: Installment 21

Here's this week's list of strategies to get your nutrition and strength and conditioning programs headed in the right direction.  This is a collaborative effort between Greg Robins and me.

1. Add amplitude to your conditioning.

Let's face it: jogging on the treadmill and riding the elliptical or recumbent bike is about as fun as watching paint dry.  While an exercise causing boredom doesn't mandate that it be thrown by the wayside immediately, it does become concerning with this exercise modality doesn't broaden the amplitude - or range of motion - that you encounter in your daily life.  Moving better is about improving mobility, which is defined as one's ability to reach a certain posture or position.  For some folks, this means actually lengthening short tissues or reducing tension in overly stiff tissues, while for others, it's about establishing stability in the range of motion that one already possesses.  Unfortunately, while you're burn some calories on these cardio machines, you aren't going to do much to improve your mobility.

The solution is to implement variety in your conditioning, whether it means taking a bunch of mobility exercises and doing them right after another, or integrating several strength training exercises with lighter loads.  Step-ups, sled pushing/dragging, side shuffles, lateral lunges are all ways to get your hips moving in ways they normally don't.

In the upper body, innovative rowing and push-up variations can keep things fun while improving your movement quality.

The next time you're planning to do some interval training on the bike, try substituting some wider-amplitude movements and see how you like it.

2. Get your Vitamin D right.

I've seen studies that have shown great benefits from getting vitamin D levels up to normal, but to my knowledge, those effects were most observed with respect to body composition, hormonal levels, and tissue quality.  Interestingly, I just came across this study that showed a significant improvement in power production over four weeks in the vitamin D supplementation group, as compared to the controls. These results are tough to interpret, as the subjects were overweight/obese adults; ideally, we'd study trained athletes with smaller windows of adaptation ahead of them to see just how beneficial vitamin D supplementation is on performance. However, it certainly makes sense that if we're improving body composition, endocrine status, and tissue quality, folks are going to get more out of their training and make faster progress.

Vitamin D is one of very few supplements that I view as "must-haves' for the majority of the population.  I'd pair it up with a good fish oil and greens supplement to cover one's nutritional foundation. This is one reason why I'm a big fan of the Athletic Greens Trinity Stack; you can a high quality version of all three in one place.


3. Plan out regressions and progressions.

People like to be good at things. This is especially the case when they are surrounded by a bunch of other people. In the case of group exercise, your attendees are going to have a much better time, get better results, and stay safer if they are performing movements correctly. Group settings aren't ideal from a coaching standpoint, though, as you can't spend as much individualized time coaching technique. Therefore, exercise selection becomes paramount to these classes' success.  In other words, you need to have both progressions and regressions in your exercise library.

A common flaw in group classes is that each week, there are 15 new exercise variations on the agenda. The week before, it was 15 other ones, and the following week, it will be 15 more. I know, I know; people want you to "keep it fresh." In my mind, by changing the exercises so often you are taking the easy way out.

Instead, have people become incredible at the basics. Have them squat, swing, push up, row - all basic movements. From there, set up progressions and regressions. This is much easier to do when you keep the original exercises basic.

Here are a few examples:

TRX Supported Squat > Counter Balanced Squat To Box > Goblet Squat > Double KB Front Squat > Offset KB Front Squat

Hands-Elevated Push-up > TRX Chest Press > Push-up > Feet Elevated Push-up > Push-up vs. Band

This is mostly for teaching purposes, as an example. The goblet squat is accessible to most people, and it falls in the middle, with two levels of regression and progression built in.

I'm a big fan of more work up front and easy sailing there out. You might need to take some time to develop your class program, but it will make for a better product and better results thereafter.

4. Use leftover vegetables in your omelet.

I don't know about you, but leftover vegetables never taste quite as good as they do when they've just been cooked.  They're cold, and often soggy to the point that even heating them up in the microwave doesn't really make them sound appetizing.  Rather than throw them out and skip on your veggies for a meal, try adding them to your omelet the following morning, as the other ingredients - eggs, spices, oils, cheese (if that's your thing), salsa, and ketchup - can help to liven up their taste.  I've done this with previously cooked asparagus, broccoli, peppers, onions, spinach, kale, mushrooms, cauliflower, green beans, and tomatoes.  Some vegetables - squash and turnip, for instance - don't have the right consistency to make for a good omelet ingredient, though, so experiment carefully!

5. Learn to stand correctly before you even try to train correctly.

Many people think moving well is all about picking the right corrective exercises to get the job done. While that's certainly part of the equation, the truth is that before you even talk about exercising, you have to educate yourself about how to simply stand with good posture.  As an example, if you have an excessive anterior pelvic tilt and lordosis, you need to learn how to engage your anterior core, activate your glutes, and prevent your rib cage from flaring up up when you're standing around. Conversely, if you do all your exercises in this aberrant posture, you just get good at sucking!

Have a great week!

Sign-up Today for our FREE Newsletter and receive a four-part video series on how to deadlift!

Name
Email
Read more

Strength and Conditioning Stuff You Should Read: 8/1/12

Here's this week's list of recommended strength and conditioning reading:

Four Must-Try Mobility Drills - In case you haven't already seen this, it's a article I had published at Arnold Schwartzenegger's website yesterday, including a lengthy video.

"He's a Big, Strong Kid" - With the $100 off sale of the IYCA High School Strength and Conditioning Coach Certification this week, it seemed like a good time to "reincarnate" this popular one from the archives at EricCressey.com.

Everything You Need to Know about the Hip Thrust - This is a thorough blog post from Bret Contreras on "everything hip thrust."  Bret's devoted his career to glutes and pioneered this exercise, so you could say that he's an authority on the matter.

Sign-up Today for our FREE Newsletter and receive a four-part video series on how to deadlift!

Name
Email
Read more

Mobility Exercise of the Week: Table Adductor Dips

In this week's mobility exercise of the week, I've got an excellent drill for reducing stiffness in the hip adductors.  I came up with this exercise when I realized that I wanted to be able to do more drills to improve hip abduction range-of-motion, but I didn't always want them to be ground-based.  And, just doing lateral lunge variations all the time can get a little boring for athletes.  Enter table adductor dips.

I especially like to use this with our throwers because it actually parallels some of the hip angles we see with the pitching delivery, so it makes for a great warm-up and off-season maintenance/improvement exercise.  I also like it for them because they can do it out on the field without having to roll around in the grass (which would be the case with a lot of other adductor mobility drills).

In terms of coaching cues, it's important to keep the weight on the support leg's heel and sit back "into" the hip.  The majority of the weight should be on the down leg, with minimal pressure put on the leg that's up on the table.

As you go through the exercise, brace the core to ensure that the movement comes through the hips (flexion and abduction) at the bottom position, rather than just allowing the lower back to round.  Having the arms out in front as I do in the video above can help as a counterbalance to prevent your butt from tucking under.  If you're super stiff, you may want to consider holding a ten-pound plate out at arm's length as an additional counterbalance.

At the top position, be sure to extend the hips all the way to stand tall between each rep.  I usually cue folks to activate the glute on the support leg to finish each rep.  This will also help guarantee that you're stretching the adductors in both flexion and a neutral position.

We'll typically do sets of eight reps on each side during the warm-up period.  This can, however, be held for a longer duration as a static stretch at the end of a training session.

For more drills like this, be sure to check out Assess and Correct: Breaking Barriers to Unlock Performance.

 Sign-up Today for our FREE Newsletter and receive a four-part video series on how to deadlift!

Name
Email
Read more
Page 1 2 3 4
LEARN HOW TO DEADLIFT
  • Avoid the most common deadlifting mistakes
  • 9 - minute instructional video
  • 3 part follow up series