Home Posts tagged "Rotator Cuff Exercises" (Page 4)

Troubleshooting the Side-Lying External Rotation

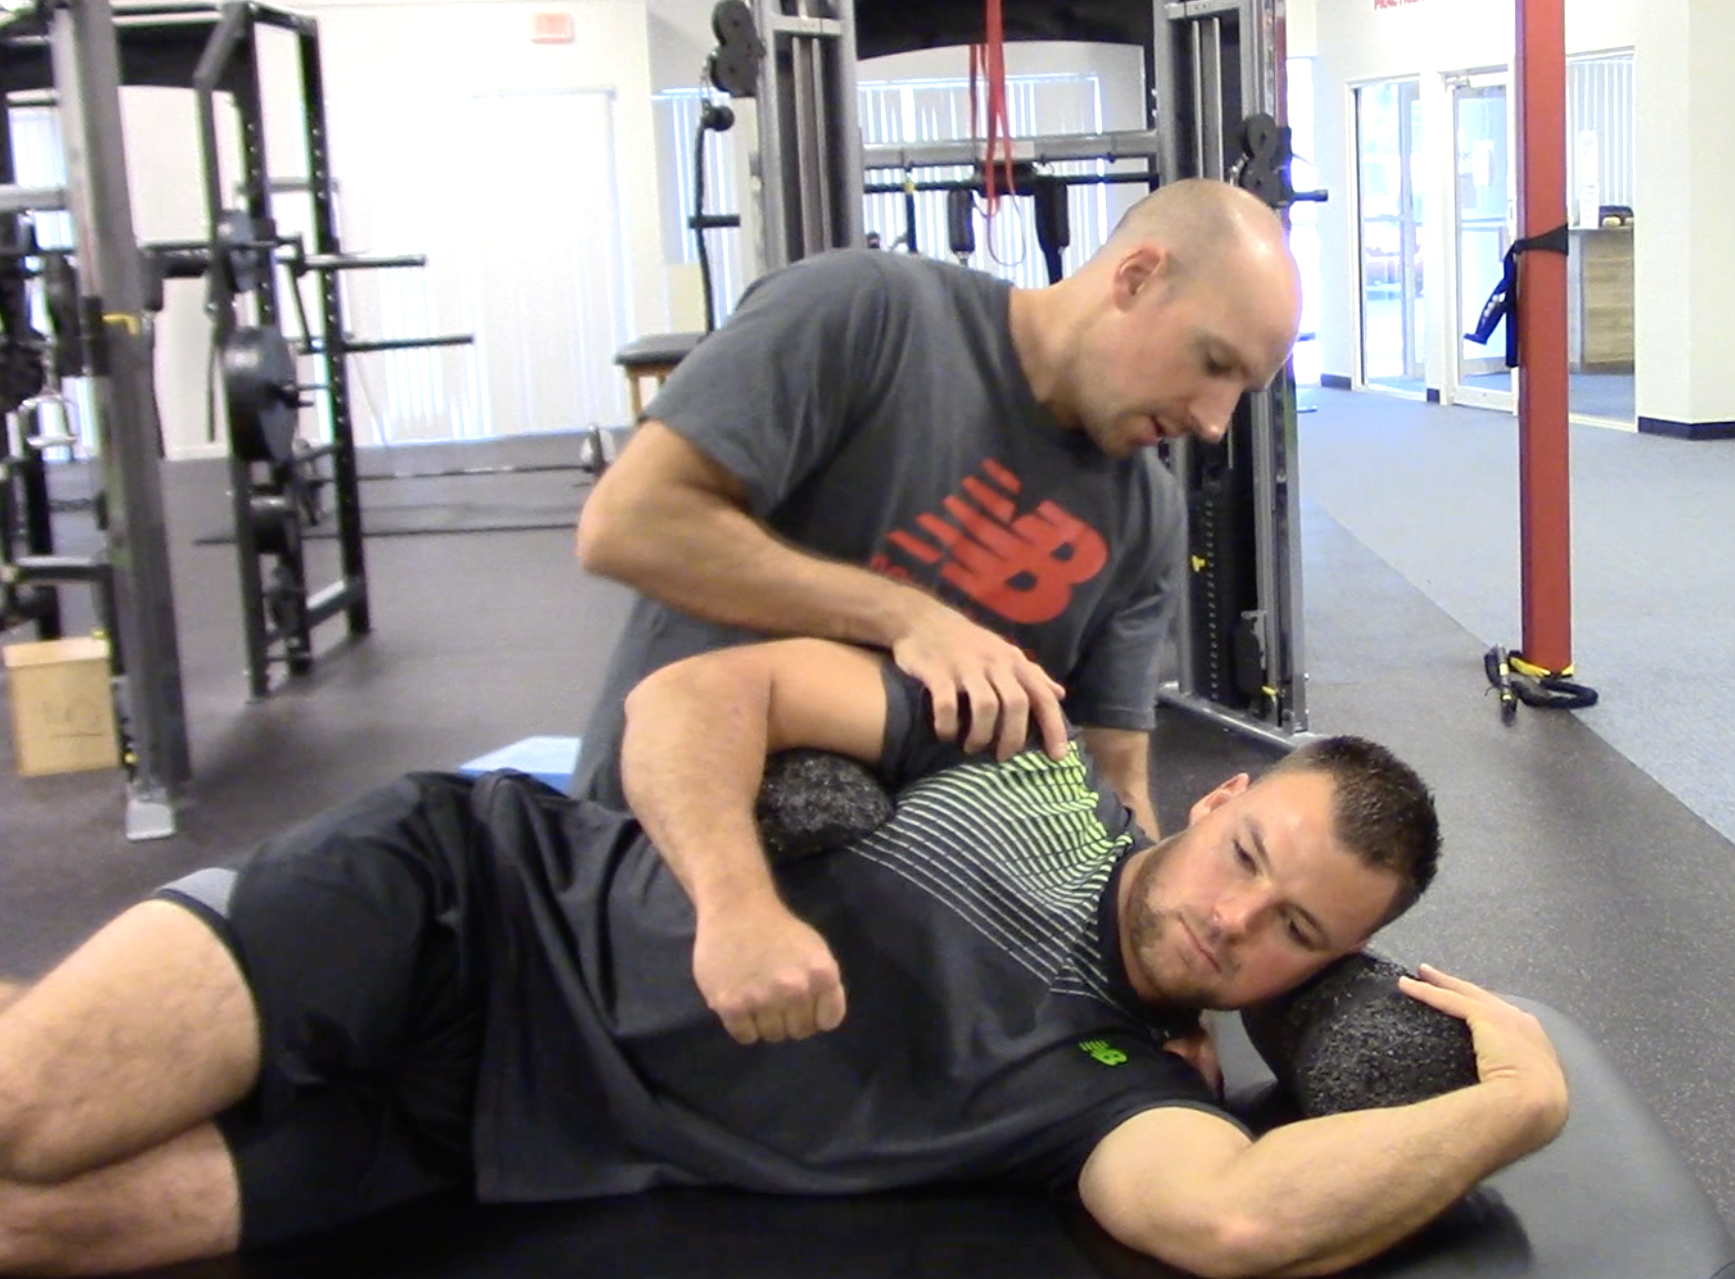
The side-lying external rotation is one of the most popular rotator cuff exercises in rehabilitation and "pre-habilitation" history, but in spite of its apparent simplicity, there are a few common mistakes I see folks make with it. Check out today's video to learn more:

Sign-up Today for our FREE Newsletter and receive a four-part video series on how to deadlift!

Name
Email
Read more

Making Movement Better: Different Paths to the Same Destination

Lately, I've been posting more training pictures and videos on my Instagram page. The other day, I posted this video, and it led to some good discussion points that I think warrant further explanation:

One responder to the video asked the following:

You had an Instagram post the other day about an athlete not being able to differentiate between hip and lower back extension. I have a client with what seems to be a similar problem and just wondered how you generally go about teaching them the difference.

The answer to this question really just rests with having a solid set of assessments that help you to understand relative stiffness. I was first introduced to this concept through physical therapist Shirley Sahrmann's work. Relative stiffness refers to the idea that the presence or lack of stiffness at one joint has a significant impact on what happens at adjacent joints, which may have more or less stiffness. Without a doubt, if you've read EricCressey.com for any length of time, the most prevalent example of this is a shoulder flexion substitution pattern. 

In this pattern, the "bad" stiffness of the lats (among other muscles) overpowers the lack of "good" stiffness in the anterior core and deep neck flexors - so we get lumbar extension (arched lower back) and forward head posture instead of the true shoulder flexion we desire. Truth be told, you can apply these principles to absolutely every single exercise you coach, whether it's an 800-pound squat or low-level rotator cuff exercise.

As an example, when you cue a wall hip flexor mobilization, you're working to reduce bad stiffness in the anterior hip while cueing an athlete to brace the core and activate the trailing leg glute. That little bit of good stiffness in the anterior core prevents the athlete from substituting lumbar extension (low back movement) for hip extension, and the glute activation creates good stiffness that impacts the arthrokinematics of the hip joint (head of the femur won't glide forward to irritate the anterior hip during the stretch). 

In the upper extremity, just use this back-to-wall shoulder flexion tutorial as an example.The "reach" would add good stiffness in the serratus anterior. The shrug would add good stiffness in the upper traps. The "tip back" would add good stiffness in the lower traps. The double chin would add good stiffness in the deep neck flexors. The flat low back position would add good stiffness in the anterior core. Regardless of which of these cues needs the most emphasis, the good stiffness that's created in one way or another "competes" against the bad stiffness - whether it's muscular, capsular, bony, or something else - that limits overhead reaching.

Returning to our prone hip extension video from above, if we want to get more hip extension (particularly end-range hip extension) and less lumbar extension, from a purely muscular standpoint, we need more "good stiffness" in rectus abdominus, external obliques, and glutes - and less stiffness in lumbar extensors, lats, and hip flexors. As the question received in response to the video demonstrates, though, this can be easier said than done, as different clients will struggle for different reasons.

Sometimes, it's as simple as slowing things down. Many athletes can perform movements at slow speeds, but struggle when the pace is picked up - including when they're actually competing.

Sometimes, you can touch the muscle you want to work (tactile facilitation). Spine expert Dr. Stuart McGill has spoken in the past about "raking" the obliques to help create multidirectional spinal stability. I've used that cue before with this exercise, and I've also lightly punched the glutes (male athletes only) to make sure athletes are getting movement in the right places.

Sometimes, a quick positional change may be all that's needed. As an example, you can put a pad under the stomach to put the lumbar extensors in a more lengthened position. In fact, doing this drill off a training table (as demonstrated above) was actually a positional change (regression) in the first place; we'd ideally like to see an athlete do this in a more lengthened position where he can challenge a position of greater hip extension. Here are both options:

Sometimes, a little foam rolling in the right places can get some of the bad stiffness to calm down a bit. Or, you might need to refer out to a qualified manual therapist to get rid of some "tone" to make your coaching easier. I do this every single day, as I have great massage therapists on staff at both our Florida and Massachusetts Cressey Sports Performance facilities.

manual_therapy_page-300x206-2

Sometimes, a little positional breathing can change the game for these athletes, as it helps them to find and "own" a position of posterior pelvic tilt while shutting off the lats.

TRXDeepSquatBreathingWithLatStretch

The take-home point here is that there are a lot of different ways to create the movement you want; coaching experience and a working knowledge of functional anatomy and relative stiffness just help you get to the solutions faster and safer.

coachingtweet

Sign-up Today for our FREE Newsletter and receive a four-part video series on how to deadlift!

Name
Email
Read more

Random Thoughts on Sports Performance Training – Installment 14

 It's time for the next installment of this popular series here at EricCressey.com, but I've pulled in some help from an old friend for this one. Given that his new DVD set, Elite Athletic Development 2.0, was just released this week, the one-and-only Mike Robertson agreed to chime in with some sports performance tips this week. Those beginning with "MR" are from Mike, and the ones with "EC" are me. Enjoy!

mike_robertson-2

1. MR: When working with overhead athletes, learn to love specialty bars.

When it comes to athletes in general, it’s obvious that they are not powerlifters. Is it helpful if they’re strong? Absolutely. But let's be honest - no one cares about how they get strong. You don't get bonus points for deadlifting from the floor, nor do you necessarily have any reason to put a barbell on your back. At IFAST, we're huge fans of specialty bars for our athletes, but especially for our baseball players.

Trap bars are kind of a god-send, if you ask me. It's an incredibly easy exercise to coach, you reduce the mobility demands (vs. a sumo or conventional deadlift), and you can load a guy up fairly quickly without compromising technique.

On the other hand, just because we don't put a barbell on our back doesn't mean we don't squat! The safety squat bar is an invaluable tool if you train baseball players (or really, any overhead athlete). You know that your wrist, elbow and shoulder are your money makers, so the last thing you want to do is expose yourself to injury in those areas. The safety squat bar front squat is awesome for newbies, as it teaches them a front squat pattern without having to "rack" the bar using the wrists, elbows and shoulders. I'll often start my baseball players off with this variation for a month or two, just to get them back in the swing of things. If we want to load up the squat pattern a bit more, all we have to do is flip the safety bar around and now we've got a back squat progression that again unloads the upper extremity. Quite simply, if you train overhead athletes - or any athletes, for that matter - invest in a high quality trap and safety squat bar. You'll thank me later.

2. EC: Show some love to the broad jump!

For some reason, in the world of athletic performance assessments, vertical jump testing gets all the attention. In my anecdotal experience, though, broad jump proficiency has a far greater carryover to actual athletic success. Bret Contreras has also alluded to this as part of his rationale for including hip thrusts and other loaded glute bridge variations in strength training programs; horizontal (as opposed to just vertical) force production really matters in sports.

That said, one reason some coaches shy away from programming broad jump variations in training programs is that they be a bit hard on the joints and elicit more soreness in the days that follow a training session. This is easily remedied by having an athlete land on a more forgiving surface (such as grass), or by using band-resisted broad jumps.

3. MR: Appreciate that push-ups can actually improve rotator cuff function!

Push-ups are a critical component of our training programs, and for numerous reasons. You see, push-ups (versus a traditional bench press), allow for a high degree of serratus anterior development. And I’d argue that in the upper body, the serratus anterior is one of the most overlooked, yet incredibly important, muscles we have. Strengthening the serratus anterior does a host of good things for us, most notably upwardly rotating the scapula. However, what many people don't understand is how it actually improves thoracic kyphosis.

This is a really loaded topic, so I’ll try to keep it brief. Back in the day we would look at most people and say they have an excessive thoracic kyphosis, but I’m not entirely sure that’s true. What I think we see (more often than not) is a flat thoracic spine, coupled with shoulders that are rolled forward due to an inability to expand a chest wall. (Thank you, Postural Restoration Institute). Here's an example EC posted a while back of a flat thoracic spine in action:

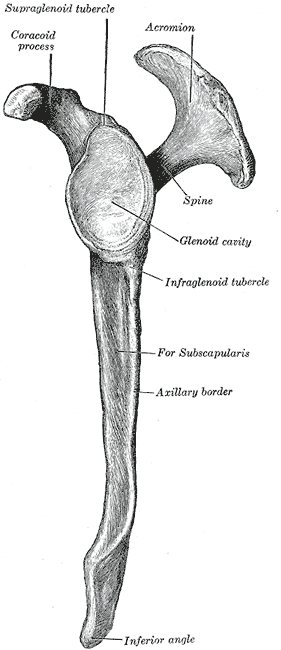
While we tend to get caught up on the scapular attachment site (or motion) of the serratus, it also attaches anteriorly to the ribcage. If we lock the scapulae in place and engage serratus anterior, it pulls on the rib cage and gives us a more normal thoracic kyphosis. Now I’m sure you may be thinking, why do we want a kyphosis? Isn’t more extension a good thing? You need a kyphosis (or subtle rounding of the upper back), because your scapulae are curved as well; just look at this side angle to appreciate it.

Gray205_left_scapula_lateral_view-2

If you have a curved scapulae sitting on a flat upper back, you lose passive stability at the shoulder. And when we lose stability at the scapulae, we are virtually guaranteed to lose stability at the shoulder. Because the rotator cuff muscles attach to the scapula, trying to stabilize the glenohumeral (ball-and-socket) joint with a flat thoracic spine is like trying to shoot a cannon from a canoe.

Want more serratus? Incorporate more push-ups, and do them correctly. As EC notes in this video, don't just let the arms do all the work; get the shoulder blades moving. The scapula should rotate toward the armpit as you press up and away from the floor:

Get this upper back positioning squared away, and you'll improve rotator cuff control both transiently (positional stability) and chronically (better training results).

4. EC: Remember that joint range-of-motion falls off over the "athletic lifespan."

It never ceases to amaze me how much a teenage athlete will change over the course of a year - even independent of training. If a kid goes through an 8-inch growth spurt at age 13, he's usually going to go from that "loosey-goosey," completely unstable presentation to the uncoordinated, stiff movement quality. Basically, the bones have stretched out quickly, and the soft tissue structures crossing the joints haven't had time to catch up (let alone learn how to establish control of new stabilization demands).

What many folks fail to recognize is that "bad" stiffness doesn't just increase in teenage athletes, but also in the decades that follow. It's well established that joint laxity decreases over the lifespan; it's one of several reasons why your 80-year-old grandmother isn't as supremely mobile as she was in her 50s.

What's the point? A lot of the foundational mobility drills you use with your teenage athletes are probably "keepers" that people can use over the course of their entire lifespan. So, teach them perfectly early on so as to not develop bad habits that will be magnified over decades.

GoodHFStretch-300x225

5. MR: Remember that good hip development for athletes should be tri-planar.

Whether it's stealing bases, returning a punt, or changing directions on the ice, there's more to the hips than sagittal (straight ahead) plane development. Sure, it never hurts to be a stronger squatter or deadlifter, but I'd also argue that's just the tip of the iceberg. We also need our athletes to be able to move well in both the frontal and transeverse planes as well. I like to think of the sagittal plane as the "key" that unlocks the frontal and transverse plane.

If you're into the Postural Restoration Institute (PRI) , you can even take this a step further and think of it like this: we need the ability to shift into and load our left hip, while we need the strength and stability to push (or get off) our right hip, particularly in those demonstrating this heavily asymmetric postural presentation.

leftaic-275x300-2

Once we have that basic movement capacity, now we need to start cementing it. This can be done initially in the weight room, with exercises like dynamic chops, lifts, the TRX Rip Trainer, etc. I'm also a huge fan of concentric med ball throws as well. Start low to the hip initially, and then raise it up over time. Progress to eccentric as movement capacity and strength improve.

Taking this a step further, don't be shy in doing some aggressive lateral plyo progressions as well. Work on Heidens/skier jumps with a stick first to develop eccentric strength and control, then work on improving speed, power and explosiveness. Last but not least, we need to prepare our athletes for the specific demands of their sport, and this is where lateral acceleration and crossover stepping comes into play. At the end of the day, use the weight room to get strong in the sagittal plane, but don't forget that the frontal and transverse planes are critical for a highly-functioning athlete!

6. EC: Don't be afraid to progress birddogs.

The birddog is an awesome core stability and hip mobility exercise, but it can quickly become really easy for athletes with some training experience under their belt. Not all exercises need to be progressed, but the band-resisted birddog is one way to add some variety and additional challenge for this invaluable exercise:

As I noted earlier, Mike and Joe Kenn recently released their Elite Athletic Development 2.0 Seminar DVD set. I've reviewed this product now myself, and it's excellent. You can learn more HERE

Sign-up Today for our FREE Newsletter and receive a four-part video series on how to deadlift!

Name
Email
Read more

Quick and Easy Ways to Feel and Move Better: Installment 64

Today's five tips come from Cressey Sports Performance coach, Miguel Aragoncillo.

1. Approach your sets and reps intelligently.

Whenever I start a new program, I’m always excited to attack the given sets and reps and put some weight on the bar. However, I won’t come into the gym every day of every training program as fresh and ready to go as I did on Week 1, Day 1.

When writing programs for our athletes, I want them to do the following things during their training sessions:

a. Move with quality and integrity.
b. Move with intensity, focusing on force production.

If you can’t bring either to a lift, one of two things is happening: you are fatigued, or the weight is too heavy. There are many causes of fatigue, whether it be from the previous day of training, previous weekend of traveling, or recent competition.

To account for this, I can do two things: regulate sets and reps (volume), or weights used (intensity).

Fellow CSP coach Greg Robins uses the phrase:

“Programs are static, and training is a dynamic process.”

A program is a piece of paper that does not factor in your life: lack of sleep, outside stress, or fatigue from a previous competition. Training is a process that should respect how you recover from day to day. 

So, if you fail or miss a rep for example, you can do one of two things:

If your program calls for 3 sets of 5 reps, that is 15 overall reps at a specific intensity. If you can’t complete the given numbers, you can:

a. Flip the numbers: 15 reps can be done using 5 sets of 3 instead. Mentally, 3 reps is easier to digest than 5, you can recover better in between sets, and you can evaluate how your body is reacting to the exercise on a more micro level. Essentially, you can do any amount of sets to accommodate for the same amount of total volume.

b. Maintain the same amount of volume and decrease the weight used: If the weights are feeling heavy for 8 sets of 3 reps, down the weight until you feel like you are moving without a significant grind.

2. Set goals by reverse engineering them.

If you want to achieve the goal of playing baseball (or any other sport, for that matter) beyond high school, keep these numbers from the NCAA in mind:

Out of 482,629 athletes in high school, less than 7% get the chance to play in college. Out of those student athletes, only 8.6% of draft-eligible players actually get drafted by a professional baseball organization. Even when combined with players who are drafted directly out of high school, you're still dealing with an incredibly low of moving on to professional baseball. And, this doesn't even take into consideration the number of players who make it to Minor League Baseball, but never advanced to the Major League level.

draft_15_logo.0-300x200

What's the point? Being in the top 0.5% of anything in life is very challenging, and baseball is certainly no exception.

So the question remains: if you want to achieve something great, how can you best achieve it?

There are a lot of ways to dissect and reverse engineer how to efficiently get to your goals. Locke and Latham (1) note that “specific goals direct activity more effectively and reliably than vague or general goals.”

While the path you may take will vary greatly because of the opportunities that are presented, there is always one thing you can control in the face of uncontrollable external factors, and it is your reaction to the given situation.

• If you got cut from a team, what is your plan of action to display your strengths, or improve your weaknesses?

• What is your reaction when something does not go as planned?

Using the SMART method (Specific, Measurable, Attainable, Realistic, Time-Bound) is a great place to start, and whether or not you desire to play professional sports, it can also help improve your likelihood to achieve aesthetically minded goals as well.

Also, the SMART method of goal setting can be used as a metric towards modifying behaviors to more positively align yourself with those goals. Are your behaviors allowing you to achieve your goals? If not, what can you do to alter these behaviors or habits?

3. If you stray from a diet, focus on your next meal, not the next day!

When it comes to healthy nutrition, you'll often hear of people "falling off the bandwagon" for a meal - and it leading to several days of poor food choices. For this reason, I always encourage folks to "right the ship" as quickly as possible.

If you go out with friends and indulge, binge eat, or just mess up your macros, don’t give up hope for the day and plan to start over tomorrow. Tomorrow may turn into the next day, and into the next day. So what do you do?

Gather your losses and do better on your next immediate meal, instead of restarting the next day. Don’t let a bad meal turn into a bad day of eating.

This is also one reason why I don't generally advocate full-on "free" days, where folks eat anything they want as a means of "de-stressing" from six days per week of quality nutrition adherence. It's a lot easier to get things back on track after a single bad meal (whether planned or unplanned) than from a full day.

4. Reduce time “lost” training by continuing with low-level exercises.

If you consider training at an established gym with a great training environment as “going all out” as a “100%” of your efforts, what happens when you train elsewhere?

CP579609_10151227364655388_1116681132_n-300x200

For example, I’ll refer to four days of lifting with extra days of working on sprints/shuffles/conditioning as 100% of the whole product. If you miss one day, that is 17% of your whole workout week missing. If you miss two days, that is 34% of your workout week that you have “lost” because of travel, long days, or other extenuating circumstances.

Take this day for example:

A1. Barbell RDL - 3x4
A2. Prone Horizontal Abduction - 3x8/side
B1. DB Bulgarian Split Squat - 3x6/side
B2. Half-Kneeling Cable Chop - 3x8/side
B3. Half Kneeling 90/90 External Rotation Hold - 3x(2x6)/side

You have two arm care exercises, one lower body bilateral strength exercise, one lower unilateral exercise, and a rotary core stability exercise.

If you can’t get to the gym to do these, give this a shot:

A1. Supine Bridge March, or 1-Leg Hip Thrust with 3 Sec Pause - 3x10/side
A2. Prone Horizontal Abduction (Off Bed) - 3x8/side
B1. Bodyweight Split Squat with 3 second Pause - 3x10/side
B2. Feet Elevated Side Bridge - 3x30sec/side
B3. Standing External Rotation to Wall - 3x(2x6)/side

Certainly this is not the same, but when comparing these exercises, you can begin to identify that there is still something you can do despite not having access to coaching or equipment.

It won’t be 100% of the full effect, but any percentage of that 100 percent will be worth something when you look back over a longer period of time to evaluate your results.

5. Use density training to get more work done in less time.

Along with decreasing or regulating caloric consumption, increasing caloric expenditure can help you towards your fitness goals. Basically, doing as much work as possible in the form of density training can burn a lot of calories in a little amount of time. Utilizing non-competing muscle groups in a superset or giant set fashion will prevent fatigue and allow you to get more work done.

For example, performing a tri-set with a TRX Inverted Row, KB Goblet Reverse Lunge, and then a Stability Ball Stir the Pot will provide several biomechanical and force production benefits.

Rather than doing 3 sets of 10 for each exercise, waiting around in between sets, and then performing each set with no pre-determined intensity, do this:

A1. TRX Inverted Row - 10 reps
A2. KB Goblet Reverse Lunge - 5/side (10 reps)
A3. SB Stir the Pot - 5/side (10 reps)

Perform as many rounds of this circuit as possible in 5 minutes.

Reference

1. Locke, Edwin A., and Gary P. Latham. "The application of goal setting to sports." Journal of sport psychology 7.3 (1985): 205-222.

About the Author

Miguel Aragoncillo (@MiggsyBogues) is a strength and conditioning coach at the Hudson, MA location of Cressey Sports Performance. More of his writing can be found at www.MiguelAragoncillo.com.
 

Read more

Random Thoughts on Sports Performance Training – Installment 9

With only a day to spare, here's the April edition of Random Thoughts on Sports Performance Training.

1. Don't forget pauses can be beneficial with single-leg training, too.

Working pauses into your lifting can yield tremendous benefits, as they reduce contribution of the stretch-shortening cycle and force a lifter to work much harder to produce force from a dead-stop. For some reason, though, they usually only get applied to "big bang" bilateral exercises like squats, bench presses, and (obviously) deadlifts. I actually really like to program pauses into single-leg work to improve carryover to what athletes really encounter in athletics and the real world. Here's an example:

2. Try the 1-arm cable rotational row from a low setting.

I love incorporating rotational rows in our athletes' programming. Many coaches only program this as an upright variation where the cable is set at chest height. I think this overlooks the importance of athletes learning how to "accept" force on that front hip. Hip rotation rarely occurs in isolation in athletics; rather, it is generally concurrent with flexion/extension and abduction/adduction. By lowering the cable a bit, you challenge things in a bit more of a sport-specific manner - and, in the process, add some variety to your athletes' programs.

3. Make sure put your intensive rotator cuff work after your overhead work.

I recently reviewed a program that paired Turkish get-ups with cable external rotations. While both are great exercises, the last thing you want to do is fatigue the rotator cuff before you go overhead, where it needs to work really hard to keep the humeral head depressed relative to the glenoid fossa. Likewise, be careful about doing all your cuff stuff early in the session, then progressing to overhead carries later. My feeling is that you just do enough to turn the cuff on during the warm-up, then train your highest stabilization demands (e.g., overhead supporting/carrying), and then head to the more direct (fatigue producing) stuff.

4. Different strength qualities make different athletes successful.

We have two athletes - both left-handed pitchers - make Major League Baseball debuts this week. The first, Jack Leathersich, is a relief pitcher for the New York Mets, and he just has one of those insanely "quick arms." In other words, it's almost as if he doesn't know how to throw a ball softly; it really jumps out of his hand. I think it's a function of his natural "reactive ability."

The second, Tim Cooney, is getting a start in his big league debut today for the St. Louis Cardinals.  He's not as naturally reactive as Jack is, but you could make the case that Tim is the strongest pound-for-pound professional pitcher we train. I've seen him do Turkish get-ups with a 100-pound kettlebell, and walking lunges with the heaviest dumbbells in the gym. He can make up for less reactive proficiency by falling back more on pure strength. I think this "strength reserve" also helps Tim as a starter, whereas reactive capabilities tend to fall off as fatigue sets in, which is probably why Jack has thrived as a reliever.

This static-spring relationship closely parallels the absolute strength to absolute speed one I shared in the past.

The more "static" guys are strong and need more reactive training, which largely takes place on the speed end of the continuum. The more "spring" guys need to keep prioritizing strength as a foundation for effective stretch-shortening cycle function, as you can't display force quickly if you don't have enough force in the first place.

I'll be back soon with another installment during the month of May!

Sign-up Today for our FREE Newsletter and receive a four-part video series on how to deadlift!

Name
Email
Read more

Common Arm Care Mistakes – Installment 6

It's that time of the year when our baseball players are in-season, so things get a bit quieter around Cressey Sports Performance. Sometimes, it's even so quiet that my staff members film videos like this:

As impressive as this reverse stunner was, I actually get even more excited about taking a step back to work "on" the business instead of "in" the business when quiet season rolls around. Often, this work on the business consists of "audits" on everything from assessment, to programming, to coaching cues; we want to know how we can get better. One topic that came up during one of these discussions was the recent trend of fitness professionals and some physical therapists insisting that upper body carrying variations with appropriate joint positioning would suffice for arm care. Examples would include things like Turkish Get-ups, or bottoms-up carrying variations:

While I absolutely love all these exercises, I firmly believe that they are only a few pieces of a larger puzzle - and this brings me to this arm care mistake:

Not selecting exercises that appreciate the true functional demands placed on the shoulder and elbow during throwing.

The problem with the "carries are enough" mindset for shoulder health is that this opinion is heavily predicated on the assumption that we're talking about general population folks who don't have to stabilize extreme positions like end-range external rotation during the late-cocking phase:

layback

A 90/90 External Rotation Hold would be a much more appropriate training strategy that would appreciate the unique joint position demands of throwing, as Eric Schoenberg demonstrates:

Another example would be the crazy distraction forces that occur at the shoulder during ball release:

delivery3

A rhythmic stabilization at the ball release position probably yields better carryover to the act of throwing:

Most of the research on isometric training shows a 10-15 degree carryover in strength from the joint angle trained. In other words, if you don't train anywhere near end-range external rotation, don't expect to be strong in that incredibly crucial position.

I've only spoken to joint position specificity thus far, though, and there is more to this discussion. Baseball players also need to handle some pretty crazy velocities of arm speed - particularly with respect to shoulder internal rotation and horizontal adduction, as well as elbow extension. Good programs start out by building strength through these patterns:

ECCishek

Once a solid strength foundation is in place, we need to begin to challenge athletes on the velocity end of the spectrum:

Very simply, to keep throwers healthy, you need to challenge both cuff strength and cuff timing - and do so at functional significant positions. In my opinion, just relying on carrying variations doesn't really accomplish either of these challenges correctly, and you can't carry in the positions that really matter.

As a final point, I'll add that I think it's a leap of faith to say that a largely reflexive muscle group (the rotator cuff) will automatically fire across an entire population when we know that structural deviations from normalcy (e.g., asymptomatic cuff tears, labral pathology) are widely prevalent.

Carrying and supporting variations are absolutely fantastic and I'll continue to use them a ton, but in my opinion, it's shortsighted to say that they can serve as a complete replacement to more "functional" arm care drills that replicate the forces and positions our players encounter on the field.

If you're looking to learn more about our comprehensive approach to arm care, I'd strongly encourage you to check out an upcoming Elite Baseball Mentorship.

Sign-up Today for our FREE Baseball Newsletter and Receive Instant Access to a 47-minute Presentation from Eric Cressey on Individualizing the Management of Overhead Athletes!

Name
Email
Read more

Quick and Easy Ways to Feel and Move Better: Installment 62

This installment of quick tips comes from Cressey Sports Performance coach, Tony Bonvechio. Enjoy! -EC

1. Avoid over-tucking your elbows when performing the bench press.

It’s widely accepted that to bench press more weight and protect your shoulders, you should tuck yours elbows tightly to yours sides and touch the bar low on the chest. This may reduce the range of motion you have to press, but unless you’re a 300-pound powerlifter with a huge belly, your elbows may still drift too far past the midline of the body if you tuck too much. This can add unwanted stress on the shoulders and make the front of the shoulder cranky over time.

It’s similar to tucking the elbows too tight to the body during rowing variations - it makes it easy to let shoulder slip into too much extension. That’s why we coach athletes to row with a bit more space between the armpit and the elbow. You limit anterior humeral (upper arm) glide while still getting full scapular (shoulder blade) retraction.

Instead, keep the elbows about 45 degrees away from the body and touch the bar somewhere around the nipple line. This also reduces the moment arm between the shoulders and the bar, limiting the horizontal distance the bar needs to travel and making it easier to keep your elbows under the bar for a smooth lockout.

2. Optimize your leg drive to make the bench press more shoulder-friendly.

On that note, using proper leg drive can spare the shoulders by accelerating the bar though the portion of the lift where the shoulders are under the most stress. The less time you spend grinding the bar through the first few inches off the chest, the better.

Optimal leg drive technique differs from lifter to lifter, but foot placement dictates leg drive technique. Lifters with shorter legs tend to thrive with the feet hooked tightly under the bench and the heels off the ground, while longer-legged lifters do better with the feet out wide and heels flat.

Either way, if you plan on competing in powerlifting, you have to abide by your federation’s rules, which may require you to keep your heels on the ground. Here are some tips for choosing the right foot position:

3. Try dark roast coffee to reduce caffeine jitters.

At first I didn’t believe it when Greg Robins told me this, but it’s actually true: dark roast coffee has less caffeine that light roast coffee. And while the difference in actual caffeine content by volume may be small, dark roast coffee is harder to drink in mass quantities than light roast, so a bolder cup may reduce overall caffeine consumption if it gets you to drink less coffee overall. If your morning joe gives you jitters, consider switching to a darker roast.

photo-95


4. Slow down the concentric phase of isolation exercises.

As performance coaches, we constantly trying to help our athletes become more powerful. That means we’re often coaching them to perform the concentric portion of most exercises explosively to enhance rate of force development. But when it comes to small muscle groups that often get “overshadowed” when performing single-joint exercises, sometimes we have to slow down.

Specifically at CSP, getting athletes to “feel” their rotator cuff or lower traps during arm care exercises can be challenging, especially if they rush through the concentric phase. Slowing down the tempo of all phases of the exercise usually cleans things up by keeping athletes in a better position and reducing contribution of unwanted synergists. For example, taking 3-5 seconds to externally rotate the humerus during cuff work can prevent the deltoid or lat from taking over.


5. When setting up for the front squat, exhale first.

I stole this trick from Miguel Aragoncillo and it works wonders for athletes whose elbows drop during front squats. Take your grip on the bar and before you unrack it, give a good hard exhale to get your ribs down. Then, inhale into your belly and back, drive your elbows up and unrack the bar.

While “elbows up” is a great cue for front squats, it won’t work if the athlete doesn’t set his or her ribcage in a solid position during the setup. Exhaling first gives you a better zone of apposition, allowing for a fuller breath and creating greater intra-abdominal pressure to keep you upright. Like Miguel told me, “Front squats are just abs and legs, dude.”

For a detailed write-up on the front squat, be sure to check out Eric's thorough post on the topic, How to Front Squat: Everything You Need to Know.

Sign-up Today for our FREE Newsletter and receive a four-part video series on how to deadlift!

Name
Email
Read more

Random Thoughts on Sports Performance Training – Installment 7

It's time for this month's edition of "musings" on the sports performance training front. Here goes...

1. Professional athletes don't need "special" exercises; they just adapt faster and need special progressions.

One of the most important lessons coaches can learn with professional athletes is that they don't need crazy advanced exercises. Far too often, coaches will assume that because a client is a high-level athlete, he/she will automatically require some fancy, innovative drill. The truth is that they need the basics, just like everyone else. You'd be amazed at how poorly some of the most high-level athletes you'll see actually move when you get them out of their sporting environments.

That said, they are unique in their ability to adapt to a given stimulus quicker than their "less athletic" counterparts. Movement quality will improve dramatically from one week to the next, and strength and power can increase much faster than you'd expect from "normal" folks. This is obviously a blessing, but can also be a burden, as it means programs may need more updating on-the-fly to continue challenging the athlete. Additionally, you have to be cognizant of the fact that their strength levels may actually increase faster than their motor control and connective tissues can safely handle. In other words, you have to be careful not to load bad patterns or degenerative tissue tendencies.

2. Don't worry about the Absolute Strength to Absolute Speed Continuum if you're untrained or detrained.

With over 55,000 views on YouTube, this is one of my most popular videos ever:

The lessons here have tremendous value to athletes of all ages and ability levels - except novice trainees, or athletes who have recently been detrained. In other words, if we're talking about a 13-year-old kid who has zero resistance training experience, or an athlete who just finished a long, grueling season and has lost appreciable strength, then you need to build strength up first.

Effectively, treat these scenarios as if an athlete is all the way to the right (speed) end of the continuum. They need to build a foundation of strength up before they'll benefit from any of the other modalities - or even be able to perform them safely. This is one reason why handing an aggressive weighted ball program to an untrained 13-year-old kid might be harmful, and why doing a ton of plyos with a volleyball player who just finished a long season is silly. Give them what they actually need, not just what you think is "sexy."

3. Efficient rotation is efficient rotation - and consistent across multiple sports.

One thing I'm really excited about with respect to our new Jupiter, FL Cressey Sports Performance facility is working with a wider variety of rotational sport athletes beyond just baseball. My business partner, Shane Rye, is an accomplished lacrosse coach, and Jupiter also happens to be home to loads of golfers of all levels. I've also got a big tennis background, and am excited to explore opportunities on that front.

CSP florida-02(1)

There are a load of commonalities among all rotational sports, and it's going to be exciting to see how our training approaches impact these other sports. How can I be so sure?

Have you ever noticed how easily baseball and hockey players pick up golf? And, have you noticed how many athletes were drafted in multiple rotational sports? Think of Tom Brady in baseball and football, and Tom Glavine in hockey and baseball. These guys weren't what you'd call "powerhouse" athletes; in other words, they weren't freak athletes that played baseball and football. Rather, you could argue that they're just guys who learned to use their bodies really efficiently in rotational patterns.

4. "Where do you feel it?" is as important a question as "How does it look?"

Every once in a while, you'll observe an athlete with a movement that looks absolutely perfect, but might not be "felt" in the right place. Or, it might even actually cause pain. This is why it's so important to always solicit feedback on where an athlete (especially a beginner) feels an exercise, as opposed just assuming it was fine just because it "looked good." As an example, I commonly see athletes who "feel" all their shoulder exercise rotation drills in the front of their shoulder, which is the exact opposite of what we want.

Without getting too "geeky" on this front, many times, the reason we have discomfort or the "wrong" feeling with drills is that athletes are paying close attention to the osteokinematics - gross movements of internal/external rotation, flexion/extension, adduction/abduction - of the joint in question, but not paying attention to the arthrokinematics of that same joint. In other words, the rolling, rocking, and gliding taking place needs to be controlled within a tight window to ensure ideal movement.

In the external rotation variation, as we externally rotate the arm, the humeral head (ball) likes to glide forward on the glenoid fossa (socket). The glenohumeral ligaments (anterior shoulder capsule), rotator cuff, and biceps tendon are the only things that can hold it in the socket. In a throwing population, the capsule is usually a bit loose and the cuff is a bit weak, so the biceps tendon often has to pick up the slack - which is why some folks wind up feeling these in the front, thereby strengthening a bad pattern. There are also a bunch of nerves at the front of the shoulder that can get irritated, but that's a blog for another day!

Gray523

5. Making your room colder can be really helpful for sleep quality.

Everyone knows that turning off electronics before bed is important for sleep quality. Additionally, getting your room as dark as possible definitely makes for better sleeping. Very few people pay attention to the temperature of the room, though. I can definitely speak to its importance, though.

As many of you know, my wife and I moved to Florida in early September. As part of this transition, I made three trips back up to Boston over the course of September-November. On each of those trips, my sleep quality was insanely better than I have in Florida. The difference? Roughly 8-10°F in the temperature of my sleeping environment. With that in mind, we're cranking up the air conditioning a bit more - and thanking our lucky stars that the Florida summer has wrapped up. If you're having trouble sleeping, tinkering with the temperature in your sleeping environment might be a good place to start. Also, I'd encourage you to check out this great guest post I published a while back: Sleep:What the Research Actually Says.

Sign-up Today for our FREE Newsletter and receive a four-part video series on how to deadlift!

Name
Email
Read more

Bear Crawls vs. Crab Walks

Yesterday, I posted on Twitter that I was a big fan of bear crawls because they get you great serratus anterior recruitment, more scapular upward rotation, improved anterior core function, tri-planar stability, and some awesome reciprocal arm/leg activity. They're one of my favorite warm-up and end-of-workout low-level core activation drills.

For some reason, though, every time you mention bear crawls, someone asks about crab walks. Candidly, I don't think so highly of crab walks. In fact, I have never used them - and that's why I didn't have a video on hand of them. As such, this demonstration took place on my kitchen floor at 11:15PM:

photo-82

Keeping this position in mind, here are a few reasons that I don't like crab walks:

1. Bear crawls drive more scapular upward rotation by putting the lats and scapular downward rotators on slack as the athlete reaches overhead. With a crab walk, the arms aren't just at the sides; they are actually behind the sides. The lats are as short as they can possibly be - especially if the athlete is allowed to slip into lumbar extension (an arched lower back posture). Most folks lack scapular upward rotation regardless of whether they sit at a computer all day or throw a baseball for a living; we don't need exercises that feed into that problem even more. Additionally, the scapula is generally anteriorly tilted unless it's an experienced athlete with great body awareness. Anterior tilt is an issue we work to combat in just about every population - athlete and non-athlete alike.

2. Crab walks are brutal on the anterior shoulder. For the same reasons I outlined in my article, Are Dips Safe and Effective?, I dislike crab walks. As the humerus (upper arm) is "hyperextended" behind the body, the head of the humerus (ball) glides forward relative to the glenoid fossa (shoulder socket). This puts a lot of stress on the anterior capsule, biceps tendon, and nerve structures that pass along the front of the shoulder. And, it makes the rotator cuff work overtime from a mechanically disadvantageous position.

IMG_8597

3. You don't walk around like a crab in any sport that comes to mind! Seriously, this is the position you're in when you got steamrolled by a running back, or you tripped over yourself! While I get the school of thought that says it's good to be somewhat prepared for just about every potentially injurious situation you'll encounter, we've got a limited amount of training time to deliver exercises that give athletes the most bang for their buck. And, even in young athlete populations, there are literally thousands of other movements we can use with kids to create a rich proprioceptive environment with safe movements they'll actually be able to utilize on a regular basis in life. And, the bear crawl is one of these movements.

Can a lot of athletes "get away" with doing crab walks? Absolutely! However, we never know what kind of long-term structural changes are going to be in place - and we can certainly never truly appreciate what kind of missed development is in play from not including more effective exercises.

To learn more about some of our approaches to assessing and improving upper body function, be sure to check out Functional Stability Training of the Upper Body.

fstupper

Sign-up Today for our FREE Newsletter and receive a four-part video series on how to deadlift!

Name
Email
Read more

Strength and Conditioning Stuff You Should Read: 6/23/14

Here's this week's list of recommended strength and conditioning reading:

The Changing Face of Youth Baseball - Here's an awesome guest post by Tampa Bay Rays third baseman Evan Longoria for former MLB player Gabe Kapler's website. It's must-read material for every baseball parent and coach.

High Performance Training without the Equipment: Installment 2 - In light of the popularity of Andrew Zomberg's recent post on training with little to no equipment, I thought I'd bring this old post of mine to the forefront. This one features good options for training the rotator cuff if you don't have access to cables or bands.

CP3

Checklist for Determining Movement Dysfunctions and How to Get Over Them - Dean Somerset did an excellent, thorough job with outlining the training process, from assessment to correction and subsequent programming. Part 2 was a great follow-up, too.

Sign-up Today for our FREE Newsletter and receive a four-part video series on how to deadlift!

Name
Email
Read more
Page 1 2 3 4 5 6 106
LEARN HOW TO DEADLIFT
  • Avoid the most common deadlifting mistakes
  • 9 - minute instructional video
  • 3 part follow up series