Home Posts tagged "strength training program" (Page 2)

5 Ways You’ve Never Used a Barbell

Today's guest post comes from Cressey Sports Performance coach, Greg Robins.

Hi, my name is Greg, and I have a problem.

I love the barbell.

In fact, I would be perfectly happy just training with the bar, a rack, a bench, and some plates. Call me crazy, but every exercise that has ever made a serious impact on my physique and strength levels involved the barbell.

To be honest, most people don’t use the bar enough. It’s not surprising, given the state of a typical “gym” these days. For every three or four bars, there must be a few hundred other pieces of equipment.

I continually challenge people to use the bar more often. Usually, my advice centers on doing more variations of the basic lifts. For me, the staple lifts never get old. However, I know plenty of people who thrive on variety in their training. With that in mind, here are five lesser-used exercises that include the barbell.

1. Barbell Rollouts

Rollouts are a great exercise, but not everyone has a wheel or other fancy implement. Not a problem! In fact, using a barbell is just as effective, if not more effective.

One benefit is that you can make the bar heavier or lighter. This may seem like a trivial difference, since the bar stays on the floor. However, you will notice that a 185-pound bar is a heck of a lot harder to pull back to the starting position. This will make your lats work harder, and tax your core. The best part? It makes your lats and abs work together, as they should!

)

2. 1-arm Barbell Rows

Heavy rowing should be a staple in most people’s programs, especially those of you who want to move some appreciable weight in the gym. This variation is a serious grip challenge. It’s also a great way to load up past what the gym offers in DBs; just use a strap so you can hold on.  However you choose to do it, the basic premise is simple: perform a row in the same fashion as 1-arm DB row. In this case, keep the barbell between your legs, and make sure to use 10- and 25-pound plates so you can keep a decent range of motion.

1-arm Barbell Rows

3. Weighted Carries

Most folks look immediately to farmer’s handles, DBs, and KBs to do weighted carries. That’s all well and good, but the barbell lends itself very well to a few loaded carries as well.  Among my favorites are a barbell overhead carry, a barbell zercher carry, and a 1-arm barbell suitcase carry.

overheadbbcarries

zercher

1-armfarmers

Each offers a totally different advantage. Overhead helps people work anti-extension properties in full shoulder flexion. The Zercher carry is great as an anti-extension exercise as well, and a better choice for those who can’t get overhead safely. Lastly, the suitcase carry trains core stability in virtually every plane, and even challenges the grip quite a bit.

4. Self Massage

Forgot your PVC pipe? No worries! The barbell with a small plates on each hand can make for a roller as well. It’s not for the more tender individuals, but works perfectly fine for people who have a longer history doing self-massage.

rolling

I also like the fact that the bar is much thinner than a roller, putting more direct pressure on the areas of interest. Try this baby out on your lower extremities and lats next time you hit the gym.

5. 1-arm Overhead Exercises

I’ve written previously about the benefits of bottoms-up KB exercises. They create a lot more need for shoulder stability, and tax the grip. However, the barbell can offer a similar benefit.

Since the bulk of the weight is now further from your hand, the forearm and shoulder demands increase BIG time.

It’s a great challenge on 1-arm shoulder presses, as well as Turkish Get Ups. Don’t believe me? Give it a try.

1-armoverhead

1-armbarbellget-up

If you’ve been hunting down some new physical challenges in the gym, these should definitely get you moving. Train hard and use the barbell!

Greg will be presenting his popular "Optimizing the Big 3" training workshop at Cressey Sports Performance in Massachusetts on August 2. This event is a great fit for lifters who have an interest in improving the squat, bench press, and deadlift - and may want to powerlift competitively. And, it's also been very popular with strength and conditioning professionals. For more information, click here.

Sign-up Today for our FREE Newsletter and receive a four-part video series on how to deadlift!

Name
Email
Read more

10 Ways to Progress Inverted Rows

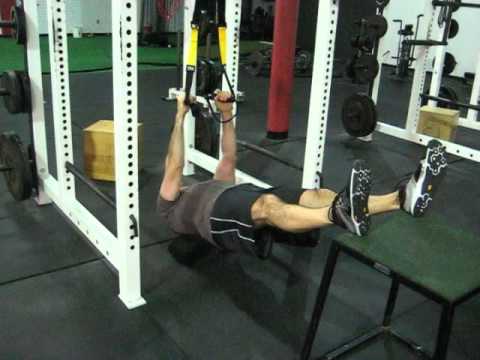
I'm a big fan of inverted row variations, as they not only build a strong, functional upper back, but also challenge core stability at the same time.  Unfortunately, for more advanced lifters, they can become too easy very quickly.  With that in mind, I thought I'd use today's post to introduce ten ways that you can progress these variations to increase the difficulty.

1. Do them correctly!

The first progression for most people is to simply perform the exercise with correct technique.  The most common errors I see in most folks' technique are:

  • forward head posture
  • elbows drifting behind the body (scapula doesn't retract, so the lifter substitutes extra movement of the humerus)
  • hip sagging (the body doesn't stay in a straight line)

If you'd like some quick refreshers on how to make these look good, check out these videos:

2. Change the grip.

Just as we see with pull-up variations, going to a pronated (overhand) grip will increase the difficulty of inverted rows, as compared to neutral (palms facing one another) and supinated (underhand) grips.

3. Try some mechanical advantage drop sets.

While we're on the topic of which grip set-ups are harder than others, we can use this to our advantage to do some drop-off sets.  If you're someone who can bang out inverted reps pretty easily and want a crazy challenge, try doing the first half of your set pronated, and then switching to supinated for the second half when you fatigue.  I like suspension trainer variations for this approach, as it's easiest to go pronated, to neutral, to supinated without having to let go of the handle.

4. Add isometric holds at the top.

The top position is without a doubt the most challenging, so you can increase the time under tension - and therefore the difficulty - by adding 1-3 second pauses at the top of each rep.

5. Elevate the feet.

This progression is somewhat "assumed," but most people overlook the fact that you can elevate the feet a lot further than you might think.  I like to use the 24" box.

You can also utilize various elevations for mechanical advantage drop sets.  Go from a more extreme elevation, to a subtle elevation, to no elevation, and then even to a more upright position to finish things off.  A set of 20-25 inverted rows can be a fantastic finisher.

6. Load with chains.

Chains might be the single greatist luxury one almost never gets in commercial gyms.  We're fortunate to have them at Cressey Sports Performance, and they're a complete "game changer" if you can get your hands on them.  They're also a great way to add extra loading to inverted rows:

7. Wear a weight vest.

This one seems logical, but there's a problem: there still isn't what I'd consider to be a great weight vest on the market.  The heaviest ones are too bulky and always seem to fall apart.  The lighter one are simply too light, and the velcro straps always seem to stop working in a matter of months of use.  If you've got one, by all means, use it - but I actually prefer #7...

8. Load with a backpack.

About 5-6 years ago, I bought a Dell computer that came with a padded backpack.  The computer was mediocre at best, but the backpack proved to be really useful in the gym!  You see, the extra padding made it conducive to adding extra loading, as you can slide plates up to 25 pounds (the diameter on anything heavier is too much to fit).  Just strap it on your chest and wear it in reverse for your inverted rows. I've got two 25-pound plates in for this demonstration:

9. Use Fat Gripz.

Adding load and range of motion aren't the only way to increase the difficulty of inverted rows; you can also challenge the grip more aggressively.  I really like Fat Gripz for this purpose, as they're super affordable and wrap over any barbell, dumbbell, or suspension trainer to make for a thicker handle.

fatgripz-300x222

10. Go to one-arm variations.

You can do inverted row variations one arm at a time, too.  In doing so, you add a little more of a challenge to rotary stability of the core.  Here's the basic version, although you can expand upon it by adding a reach at the bottom (toward the floor) and top (toward the rack) with the non-working arm.

Inverted rows are a staple exercise, but that doesn't mean that they need to be boring!  Try these progressions - and even combine some of them - and you'll find that you're able to include an inverted row variation in just about every strength training program you complete.

Sign-up Today for our FREE Newsletter and receive a four-part video series on how to deadlift!

Name
Email
Read more

Strength Training Programs: 4 Reasons You Might Not Need to Deload

I'm a firm believer that deloads - or planned periods of reduced training volume or intensity - are an important concept to understand if you're looking to get optimal results with your strength and conditioning programs.  In fact, I thought it was so important that I wrote an entire 20-page e-book on the subject.

That's not to say, however, that I think absolutely everyone needs to worry about incorporating deloading periods, though.  In fact, I think there are several scenarios in which they aren't necessary. Read on.

1. You train less than three times per week.

If you want to deload, you actually need to load first.  That's hard to do when you're only getting to the gym 1-2 times per week. 

A while back, Dr. John Berardi talked about the importance of getting in six hours of activity each week even just for general health and maintaining or enhancing one's fitness; I've definitely seen this duration to be an appropriate target for folks. If you're a 4x/week strength training guy, you usually hit this number, if you figure 75 minutes per training session, plus a bit of additional activity throughout the week.  And, even if you only lift 3x/week, you're still going to get very close, as the full-body sessions tend to run a bit longer.  If you're only 2x/week, you're going to be at least three hours short on the week.  Adding in more deload time to an already deloaded schedule would be silly.

The obvious exception to this rule would be in-season athletes doing their strength training at a reduced frequency. These individuals are, of course, accumulating a lot of other physical activity from their sports.  They'd still want to reduce volume or intensity a bit in the weight room every 4-6 weeks, because you can't count on your "sporting volume" ever dropping predictably during the season.

art-of-the-deload2

2. You're a complete beginner.

The great thing about being a beginner is that just about everything works.  You could show up to the gym, do one set of preacher curls, then bang your head against the wall for 45 minutes and you'd still probably get bigger and stronger as long as you eat enough.  My feeling is that if you can do "anything" to improve, you might as well do a lot of "anything" while you still can.  Just dropping volume for the sake of dropping volume every few weeks isn't a good move, as you're likely missing out on a big window of adaptation. 

Beginning lifters really aren't neurally efficient enough to impose a lot of fatigue. And, just as importantly, they actually need a lot of volume early on so that they can practice new movement patterns. Finally, on the psychology side of things, you never want to hold someone back too much when they're first starting with an exercise program. The immediate results are incredibly motivating, and if you cut volume back substantially, you run the risk fo them not coming back after a period away from the gym.  Don't give them a chance to get disinterested.

In my e-book, The Art of the Deload, I outline a strategy for beginners to "deload without deloading." I call it the "Introduction Week Deload:"

This is best suited to beginners who need a chance to learn the movements with light weights.

It’s very simple: the set/rep parameters stay the same for the entire month, and the only thing that changes is the load utilized (lifter gets stronger).  At the end of the month, you change exercises and stick with the same approach.  You’ll find that in Week 1 of the new program, the beginner will be using markedly less intensity, as he or she will be cautious in feeling out the new movements.

You can “ease” into this transition by using “variation without change.”  In other words, change the exercises, but don’t completely overhaul the nature of the movements.  An example might be to switch from a neutral grip pull-up to a chin-up (supinated grip), or moving from dumbbell reverse lunges to walking dumbbell lunges.

3. Your program is predominantly corrective or rehabilitative in nature.

I know this might come as a shocker, and I really hate to burst your bubble, but side-lying clams don't impose enough fatigue to require a deload.  Stop overthinking things!

Now, don't get me wrong: I'm a firm believer that lifting heavy stuff can be tremendously "corrective" in nature as long as it's done with correct technique.  However, there are going to be times when it just isn't feasible to maintain a training effect in full.  Imagine, for instance, what happens shortly after a shoulder surgery.  If you're in a sling, you obviously can't do anything to load the affected side.  You also can't deadlift or squat, and just getting into positions for exercises like barbell hip thrusts isn't going to happen.  You have to be careful about exercises with arm swing, so dragging the sled (if you even have the equipment or space to do so) is potentially out. In other words, you're basically left training the other arm and then doing glute ham raises, leg curls, and leg extensions.  We can do more at Cressey Performance because of our equipment selection, but most folks don't have that luxury at their commercial or home gyms.

That said, it would be incredibly hard to overtrain - or even overreach - with those implements and restrictions.  So, there's no reason to cut back every fourth week just because you're supposed to do so.  Besides, if you have surgery, you're going to be on the shelf for 10-14 days anyway, as you'll be hopped up on pain killers, short on sleep, and likely restricted from going to the gym in the short-term to minimize the risk of infection.  There's no need to take more time off!

4. You have deloads within the week, rather than within the month.

This point actually piggybacks somewhat on point #1.  Some lifters will have two more challenging training days during the week, and then supplement them with 2-3 lower intensity and volume sessions during that same week.  In other words, rather than deload for an entire week every three weeks (7 out of 28 days), they'll deload a few days within each week (2/3 out of 7).  With this approach, the "supercompensation" curve is less "up and down;" the highs aren't as high, and the lows aren't as low.  However, this often yields a consistent upward and more linear trend in fitness gains.

In my opinion, it is an approach that is much more sensitive to outside factors.  Getting poor sleep, or adding in travel demands can quickly throw you for a loop, whereas you can plan around these things a bit more when you deload for an extended period of time.  You can either move the week-long deload up a bit, push it back slightly, or shorten it because you don't feel like you've loaded enough going into it.  It's harder to have that same "loading flexiblity" within the week, as opposed to within the month.

Wrap-up

To reiterate, I think implementing strategic deloads is incredibly important for the intermediate and advanced lifter, and there are certainly many different ways to implement these periods.  However, as you can tell, there are also definitely some scenarios when it's best to skip the deload period and keep on getting after it in the gym.  Take a good look at your training program and experience - and then ask yourself how you're feeling - and you'll have your answer.

Sign-up Today for our FREE Newsletter and receive a four-part video series on how to deadlift!


Name
Email
Read more

Functional Stability Training: Does the Bilateral Deficit Apply to Deadlifts?

When Mike Reinold and I released our product, Functional Stability Training of the Lower Body, we thought it would be a good idea to give folks a few samples of what the products entail.  With that in mind, I wanted to give you an excerpt from one of my webinar presentations, "15 Things I've Learned About the Deadlift."  Many of you may not have heard of the bilateral deficit, but it's one of the strongest supporting arguments for including single-leg work in a strength training program. This presentation will make you think about applying it differently with deadlift variations, though.

The entire Functional Stability Training is available at www.FunctionalStability.com.

Sign-up Today for our FREE Newsletter and receive a four-part video series on how to deadlift!

Name
Email
Read more

Strength and Conditioning Stuff You Should Read: 4/11/13

Here's this week's list of recommended strength and conditioning reading:

To Sell Is Human - This was a great book I finished last week.  The title is a bit misleading, though, as the author (Daniel Pink) actually talks predominantly about "non-sales selling:" how we "sell" our ideas to family members, clients, co-workers, and others. It's an awesome collection of social behavior research that definitely impacted me as both a coach and business owner. If you like the writing of Malcolm Gladwell and Chip and Dan Heath, you'll enjoy this.

Strength Training Programs for the Pros and the Joes: Not As Different as You Might Think - While I was on vacation, a guy I met asked how training professional athletes differed from what I do with normal folks who just want to be fit. I told him he'd be surprised at how many similarities there are, and this article from a while back outlines why.

New Uses for Creatine - This was an excellent review of the recent research on creatine supplementation. More and more, creatine supplementation is proving valuable for general health, not just performance.

Sign-up Today for our FREE Newsletter and receive a four-part video series on how to deadlift!

Name
Email
Read more

Exercise of the Week: Side Bridge Rows

Check out this week's exercise of the week: the side bridge row.  I think you'll find it to be a great progression you can add to your strength training programs.

Also, don't forget: the 38% off sale on Show and Go: High Performance Training to Look, Feel, and Move Better ends tonight at midnight. The discount is automatically applied at checkout; just head HERE to take advantage of this great discount.

Sign-up Today for our FREE Newsletter and receive a four-part video series on how to deadlift!

Name
Email
Read more

Strength and Conditioning Stuff You Should Read: 2/12/13

Happy Valentine's Day Week! While I love all my readers and appreciate your support, I won't get all sappy on you today.  Instead, our recommended strength and conditioning reading will focus on getting jacked and crushing good food.  What's not to love?

Strength Training Program: What to Do If You Can't Squat Deep - This was a guest blog I wrote over at Men's Health earlier this week. If you don't have the mobility to squat deep, don't worry; I'll give you some alternatives to ensure that your lower body strength training doesn't suffer.

Limit Protein to 20g Per Meal? - This is an old blog post from Dr. John Berardi, but I've had two separate athletes ask me about whether the body can only "handle" a certain amount of protein at each meal.  As such, I thought it'd be a good time to reincarnate this excellent write-up.

Smart Overhead Pressing - This was a great post at T-Nation by Dean Somerset.  If more people would follow progressions like this before jumping into overhead pressing, we'd have a lot fewer shoulder injuries in the weight training population.

Sign-up Today for our FREE Newsletter and receive a four-part video series on how to deadlift!

Name
Email
Read more

Strength Training Technique: Fine-Tuning the Band Pullapart

The band pullapart is a very commonly prescribed exercise improve upper extremity function and correct bad posture.  However, while it may appear really simple to execute, it's important to make sure that it's coached correctly, as it's easy to develop some bad habits.  Check out today's video to learn more:

 Sign-up Today for our FREE Newsletter and receive a four-part video series on how to deadlift!

Name
Email
Read more

Strength Training Programs: Coaching the Dumbbell Pullover

For some reason, the pullover has become one of those old strength training exercises that has fallen out of favor with in the iron game.  I'm not sure why, as it definitely has some utility on a number of fronts, provided that you do it correctly.  Check out today's video to learn the "why" and "how" of the dumbbell pullover:

 Sign-up Today for our FREE Newsletter and receive a four-part video series on how to deadlift!

Name
Email
Read more

Quick and Easy Ways to Feel and Move Better: Installment 28

Here's this week's list of tips to get your nutrition and strength and conditioning programs on track.  Greg Robins took a break this week, so I'm stepping up my game and covering this installment.

1. If you always squat, try a month without squatting.

There's an old saying in the strength and conditioning field that "the best program is the one you're not on." In other words, everything works, but nothing works forever.  Squats have come under a fair amount of scrutiny over the past few years as diagnoses of femoracetabular impingement have gone sky-high and we've encountered more and more people in the general population who simply don't move well enough to squat in good form.  So, it makes sense to not shove a round peg in a square hole; at the very least, try to remove them from your strength training programs for a month here and there.

In these instances, I like to start the training session with an axially-loaded single leg exercise for 3-6 reps/side.  If you're not good in single-leg stance, start on the higher side with a lighter weight. If you're a long-time single-leg believer, though, you can really load these up:

After that, you can move on to deadlifts, barbell supine bridges/hip thrusts, or any of a number of other exercises.  The point to take away from this is that eliminated loaded squatting variations for a month here and there won't set you back.

2. Work on the squat pattern, not just the squat.

A lot of folks struggle to squat deep because they lack the ability to posteriorly shift their center of mass sufficiently.  This is particularly common in athletes with big anterior pelvic tilts and an exaggerated lordotic curve.

If you give these athletes a counterbalance out in front of their body, though, their squat patterns "clean up" very quickly.  As such, in combination with other mobility/stability drills, I like to include drills to work on the actual squat technique both during their warm-ups and as one of the last exercises in a day's strength training program.  Goblet squats and TRX overhead squats are two of my favorites:

3. Make muffins healthier.

My favorite meal is breakfast, and I know I'm not alone on this!  Unfortunately, once you get outside some of the traditional eggs and fruit choices, things can get unhealthy very quickly.  That's one reason why I'm a fan of Dave Ruel's recipe for the much healthier high protein banana and peanut butter muffins from Anabolic Cooking.  Dave has kindly agreed to let me share the recipe with you here:

Ingredients (for three muffins)
• ¾ cup oatmeal
• ¼ cup oat bran
• 1 tbsp whole wheat flour
• 6 egg whites
• ½ scoop vanilla protein powder
• ¼ tsp baking soda
• ½ tsp stevia
• 1 tbsp natural peanut butter
• 1 big banana
• ½ tsp vanilla extract
• ½ tsp banana extract

Directions
1. In a blender, mix all the ingredients (except for the banana). Blend until the mix gets thick.
2. Cut the banana in thin slices or cubes. Add the banana to the mix and stir (with a spoon or a spatula)
3. Pour the mix in a muffin cooking pan, and cook at 350°F. Until cooked (about 30 minutes).

Nutrition Facts (per muffin)
Calories: 190
Protein: 17g
Carbs: 18g
Fat: 4.5g

Quick tip: you can cook a big batch and freeze the muffins, then just microwave them when needed down the road.

Anabolic Cooking is on sale for $40 off until tonight (Friday) at midnight, so I'd encourage you to check it out and enjoy the other 200+ healthy recipes Dave includes.  My wife and I cook from this e-book all the time.

4. Dominate the back-to-wall shoulder flexion drill before you overhead press.

Whether your shoulders are perfectly structurally sound or not, overhead pressing can be a stressful activity for the shoulder girdle.  To that end, you want to make sure that you're moving well before you move overhead under load.  I like to use the back-to-wall shoulder flexion "test" as a means of determining whether someone is ready to overhead press or snatch (vertical pulling is a bit different).  Set up with your back against the wall, and your heels four inches away from the wall.  Make sure your lower back is flat against the wall, and make a double chin while keeping the back of your head against the wall.  Then, go through shoulder flexion.

If you can't get your hands to touch the wall overhead without bending the elbows, going into forward head posture, arching the back, or moving the feet away from the wall, you fail.  Also, pain during the test is a "fail," too.  Folks will fail for all different reasons - but a big chunk of the population does fail.  Fortunately, a bit of cueing and some corrective drills - and just practicing the test - will go a long way in improving this movement quality.  Hold off on the snatches and military presses in the meantime, though.

5. Drink with a straw to get better about water intake.

I always give my wife, Anna, a hard time about how little water she drinks.  She'll get busy at work and will simply forget to have a sip of water for 5-6 hours.  Other times, though, she just doesn't want to drink cold water - because it's winter in New England and she is always trying to get warm!  One quick and easy solution to the later problem is to simply drink with a straw, as water won't contact your teeth, which are obviously very cold-sensitive.  My mother gave Anna a water bottle with a straw for Christmas, and she's been much better about water consumption ever since.  Try it for yourself.

Sign-up Today for our FREE Newsletter and receive a four-part video series on how to deadlift!

Name
Email
Read more
Page 1 2 3 4 12
LEARN HOW TO DEADLIFT
  • Avoid the most common deadlifting mistakes
  • 9 - minute instructional video
  • 3 part follow up series