Home Posts tagged "thoracic spine mobility"

Our Favorite 3D Strap Drills – Installment 2

I'm back with the second installment of our series on our favorite 3D Strap exercises at Cressey Sports Performance. In case you missed it, be sure to check out Part 1 from Ethan Dyer. Here are four more CSP "regulars:"

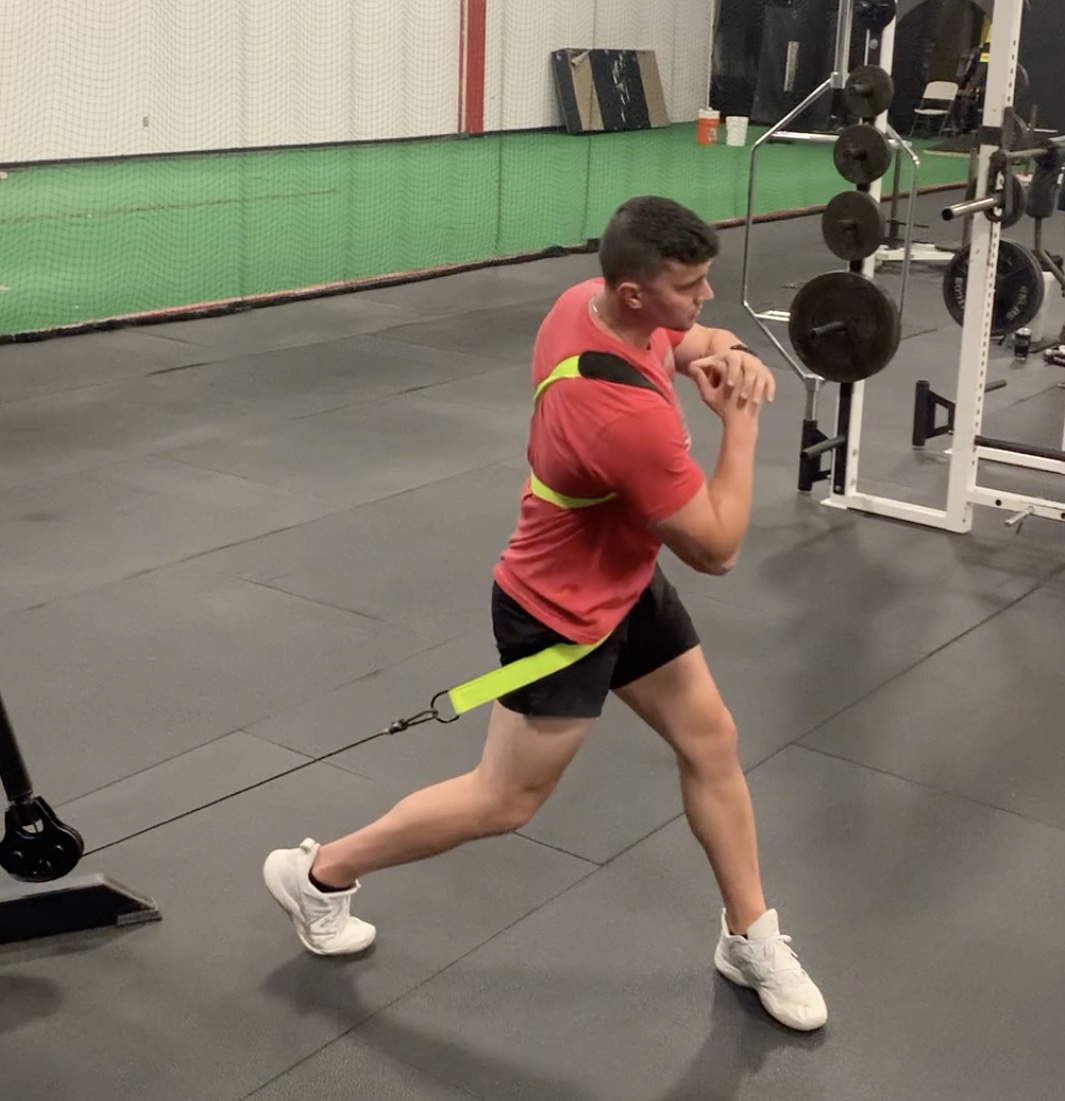
1. 3D Strap Assisted Coil from Low Setting - this an awesome "feel" drill for athletes who need to grasp how to leverage the transverse plane (hip rotation) during lower extremity contributions to rotational power.

https://www.youtube.com/embed/0Nd0DKi_0RM

2. 3D Strap Lateral Lunge w/Rotation to Slantboard - this variation builds on the previous option, as you get more range of motion and speed of movement into the coil.

https://www.youtube.com/embed/2sOD9vJbWOE

3. Split-Stance 3D Strap Hip Airplanes - this is an excellent drill for making mobility stick after traditional ground based drills and positional breathing.

https://www.youtube.com/embed/OJzVgfK9WkY

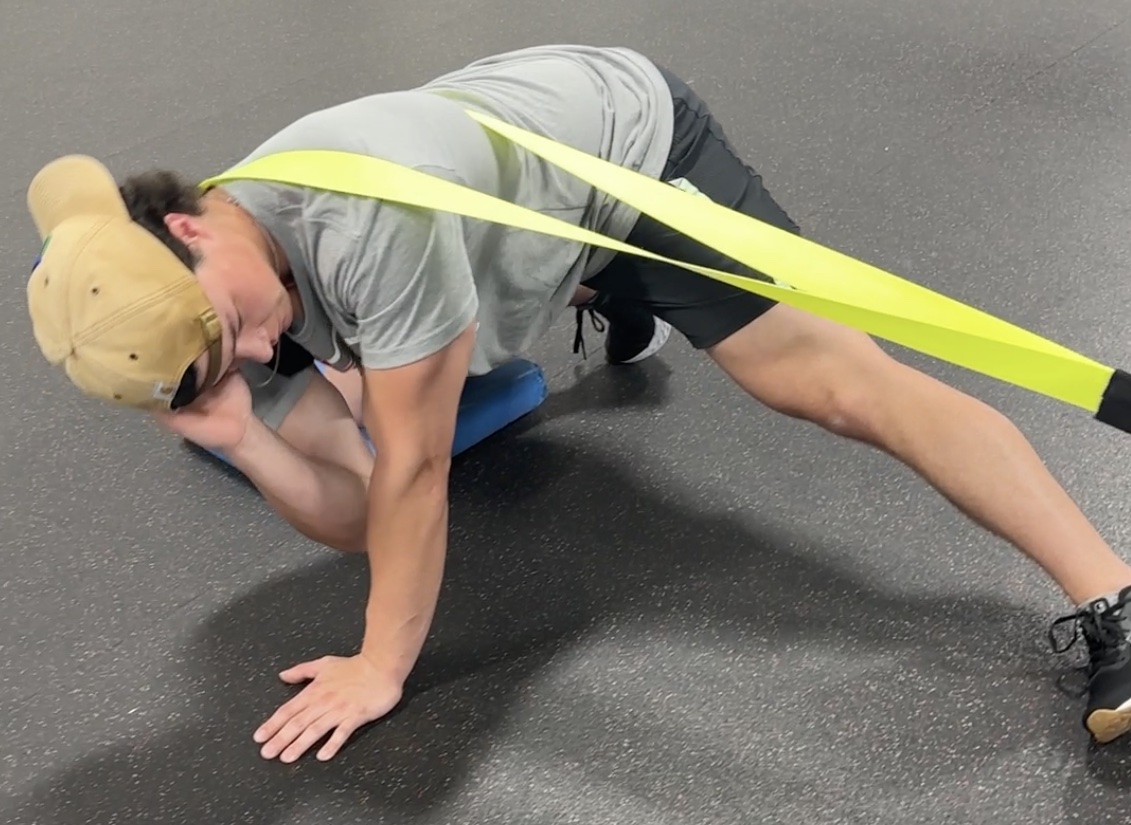
4. Adductor Stretch with Offset 3D Strap Assisted Extension-Rotation - here's a great combination hip and thoracic mobility drill. Normally, it's super advanced, but the strap assistance helps athletes to tap into more of their ROM by minimizing how much they have to compete against gravity.

https://www.youtube.com/embed/VtLr1_gQdXA

As you can see, these 3D straps add a ton of options to your training bag of tricks. I'd strongly encourage you to check them out at www.WhatsThatStrap.com and enter coupon code CRESSEY at checkout for free shipping on your order.

Sign-up Today for our FREE Newsletter and receive a four-part video series on how to deadlift!

Name
Email
Read more

Our Favorite 3D Strap Drills – Installment 1

We use the 3D Strap a ton with our athletes, so I encouraged Cressey Sports Performance - MA coach Ethan Dyer to record a few of his favorite drills to share with a larger audience. Here they are (and I'll be chiming in with a second installment of this article myself very soon).

Also, if you haven't started using the 3D Strap with your athletes, I'd strongly encourage you to do so; they add a ton of options to your training bag of tricks. Definitely check them out at www.WhatsThatStrap.com and enter coupon code CRESSEY at checkout for free shipping on your order.

Enjoy! -EC


1. 3D Strap Lateral Sled Drag: One of the most notable benefits of the 3D Strap for baseball and softball athletes is that it doesn’t require any gripping. This means we can load up activities like reverse and lateral sled drags without having to worry about the neural and local fatigue associated with frying our grip and forearms, particularly in-season.

https://www.youtube.com/embed/rN3eWdUqnNs

2. 3D Strap Lateral Rotation: This is a piece of equipment that allows for significant tactile and sensory feedback while executing certain drills, like this lateral rotation. The helical, compressive forces and leading effect that the strap provides is unique and gives us plenty of ‘feel’ based options for our rotational athletes.

https://www.youtube.com/embed/zPc3c-3emb8

3. 3D Strap-Assisted Bowler Squat: The 3D Strap provides a ton of value for loaded single leg activities like this bowler squat. In addition to the previously mentioned ‘feel’ based input we get, we’re able to add significant loading to exercises where we might be looking for resisted or assisted range of motion.

https://www.youtube.com/embed/hXWuLpEPCS0

4. Split-Stance 3D Strap-Resisted Row w/Alternate Arm Reach: Even in post-surgical contexts, we can drive rotation through the upper body without needing to do any gripping. This may be less significant loading than an actual cable row, but if we’re looking to restore / maintain range of motion at the ribcage post-surgery, this kind of activity can be an excellent choice.

https://www.youtube.com/embed/v9Iq6CfAmPE

5. 3D Strap-Resisted Heiden with Stick: The strap isn’t a band, meaning it’s non-elastic. Because of this we can get more out of activities like resisted jumps for certain athletes. When we yank on the strap the force is applied over a very small amount of time, which should bias getting into and out of the cut with greater velocity. This cannot be done to the same extent with a band, making the 3D Strap a useful tool while programming for change of direction or return to run progressions.

https://www.youtube.com/embed/zNCIR4VxFEU

As you can see, this is an awesome piece of equipment that can really yield a variety of training benefits. We'll be back soon with more of our favorites, but in the meantime, you can check it out at www.WhatsThatStrap.com and enter coupon code CRESSEY at checkout for free shipping.

About the Author

Ethan Dyer serves as a Strength & Conditioning coach at Cressey Sports Performance. He started as a client at CSP and eventually went on to intern at CSP-MA. Following another internship at Indianapolis Fitness and Sports Training, Ethan joined the CSP-MA team. He was a pitcher at the College of the Holy Cross before transferring to Endicott College to complete his undergraduate work with a major in Exercise Science and minor in Psychology. A Certified Strength and Conditioning Coach through the National Strength and Conditioning Association, Ethan has been a volunteer with both the Miracle League and Special Olympics, and has a passion for working with young athletes to help them fall in love with training while avoiding injury. You can follow him on Instagram at @Ethan___Dyer.

Sign-up Today for our FREE Newsletter and receive a four-part video series on how to deadlift!

Name
Email
Read more

Exercise of the Week: Bear Position to Thoracic Bridge

Today’s guest post comes from Cressey Sports Performance – Florida coach and internship coordinator, Andrew Lysy.

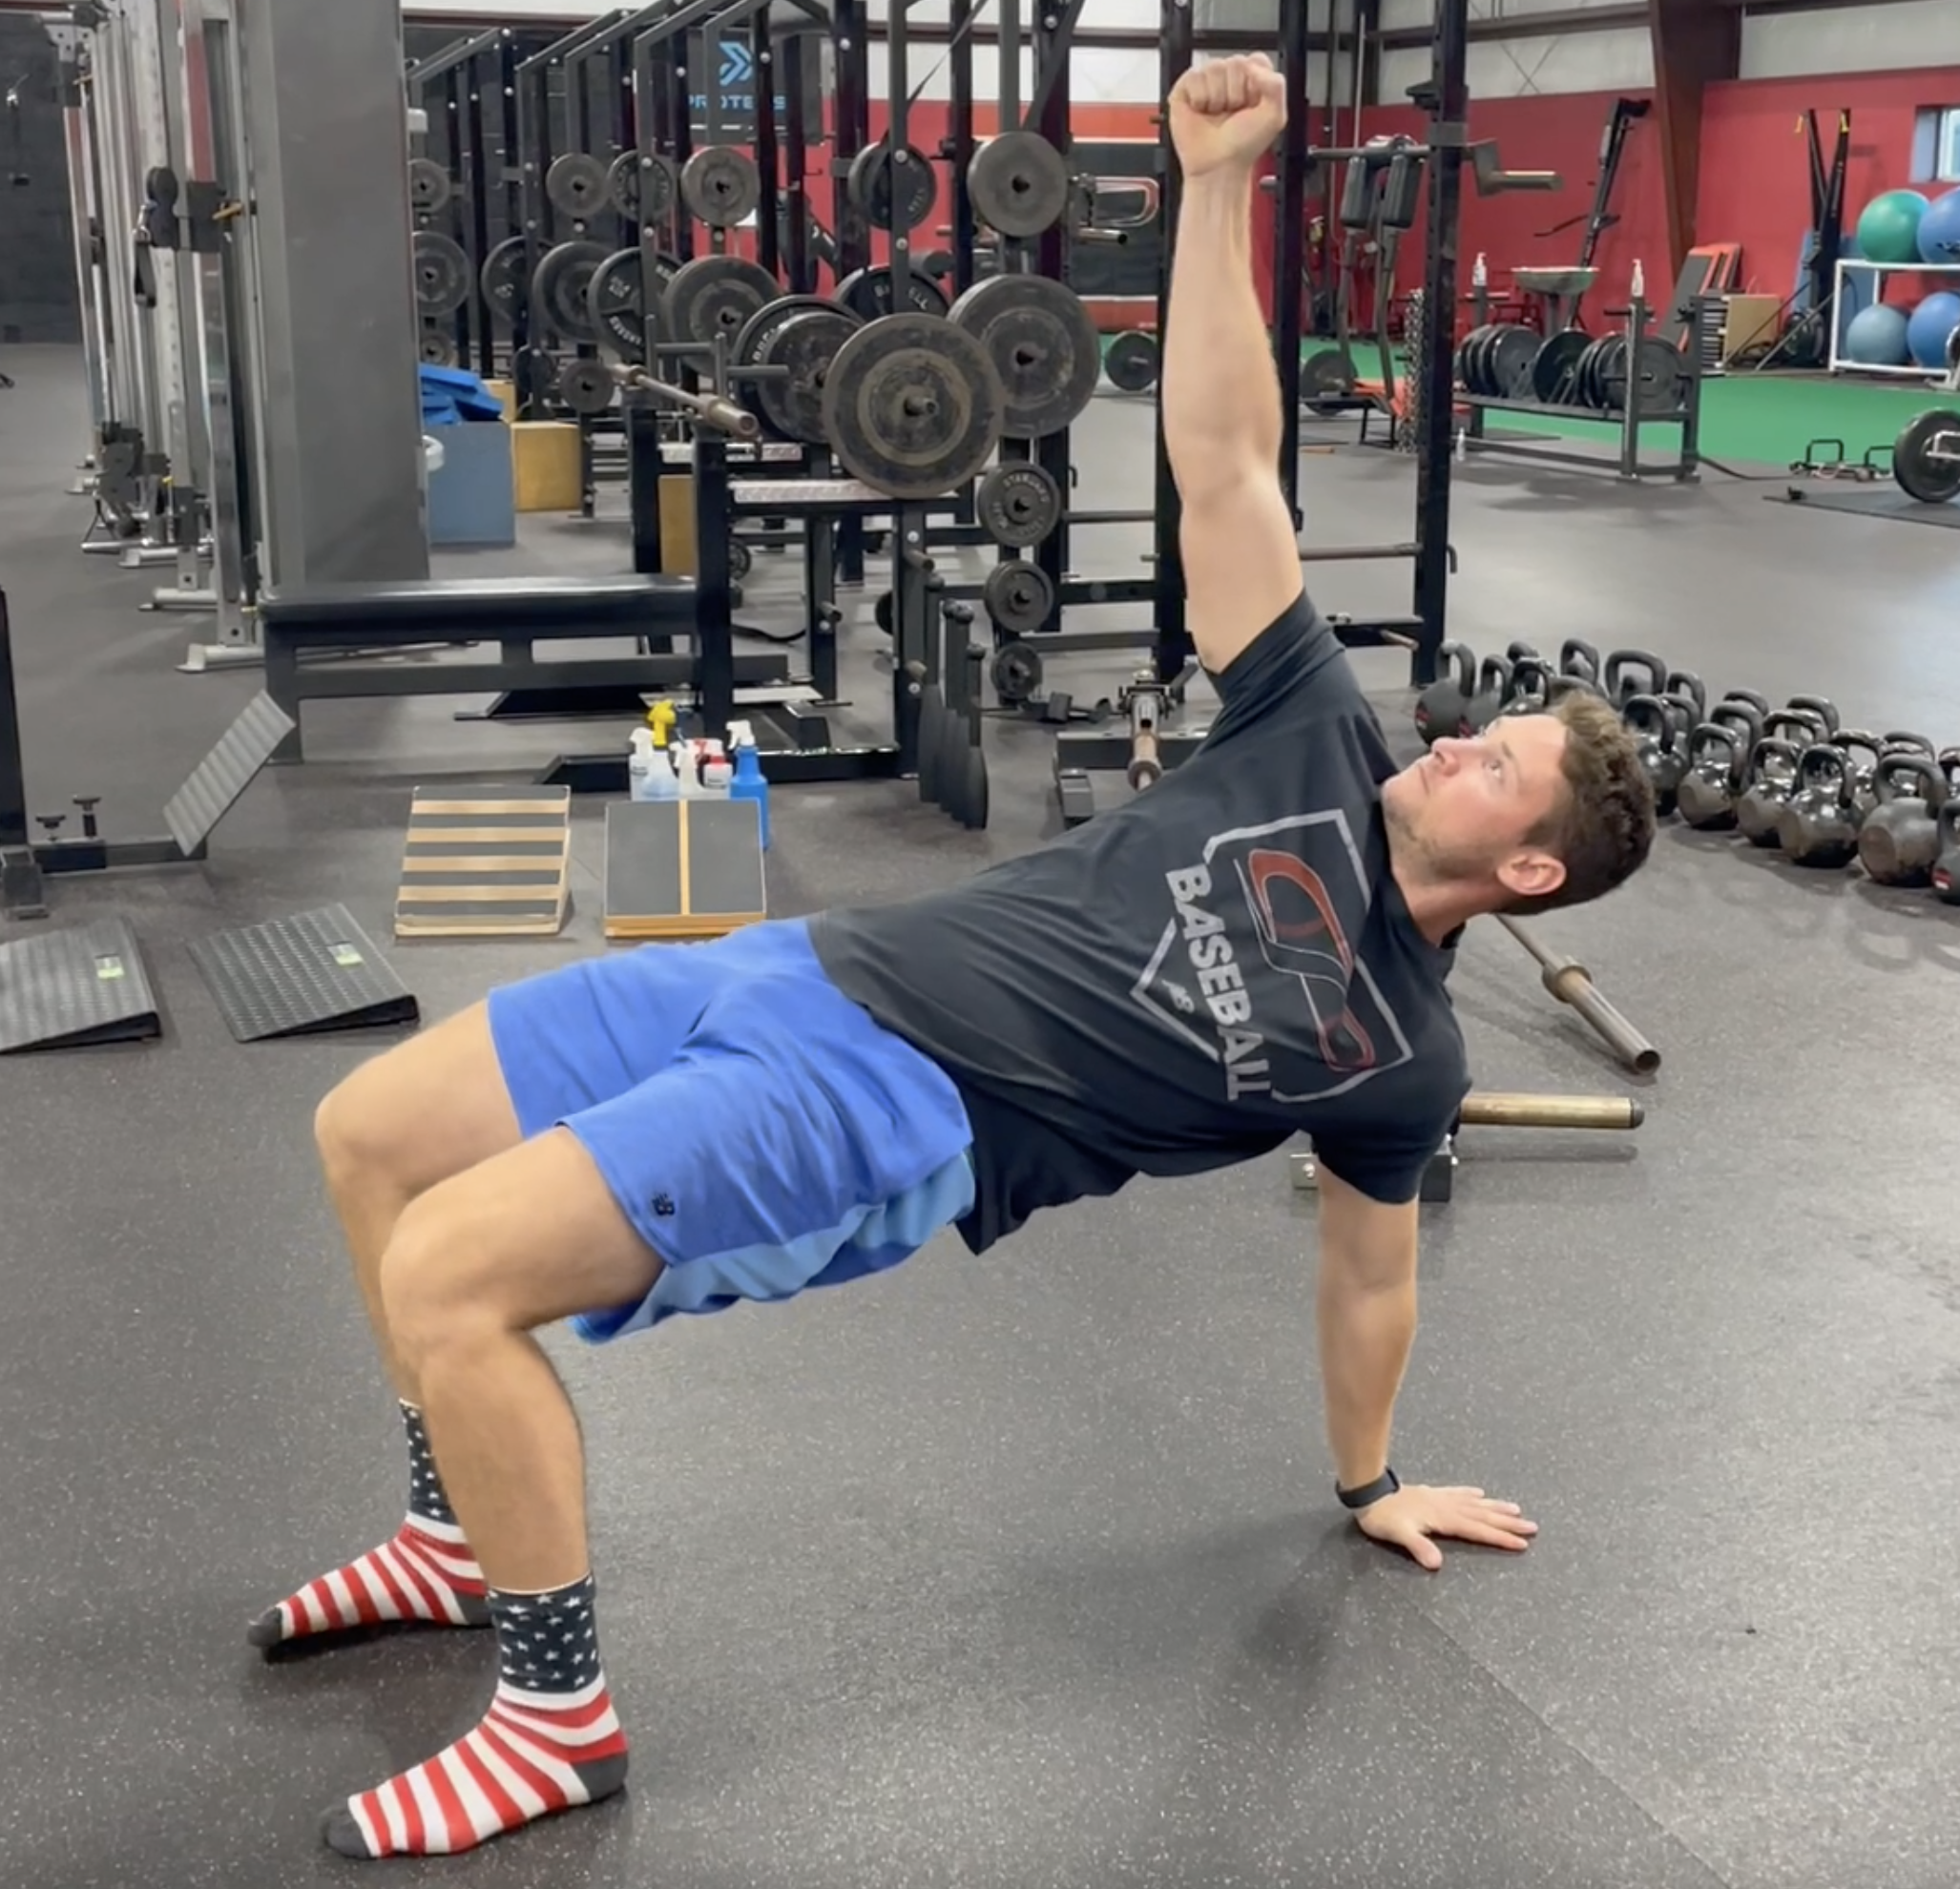
Bear Position to Thoracic Bridge is one of the newer mobility exercises we’ve been using lately to enhance thoracic spine, shoulder and hip mobility.

Unlike many other thoracic mobility exercises, Bear Position to Thoracic Bridge actively stretches out your biceps and pecs in a closed-chain manner.

In addition to creating length in the biceps and pecs, the athlete will also be working on anterior expansion, manubrium expansion and shoulder extension, which can help you regain shoulder internal rotation.

A few important cues for properly executing Bear Position to Thoracic Bridge:

1. Actively push away from the ground with your legs and arm/hand. While pushing away from the ground, create a cork-screw feeling with your hand so that your shoulder doesn’t tip/dip forward!

2. While extending your hips, maintain a straight line from your shoulders to your knees. This will help resist excess extension from your lower back and put all of the pressure on your hips!

3. Your feet and thighs should be parallel to each other.

This exercise is commonly used as a warm-up, mobility exercise or filler. We’ve used it for 2-3 sets for 5-8 reps. We’ve also held the Thoracic Bridge position for breaths.

Note from EC: If you're looking to learn more about how I evaluate, program, and coach at the shoulder joint, be sure to check out my popular resource, Sturdy Shoulder Solutions. It's on sale for $40 off through this Sunday at midnight; just enter the coupon code APRIL22 at www.SturdyShoulders.com. 

Sign-up Today for our FREE Newsletter and receive a four-part video series on how to deadlift!

Name
Email
Read more

Why the Overhead Angle Matters in the Pitching Delivery

The overhead view in a pitching delivery can enable you to see certain things that can’t be appreciated from other perspectives. Foremost among these is the ability to differentiate between thoracic rotation (upper back motion) and horizontal abduction (shoulder motion).

In this image taken just prior to stride foot contact, Gerrit Cole's pelvis has already rotated counterclockwise toward the plate while his torso is still rotating clockwise. This is the hip-shoulder separation throwers seek for generating big time velocity.

However, when a thrower lacks thoracic rotation - or gives up thoracic rotation too early (usually by chasing arm speed too early in the delivery) - he’ll often resort to creating excessive horizontal abduction (arm back) to find the pre-stretch he wants to generate the velocity he covets. This is not only an ineffective velocity strategy, but it also can increase anterior shoulder and medial elbow stress - all while leading to arm side misses, accidental cutters, and backup breaking balls.

Over the past few years, I’ve heard of a few pitchers being advised to work to increase the horizontal abduction in their deliveries. I don’t think you can make this recommendation without the overhead view, and even then, it’s likely taking a distal (arm) solution to a proximal (trunk and timing) problem.

I covered hip-shoulder separation in the pitching delivery in great detail in a free presentation I gave away earlier this year when we launched our podcast. You can still get it by subscribing below:

Join our mailing list to receive podcast updates and my free Hip-Shoulder Separation presentation!

Please complete the form below to subscribe.

 *
 *
 

Read more

Free Presentation: Hip Shoulder Separation in Rotational Athletes: Making Sense of the Thoracic Spine

We're really proud of what we've created with the CSP Elite Baseball Development Podcast. And, we're confident you will really like it, too - so we'd love it if you'd subscribe to the opt-in box below so that we can notify you each time a new episode goes live. To sweeten the deal, to start, everyone will receive free access to my 35-minute presentation, Hip Shoulder Separation in Rotational Athletes: Making Sense of the Thoracic Spine. I delivered this presentation to a packed house at the popular Pitchapalooza seminar, and it's yours free when you opt in.

Only email address is required; you'll be emailed the access link right away (be sure to check your junk mail folder): 

Join our mailing list to receive podcast updates and my free Hip-Shoulder Separation presentation!

Please complete the form below to subscribe.

 *
 *


Enjoy!

 
Read more

Strength and Conditioning Stuff You Should Read: 11/9/18

I hope you've had a good week. To kick off your weekend on the right foot, I've got some good reading from around the strength and conditioning world.

First, though, I just wanted to give you a heads-up that I'll be speaking at Pitchapalooza near Nashville in early December as part of an awesome lineup. You can learn more HERE.

Maximum Strength Training for Tennis: Why You Should Do It - Matt Kuzdub authored a great guest post for EricCressey.com a few months ago, and this was another recent post of his in the tennis world. Much it it could be applied to other sports as well.

Your Glutes Probably Aren't to Blame for Sore Knees, but They Could Still Be Stronger - Here's a solid dose of reality with some actionable strategies from Dean Somerset.

5 Great Analogies for Training Baseball Players - A big part of getting results is clearing communicating with athletes, and analogies are an invaluable way of doing so. This article outlines some of my favorites for working with a baseball population.

Top Tweet of the Week

Top Instagram Post of the Week

Sign-up Today for our FREE Newsletter and receive a four-part video series on how to deadlift!

Name
Email
Read more

Exercise of the Week: Bent-over T-Spine Rotation with Hip Hinge

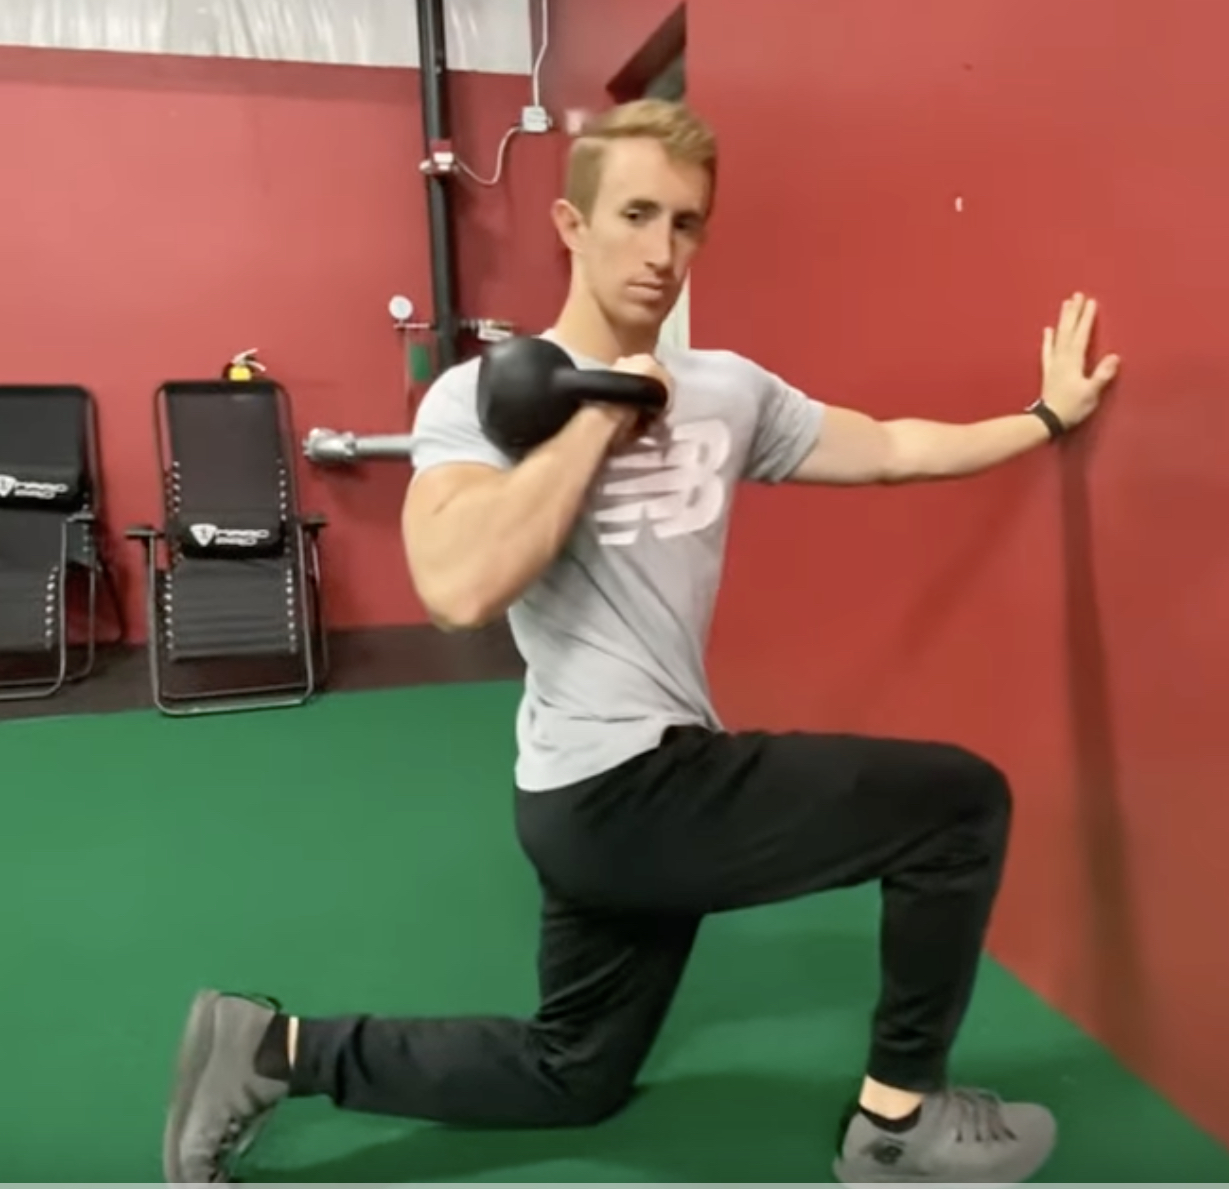
I wanted to introduce you to a new exercise we've been playing around with lately. I created the bent-over thoracic spine rotation with hip hinge because I was looking for a way for athletes to avoid compensatory movements as we worked on thoracic spine mobility in the standing position. Essentially, you'll often see folks with limited thoracic spine mobility move East-West with the hips or laterally flex through the spine as they try to find motion in spite of their limitations. By pushing the butt back to the wall, we effectively block off compensatory hip motion (and work on a better hip hinge pattern at the same time).

Key coaching points:

1. By having the eyes follow the hand, you get some cervical rotation to help things along.

2. Make sure the upper back is moving and you aren't just "hanging out" on the front of the shoulder. This is especially true in a throwing population who may have acquired anterior shoulder laxity.

3. We'll usually do eight reps per side. This can be included as a single set during a warm-up, or for multiple sets as fillers during a training session (we'll often plug it in between medicine ball sets).

4. This is a better option for those who have active range-of-motion limitations to thoracic spine rotation, as opposed to passive limitations. In the case of the passive limitations, athletes are better off with things like side-lying windmills, where they have assistance from gravity (instead of having to compete against it).

To learn more about how we assess, program, and coach around the thoracic spine (and entire shoulder girdle), be sure to check out Sturdy Shoulder Solutions.

Sign-up Today for our FREE Newsletter and receive a four-part video series on how to deadlift!

Name
Email
Read more

Assessments You Might Be Overlooking: Installment 6

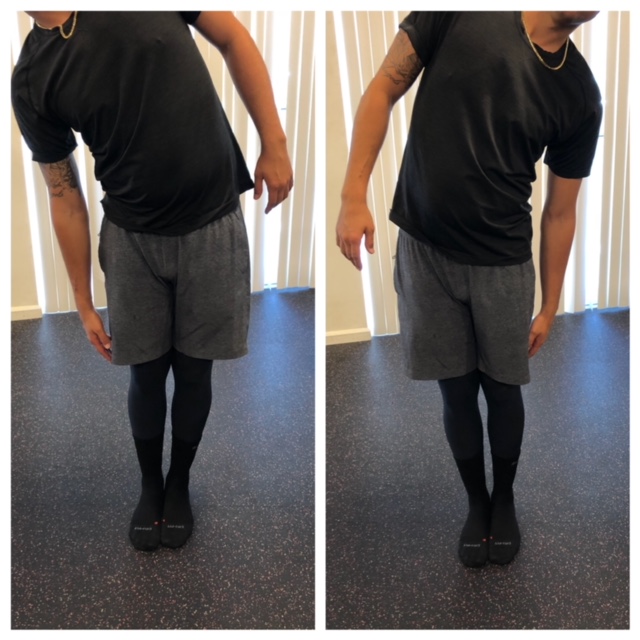
It's been quite some time since I published an update to this series, but some recent professional baseball initial offseason evaluations have had me thinking more and more about how important it is to take a look at lateral flexion.

In the picture above, I'd say that the athlete is limited in lateral flexion bilaterally, but moreso to the left than right. You'll also notice how much more the right hip shifts out (adducts) as he side bends to the left; he's substituting hip fallout for true lateral flexion from the spine. The most likely culprit in this situation is quadratus lumborum on the opposite side (right QL limits left lateral flexion).

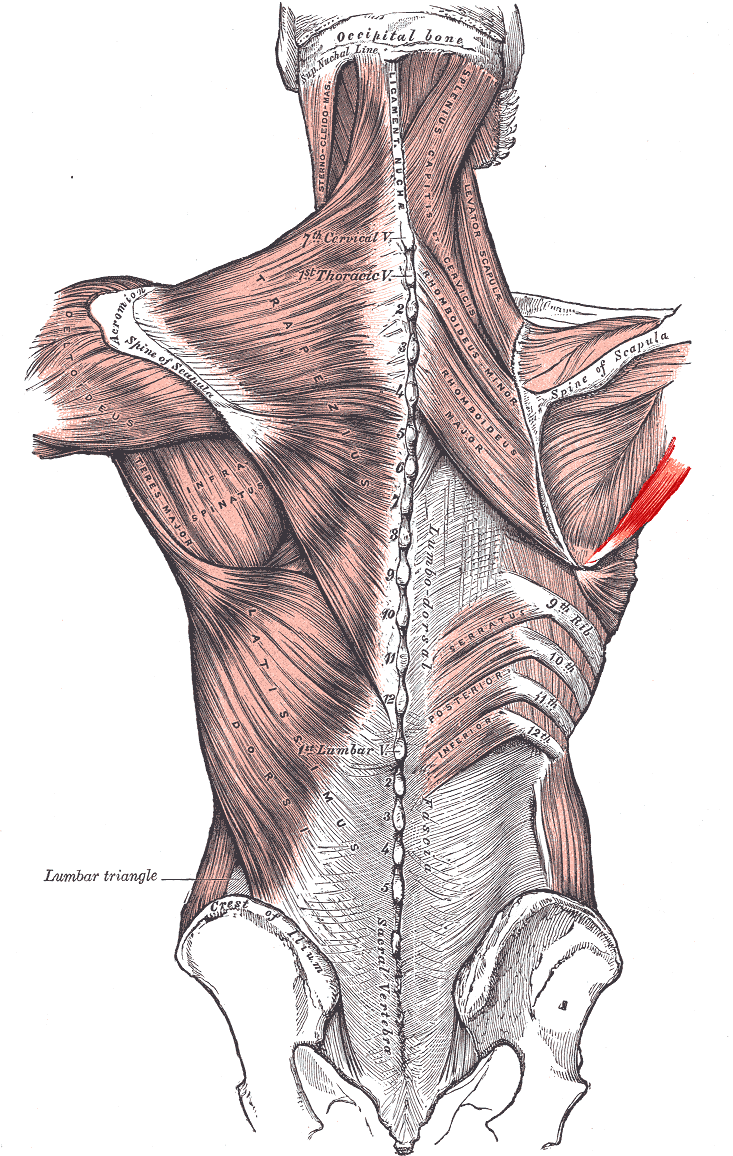
As you can see from the picture below, the triangle shaped QL connects the base of the rib cage to the top of the pelvis and spine.

Stretching out the QL isn't particularly challenging; I like the lean away lateral line stretch (held for five full exhales). This is a stretch that can be biased to target the lat, QL, or hip abductors.

That said, the bigger issue is understanding why a QL gets tight in the first place. As Shirley Sahrmann has written, whenever you see an overactive muscle, look for an underactive synergist. In this case, the right glutes (all of them) are likely culprits. If the gluteus maximus isn't helping with extending the hip, the QL will kick on to help substitute lumbar extension. And, if the gluteus medius and minimus aren't doing their job as abductors of the hip, the QL will kick in to "help out" in the frontal plane. This double whammy has been termed a Left AIC pattern by the good folks at the Postural Restoration Institute, and they've outlined many drills to not only address the apical expansion (which creates length through the QL), but also bring the pelvis back to neutral.

Taking this a step further, typically, those with very overactive QLs will also present with limited thoracic rotation (in light of the QL attachment on the inferior aspect of the ribs), so you'd be wise to follow up this stretch with some thoracic mobility work. The athlete in the example at the top of this article had the most limited thoracic rotation (both active and passive) that I've seen in any pitcher this offseason.

That said, here's a good rule of thumb:

If you have a flat thoracic spine athlete with limited thoracic rotation, look at pectoralis major, latissimus dorsi, and quadratus lumborum. If horizontal abduction (pec) and shoulder flexion (lat) both check out well, go right for QL tissue extensibility (as measured by lateral flexion). It will be absolute game changer - particularly in rotational sport athletes.

If you're looking to learn more about how we assess, program, and coach at the shoulder girdle, be sure to check out my popular resource, Sturdy Shoulder Solutions.

Sign-up Today for our FREE Baseball Newsletter and Receive Instant Access to a 47-minute Presentation from Eric Cressey on Individualizing the Management of Overhead Athletes!

Name
Email
Read more

Stop Thinking About “Normal” Thoracic Spine Mobility

Years ago, I published a post, Tinkering vs. Overhauling - and the Problems with Average, where I discussed the pitfalls of focusing on population averages, especially in the world of health and human performance. I'd encourage you to give it a read, but the gist is that you have to be careful about overhauling a program because you see someone as being outside a "norm" that might have been established for an entire population when they are unique in so many ways.

Thoracic spine mobility is an excellent example. What would be considered acceptable for an 80-year-old man would be markedly different than what we'd want from a 17-year-old teenage athlete in a rotational sport. This athlete, for instance, had some marked negative postural adaptations that contributed to two shoulder surgeries during his time as a baseball pitcher. If he was far older with different physical demands, though, he might have never run into problems.

Lumbar locked rotation is a great thoracic spine rotation screen I learned from Dr. Greg Rose at the Titleist Performance Institute. Briefly, you put the lumbar spine in flexion (which makes lumbar rotation hard to come by) and the hand behind the back (to minimize scapular movement). This allows you to better evaluate thoracic rotation without compensatory motion elsewhere. Check out the high variability among three athletes who are all roughly the same age:

On the left, we have a professional baseball pitcher. In the middle, we have an aspiring professional golfer. And, on the right, we have a powerlifter who's moved well over 600 pounds on both the squat and deadlift. Adaptation to imposed demand is an incredibly important part of this discussion of "normal." The hypertrophy (muscle bulk) that benefits the powerlifter could possibly make the baseball pitcher and golfer worse, but at the same time, I wouldn't necessarily say that the powerlifter is "lacking" in thoracic rotation because you don't need a whole lot of movement in this area for a successful, sustainable powerlifting career.

I should also note that these are all active measures. If we checked all three of these guys passively, we'd likely see there's even more thoracic rotation present than you can see here. And, that can open up another can of worms, as having a big difference between active and passive range of motion can be problematic, too.

The take-home message is that if you're going to call someone's movement quality "abnormal," you better have a clear designation of what "normal" is for their age and sport, as well as what's required for their athletic demands.

For more information on how we assess and train thoracic mobility, I'd encourage you to check out my popular resource, Sturdy Shoulder Solutions.

Sign-up Today for our FREE Newsletter and receive a four-part video series on how to deadlift!

Name
Email
Read more

What (Physically) Goes Into a Good Swing

Cressey Sports Performance athlete Chris Taylor had a big go-ahead 2-run HR last night for the Dodgers - and the second I saw this photo of his swing on Instagram, I immediately got to thinking about how great a representation it is of the demands of the swing.


CT3 for the lead! #LADetermined

A post shared by Los Angeles Dodgers (@dodgers) on

As a right-handed hitter, the pelvis rotates counterclockwise toward the pitcher during the swing. However, "counterclockwise" doesn't really do justice to the fact that it's actually hip movement in three planes: rotation (transverse), abduction (frontal), and extension (sagittal). Additionally, earlier in the swing, the torso actually rotates clockwise to create the separation that allow for greater storage of elastic energy and sets the stage for the barrel getting to the zone at the right time and angle - and for as long as possible. This reminds us that you can't have good swing mechanics if you don't have mobility in the hips and thoracic spine, and adequate stability in the core to prevent any energy leaks.

More specific to this photo, though, is the fact that all that motion from the trailing leg has taken place, which means all the force has been transferred forward - and something has to "accept it." We often use the analogy of riding a bike into a curb; if the curb isn't hard, the kid doesn't get launched over the handlebars. In this case, the "firm curb" is the front leg creating a blocking effect as the hip extensors and external rotators (glutes!) eccentrically control that aggressive force transfer into the lead leg. As you'll see in this photo, sometimes the tri-planar forces are so significant that guys might even roll to the lateral aspect of their shoes. And, unless they're in a great pair of New Balance cleats, they might even "swing out of their shoes" (yes, you'll sometimes see guys fold over the side of cleats that don't have good lateral stability).

Anyway, let's take this example to an untrained 15-year-old who doesn't have the strength, motor control, and mobility foundation that Chris has here. There's a good chance he's going to go to the wrong places to find a lot of this motion to generate, transfer, or accept force - and the most common spot is the lower back. You'll commonly see stress fractures and annoying tightness in this region in these kids because the lumbar spine isn't conditioned to produce force or go through significant rotational motion. Watch one of these kids go through a simple bowler squat and they usually fold up line a lawn chair.

In my experience (both in pitching and hitting), the kids most at risk are the ones who grow quickly at a young age. They have long levers that help them to generate velocity, but insufficient physical strength and range of motion to dissipate these aggressive patterns as they get to this position and beyond. They're all gas and no brakes.

Chicks can't dig the long ball if you're in a back brace because you ignored your hip and thoracic mobility and core stability. Take as much pride in your physical preparation as you do in your swing. Chris sure does!

Sign-up Today for our FREE Baseball Newsletter and Receive Instant Access to a 47-minute Presentation from Eric Cressey on Individualizing the Management of Overhead Athletes!

Name
Email
Read more
Page 1 2 3 4
LEARN HOW TO DEADLIFT
  • Avoid the most common deadlifting mistakes
  • 9 - minute instructional video
  • 3 part follow up series