Home Posts tagged "Scapular Stability" (Page 2)

Optimizing and Progressing Arm Care

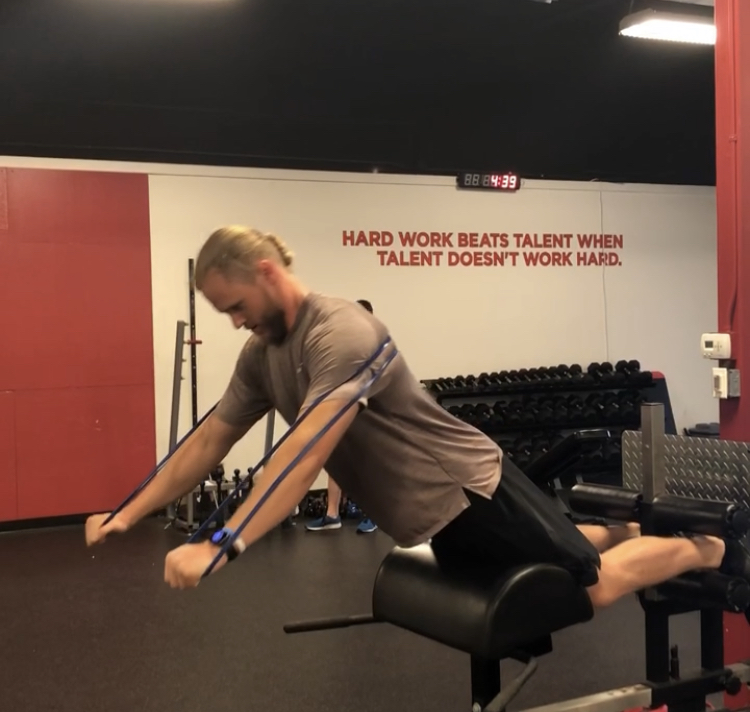
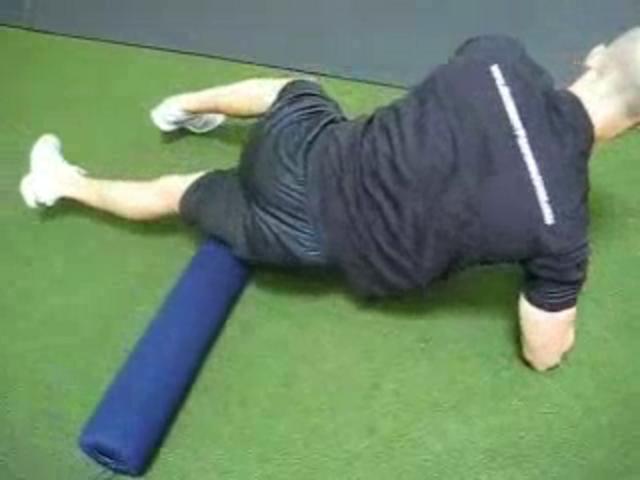
The prone horizontal abduction - also known as a "T" - is well known as a popular arm care exercise that has been around for decades. Unfortunately, it's commonly performed incorrectly. In today's video, I cover the most common mistakes - and then add a progression I like to use with folks once they've mastered the technique. Check it out:

Keep in mind that these cues also apply to "T" drills you perform with bands, TRX, or any other implements as well.  

Sign-up Today for our FREE Baseball Newsletter and Receive Instant Access to a 47-minute Presentation from Eric Cressey on Individualizing the Management of Overhead Athletes!

Name
Email
Read more

Random Thoughts on Sports Performance Training – Installment 26

It's time for the January edition of Random Thoughts on Sports Performance Training. Before I get to it, though, just a friendly reminder that today is also the last day of the introductory $75 off sale on Cressey Sports Performance Innovations. Don't miss out on this chance to get our popular resource at a great price using the coupon code APRIL2020. You can learn more HERE

CSPInnovations-02-2

Since my presentation is "Scapular Control: Implications for Health and High Performance," I thought I'd take an upper extremity approach to this month's cues.

1. If you want to relax the neck, talk or exhale.

One of the biggest mistakes I see athletes make when they're doing upper body work is aggressively recruiting the muscles surrounding the neck. In particular, we know that a hypertonic sternocleidomastoid (SCM) and scalenes can be implicated in not only neck pain, but also headaches and thoracic outlet syndrome.

tos3

In most cases, simply telling an athlete to relax or repositioning their head/neck will get the job done. However, another strategy you can employ is to have them exhale through the exertion phase, or simply talk during the set.  Both the scalenes and SCM are accessory muscles of inhalation and this forces them to relax a bit so that you can build tension where you really want it.

2. When it comes to scapular control, nothing beats kinesthetic awareness coaching cues.

As I've written at length in the past, I'm a big believer in categorizing all athletes by their dominant learning styles: visual, kinesthetic, and auditory.

Visual learners can watch you demonstrate an exercise, and then go right to it.

Auditory learners can simply hear you say a cue, and then pick up the desired movement or position.

Kinesthetic learners seem to do best when they're actually put in a position to appreciate what it feels like, and then they can crush it.

My experience with teaching scapular positioning has been that option #3 - actually putting someone in the position you want - is the quickest and easiest way to teach someone about scapular positioning. This is likely because:

a. The scapula is a unique bone with some unique movements (upward/downward rotation, anterior/posterior tilt) that aren't familiar to most people

b. You're always wearing a shirt when demonstrating drills, which makes it harder to see these subtle movements as they occur.

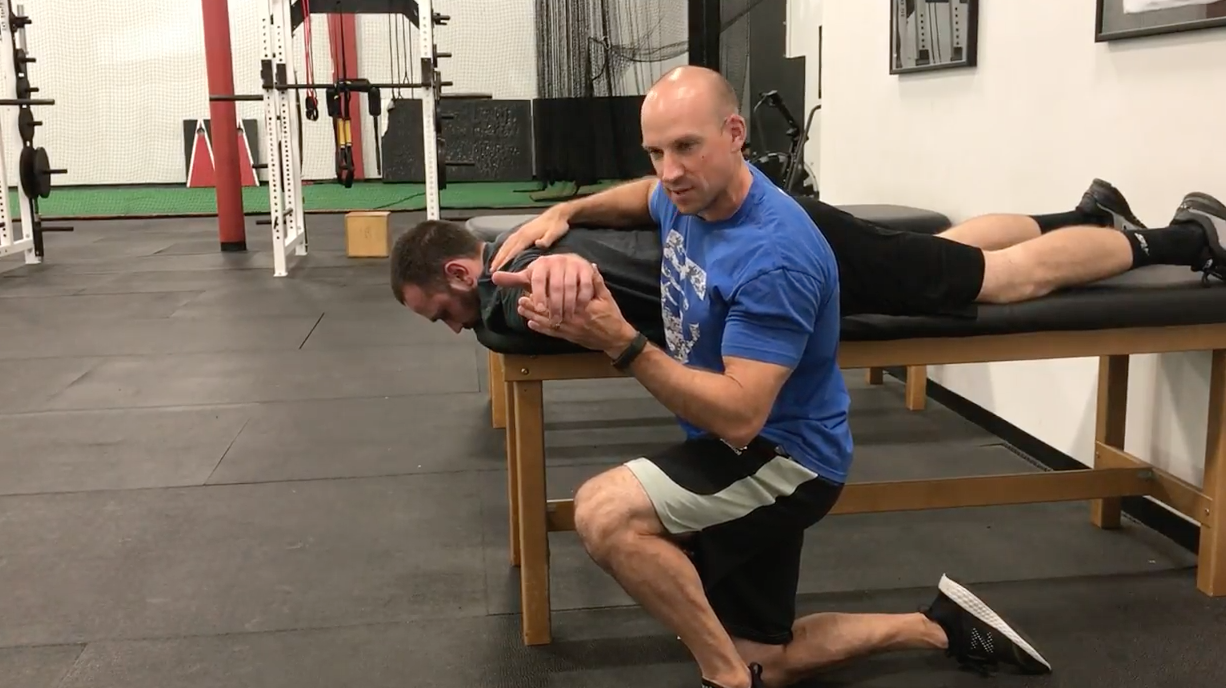
When in doubt, put a shoulder blade in the position you desire and then ask an individual to hold it and own it.

3. Uncontrolled end ranges are bad for the scapulothoracic joint, just like every other joint.

Here's something to consider...

We know that if you repeatedly flex and extend the spine to its end-ranges, you'll eventually wind up in trouble - whether it's a herniated disc, stress fracture, or some other pathology.

We also know that if you repeatedly hyperextend an elbow, you'll eventually wind up with loose bodies in the joint, early osteoarthritis, or a torn ulnar collateral ligament.

The point is that it's important to have sufficient range of motion - and stability in that ROM - but not excessive ROM. Hanging out at any end range probably isn't a good idea.

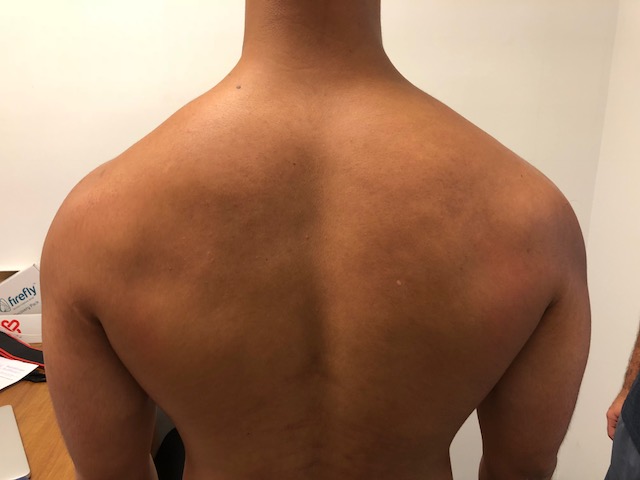
Interestingly, though, we overlook the fact that the scapulothoracic joint - the interaction of the shoulder blade with the rib cage - is subject to these rules. In particular, one issue that sometimes emerges is an excessive "military posture" of scapular adduction (toward the midline) and depression when folks are cued "down and back" without understanding what it really means.

adductedscap-300x162

These athletes often get neck/upper back flare-ups when they do a lot of deadlifting, carries, or even too much horizontal pulling. The shoulder blades are so far pulled back that it becomes a faulty stabilization strategy instead of a strong base from which to perform.

4. A PVC dowel is a super affordable way to do a lot of great things for your upper body work.

I was looking at a program I wrote for one of our pro guys yesterday, and realized that we used the PVC dowel for three different exercises in a single training day. That's as much as barbells and dumbbells - but you can buy the piece of PVC for around $1. You won't find a piece of training equipment that offers that kind of bang for your buck - and this realization made me think back to this video from a few years ago. These options are really just the tip of the iceberg, too:

Have a great Sunday - and don't forget about the CSP Innovations sale that ends tonight! Just enter coupon code APRIL2020 at www.CSPInnovations.com

lineup-1   

Sign-up Today for our FREE Newsletter and receive a four-part video series on how to deadlift!

Name
Email
Read more

Coaching Cues to Make Your Strength and Conditioning Programs More Effective – Installment 14

I haven't posted an update to this popular coaching cues series since December, so I figured this article was long overdue. Here are a few coaching cues we use regularly with our clients at Cressey Sports Performance:

1. "Keep your hips in the hallway."

Birddogs are a fantastic exercise for building core stability and educating individuals on how to differentiate between hip and lumbar spine (lower back) movement. Usually, though, folks just discuss differentiating these motions in the sagittal plane, so the focus is on hip flexion/extension vs. lumbar flexion/extension. In the process, a lot of folks overlook what is going on in the frontal and transverse plane. A lot of side-to-side movement is a good sign that the athlete doesn't have sufficient rotary stability (control of the center of mass within a smaller base of support).

A cue I've found to work great is to put my hands about 1" outside the hips on both sides, and to cue the athlete, "Keep your hips in the hallway." If the outside of the hips contact my hand, it's a sign that they've lost control of the frontal and transverse plane.

2. "Scaps to the sky."

We coach our wall slides with upward rotation and lift off a bit differently for just about everyone that comes through our doors. Really, it comes down to appreciating what their starting scapular positioning is. If someone is really anteriorly tilted, we'll guide the scapula into posterior tilt. If they have more of a "scaps back" (adducted) military posture, we'll help the shoulder blades to get out and around the rib cage. If someone starts in a more depressed (low shoulder) position as in the video below, we might cue them to incorporate a shrug to facilitate better upward rotation.

When you teach the drill, though, you want to make sure that the motion is coming from not just movement of the humerus (upper arm) on the scapula (glenohumeral movement), but moreso from movement of the scapula on the rib cage (scapulothoracic). I love the "scaps to the sky" cue for this reason. Usually, I'll manually help the shoulder blades up a bit, too.

3. "One inch per second."

I blatantly stole this one from Shane Rye, one of my business partners at Cressey Sports Performance - Florida. When athletes foam roll, they always seem to have a tendency to race through each "pass." It's far better to slow down, recognize areas that need more attention, and gradually work your way along. The "one inch per second" cue always seems to get athletes to pace themselves better.

101989867_640

Sign-up Today for our FREE Newsletter and receive a four-part video series on how to deadlift!

Name
Email
Read more

Random Thoughts on Sports Performance Training – Installment 18

It's time for the May installment of my random thoughts on sports performance training. I never really expected this series to last this long, but I'm enjoying it and the feedback has been awesome, so we'll keep it rolling. Here goes...

1. Don't eliminate internal focus cues altogether.

I'm a big fan of external focus cues. As an example, I've had much better luck with saying "show me the logo on your shirt" than "pull your chest up" when coaching a deadlift. Effectively, individuals seem to perform better when we let them organize themselves to their surrounding environment (in this case, the logo on the shirt), as opposed to us sending mixed messages that might interfere with how they would naturally figure out how to organize the body for optimal performance. The key word here, however, is performance. If you're just looking to run faster, jump higher, or throw harder or farther, external cues are your best bet.

athletics-649650_960_720

What happens is there is aberrant movement, though? We've always heard that athletes are great compensators. If we just tell an athlete with very limited hip extension to "push the ground away" when he sprints, isn't he just going to continue to jack his lower back into excessive extension when the better long-term strategy is to get the hip extensors to do the job? To this point, there is actually some research (examples here and here) that internal focus cues definitely still have their place, especially when trying to modulate muscular recruitment patterns on single-joint exercises. I use internal focus cues (usually with tactile facilitate, or touching the region in question) every day to get better positional awareness and recruitment patterns, particularly with our arm care drills.

If you had to put me on the spot, I'd say that external focus cues are better and definitely a good place to start. I don't think we should throw the baby out with the bath water, though; internal cues definitely should always have a place in your coaching toolbox.

2. Barefoot deadlifting doesn't just clean up movement quality; it also makes it easier to coach.

I've written a lot in the past about how I like to have our athletes deadlift barefoot or in minimalist sneakers. Because the deadlift is a posterior chain dominant exercise and we want the athletes to think about driving their heels through the floor, it seems only fitting to make it easier for those heels to be in close proximity to the floor. Additionally, given that some people have mobility or stability restrictions that make it hard to get all the way down to the bar without compensation, being barefoot actually shortens an individual's range of motion by an inch or so. 

That said, there are two technique flaws you can spot easier in a barefoot scenario. First, you never want to see an athlete deadlift on a pronated foot; rather, a supinated foot gives us the rigidity we need to put force into the ground. You'll commonly see athletes "spin out" and dump into pronation like this, though.

IMG_5887

Second, you can more easily spot what the toes are doing. Often, when someone has a faulty hip hinge pattern, they'll simply pull the toes up rather than maintaining "tripod foot." This is most easily recognized on the decent of the lift.

IMG_8741

You can certainly spot these issues when athletes have shoes on, but they are definitely easier to pick up in the barefoot scenario.

3. If you're successful in one rotational sport, you've got a higher likelihood of success in other rotational sports.

A few days ago, Bartolo Colon hit his first career home run at age 42. This feat is is impressive in itself, but it's more surprising to the casual observer when you realize that Colon is a) a pitcher and b) obese.

For me, though, this wasn't nearly as surprising as it was entertaining. Efficient rotation is efficient rotation, whether you're a hitter, pitcher, hockey player, or golfer. There's a reason hockey and baseball players are usually excellent golfers without much formal skill instruction; they understand sequencing from the ground up.

Bartolo Colon has 17 years of Major League Baseball service time, has thrown over 3,000 innings, and has won 221 MLB games. You break down or lose effectiveness long before any of those numbers happen if your body doesn't "get" efficient rotation.

4. A little upper trap rolling can go a long way in improving upward rotation of the scapula.

Serratus anterior, lower trap, and upper trap work together to get the upward rotation of the scapula that we want with overhead movement.It's important, though, that they all work together to do this. If you want to get up to speed on upward rotation, give this video a watch:

If you've read this blog or followed me on YouTube for any length of time, you've probably realized that I'm a huge serratus anterior guy. It's really important that you get serratus anterior going to create the rotational component of upward rotation that gets the shoulder blade around the rib cage. I have quite a few serratus activation videos (examples here, here, and here), but I think it's important to realize that if someone doesn't have good serratus recruitment, they'll often create a pure scapula elevation (shrugging) pattern instead of the clean upward rotation we want. Effectively, upper trap and levator scapulae can pick up the slack and do too much work. When I see this pattern, I'll often encourage individuals to try out a little bit of upper trap rolling with a lacrosse or baseball to reduce the bad stiffness "up top" before we get to work.

Sign-up Today for our FREE Newsletter and receive a four-part video series on how to deadlift!

Name
Email
Read more

Exercise of the Week: Resisted Scapular Wall Slides

Today's "Exercise of the Week" guest post comes from Lee Boyce. Enjoy! -EC

One of the basic exercises that people are taught to practice for improved shoulder rotation, upper back activation, scapular mobility and anterior muscle release as a by-product is the standard scapular wall slide. To do them, a lifter would simply stand with the heels, butt, upper back, shoulders and full arms and hands against the wall, reduce the lower back arch, and slide the hands up and down, mimicking a full shoulder press movement pattern.

Regressing this movement is as simple as taking the feet a few inches away from the wall and assuming position otherwise. Progressing this movement, however, is another story.

The problem is that people adapt quickly to an unloaded mobility drill, and because of this, the wall slide can become another non-transferrable “skill” that doesn’t carry over to generally improved posture or performance. Moreover, depending on whether the humerus is properly nested in the glenoid fossa to begin with, the wall slides themselves may always pose a problem from a biomechanical perspective. To help this cause, adding some mild resistance can “remind” the muscles of the rotator cuff to center the humeral head in the socket and create a much more effective external rotation position. Plus, using a neutral grip via ropes (as compared to a palms-forward grip) creates a much more ideal (and shoulder friendly) environment for external rotation that can act to counter anterior shoulder glide.

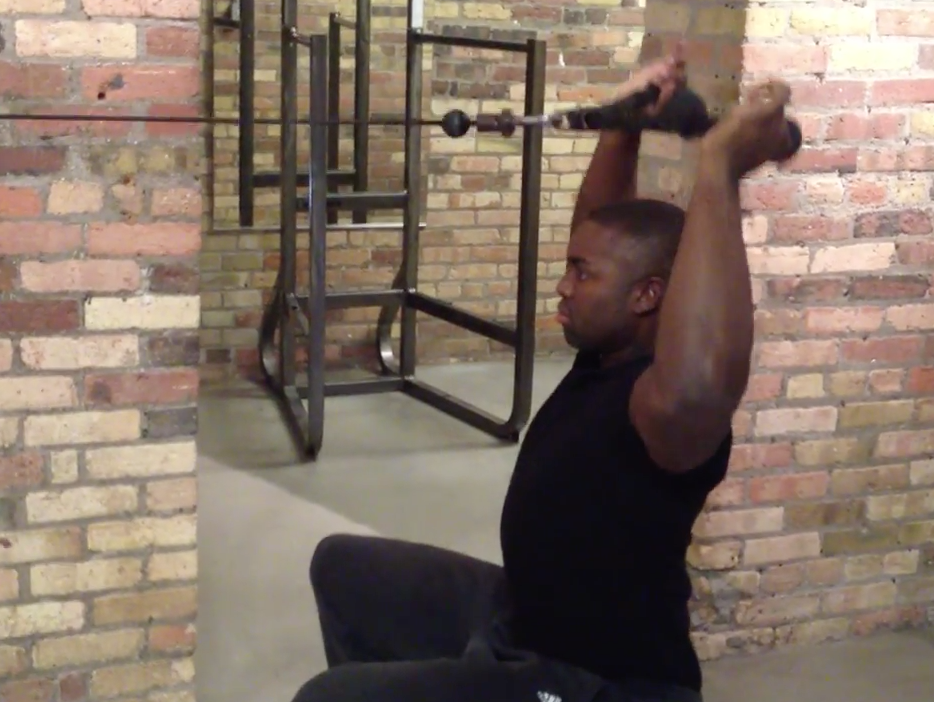
For resisted scapular slides, I like using a cable pulley, and performing the lift from a seated position. It’s a bit easier for a lifter to focus on avoiding back hyperextension, which is a common compensation pattern when lifters have insufficient shoulder mobility.

This movement creates a force angle that works against the standard slide pattern, so keeping the hands and arms moving along the same plane becomes a much more challenging task for the scapular muscles. It’s easy to “let up” and allow the hands and arms to drift forward. To view the movement in action, watch the video below.

Coaching Cues

1. Have the athlete sit squarely on a box or bench. The closer parallel the box puts him in, the better.

2. Set up the cable pulley and ropes in a position just above head level. This way, at the top position, the force angle won’t be strictly downward, and there will be ample tension throughout.

3. If the lifter is still novice or intermediate level as far as shoulder mobility and control goes, a neutral grip is recommended for reasons mentioned above. If the lifter is more advanced, he can feel free to pinch-grip between the thumb and first finger, and face the palms forward.

4. During the movement, avoid slipping into lower back hyperextension; maintain thoracic region extension; and be sure to maintain neutral head posture. Also, avoid letting the elbows fall out of line with the hands in the vertical plane.

5. Your target areas are the rotator cuff muscles, rear deltoids, and lower traps (as you raise the weight further overhead). When you start feeling this in other areas like the biceps and upper traps, readjust positioning and continue.

6. The exercise is very specific, so it shouldn’t take much weight for it to be effective. 15-20lbs of resistance on most machines is usually plenty.

7. The movement won’t work if it’s done in a rush. Think of a 2121 tempo as a solid guideline.

8. Use higher reps to build up the muscular endurance of these muscle groups.

9. Your range of motion should replicate your typical dumbbell shoulder press – meaning the rep begins very close to the shoulder level, and ends at a full arm extension overhead.

10. Through the movement, remember to keep the hand separated (pull the rope handles apart) as much as possible. Doing so keeps the upper back engaged, avoids internal rotation, and keeps the hands stacked over the shoulder, where they belong.

About the Author

Lee Boyce (@CoachLeeBoyce) is a strength coach, writer, and former collegiate level sprinter and long jumper, based in Toronto, Canada. In 2013, he was named to the training and treatment staff for team Jamaica at the Penn Relays . He’s regularly featured in the largest fitness publications as a writer. Visit his website at www.LeeBoyceTraining.com or check him out on Facebook.

Sign-up Today for our FREE Newsletter and receive a four-part video series on how to deadlift!

Name
Email
Read more

The Best of 2015: Strength and Conditioning Videos

With my last post, I kicked off the "Best of 2015" series with my top articles of the year. Today, we'll highlight the top five videos of the year. These videos only include instructional videos, not quick exercise demonstrations.

1. Avoid this Common Wall Slide Mistake - I'm a huge fan of wall slides for teaching good scapular upward rotation. Check out this video to see if you're making a common mistake on this front:

2. Steer Clear of this "Shoulder Health" Exercise - Continuing with the shoulder theme, here's a drill I don't particularly like. The good news is that I propose a suitable alternative. 

3. Serratus Anterior Activation: Reach, Round, and Rotate - This video covers some of our common coaching cues for a different variation of wall slides than featured in video #1.

4. 3 Back to Wall Shoulder Flexion Cues - This drill is both a great training exercise and an assessment. With the right cueing, you can clean the pattern up pretty quickly, in most cases.

5. Exercise of the Week: Split-Stance Anti-Rotation Medicine Ball Scoop Toss - This is one of my favorite medicine ball exercises for early on in training progressions. 

I'll be back soon with the top guest posts of 2015!

Sign-up Today for our FREE Newsletter and receive a four-part video series on how to deadlift!

Name
Email
Read more

Understanding Scapular Positioning in the Throwing Motion

Today's guest post comes from Cressey Sports Performance - Massachusetts pitching coordinator, Matt Blake (@Blake_Matt). Matt is an integral part of the Elite Baseball Mentorships team. Enjoy! -EC 

At a recent conference, Eric Cressey gave a presentation that tackled the importance of baseball professionals understanding scapular mechanics and the integral role they play in the throwing athlete’s kinetic chain. Eric Schoenberg also recently showed a great drill to incorporate scapular motion into the kinetic chain of activity. Given that I’m the third member of the Elite Baseball Mentorships team with these two, I figured I might as well chime in to highlight its importance from my perspective as well.

This is an important discussion to have because it can help demonstrate the need for all phases of development to work together to keep the high-level thrower operating on all cylinders. If we’re all speaking the same language, we can work to build the athlete’s awareness for their overall movement and integrate the education from the warm-up through the initial phases of the throwing progression.

If we’re all saying different things to the athlete using our own jargon, it’s easy for them to misinterpret the carryover of certain drills, exercises, and concepts across channels. If we all lay down similar verbiage in our conversations with the athlete regarding their prehab work, dynamic warm-up, strength training and throwing motion, it makes it a lot easier for them to appreciate the importance each piece holds in the puzzle.

In order to get started, let’s look at where the scapula is positioned and introduce its fundamental movements so we can begin to appreciate its role in the kinetic chain.

scaps1scaps2

When looking at the scapula’s position and actions, you have to acknowledge the importance of its relationships with the rib cage and the humerus. These relationships are integral in tying the torso and the arm action together in a high-level throw. These interactions between the thoracic region, scapula and humeral head may be the most overlooked or misunderstood components of the delivery – especially for the average coach who has no anatomical background.

The degree of misunderstanding is mainly because the actions are so subtle and can’t be fully appreciated when the athlete throws with their shirt on. This is why its so vital to have a strength/rehab professional in the mix, who can provide a shirtless scapular screen to give us a baseline on where the scapula lies at rest and how it functions in relation to the movement of the arm.
 

Once you can identify how an athlete presents, you can begin to build a more individualized corrective movement progression. This will serve to help the athlete identify and turn on the appropriate movement patterns to keep the humeral head flush with the scapula through its full range of motion. This is essential in the throw, because of the importance of a “clean” arm action to help alleviate some of the stress involved in the high-level motion. For demonstration sake, here’s an example of a HS pitcher, who throws 88-91, with a relatively efficient arm action for his age.

The ability to create elite levels of hand-speed in a durable manner can be won or lost based on how the humeral head functions in conjunction with the scapula. In my mind, this is the crux of the delivery, where you need to be able to tie the “whip-like” arm action into the sequential actions of the torso.

As the thrower engages his landing position, the kinetic forces of the delivery are beginning to flow up through the chain towards the scapula and arm. It’s crucial at this point for the arm to get set up in a sound position to optimize control of the (glenohumeral) joint in an effort to handle the energy that’s about to drive through that portion of the chain towards release. The “optimal” timing of this set-up will be dictated by how the athlete sequences hip and torso rotation, as well as how much laxity they present with, etc. - but for the sake of discussion, we’ll say landing is a crucial checkpoint.

From here, the key actions that we’re going to break out today are upward rotation and protraction. This isn’t to say that they are more important than the other actions, but throughout the season, throwers tend to lose upward rotation from the stress of the throwing motion. With that in mind, let’s identify what it is and how it works with protraction to aid the durability of the high-level delivery.

This concept is something that EC has written and produced videos about countless times over the years, but it continues to be a point that needs to be reiterated time and again. For those who haven’t seen it, this is a great video to consider in this discussion.

From this video, we’ll take it a step further, so you can visualize how this actually plays out in the throwing motion itself.

As you can see, there is a considerable amount of range of motion and control that needs to be in place if you expect to keep the humeral head “centered” from lay-back through the entirety of the deceleration phase. The challenge here is that we can’t always see how the arm action is working with the shoulder blade. One way to combat this is via communicating with your athletes about where they feel their soreness the day after throwing.

Generally speaking, I like to have guys tell me they’re sore near the medial border of the scapula, in the meat of back, where the scapular retractors are eccentrically controlling the scapula as it moves away from the mid-line. If guys are sore near the back, top, or front portion of the shoulder joint itself, then we’re probably getting too much “joint-play” and the humeral head is gliding and translating away from the center of the socket too much during the throw.

If these other patterns of soreness are presenting somewhere along the line, either the rotator cuff wasn’t doing its job, the scapula wasn’t working in sync with the humeral motion, or the thrower’s motion in general is putting them in positions that aren’t utilizing the correct patterns. In this case, let's assume that we did have a “good” post-throwing stress pattern.

Once we’ve identified that we are using scapular upward rotation and protraction to our benefit to control the socket, now we need to work extremely hard to counteract the eccentric damage associated with these actions. This is where the recovery protocol and the warm-up itself are crucial on a daily basis to make sure we’re getting back both the range of motion that we need, as well as activating it correctly before we begin to throw again.

To learn more about how physical assessment, strength and conditioning principles, video analysis, and drill work for the pitcher fit together, be sure to check out one of our Elite Baseball Mentorships. Our next event will be held January 17-19, 2016 at Cressey Sports Performance in Hudson, MA. The early-bird registration is December 17, 2015. For more information, check out www.EliteBaseballMentorships.com.  

Sign-up Today for our FREE Baseball Newsletter and Receive Instant Access to a 47-minute Presentation from Eric Cressey on Individualizing the Management of Overhead Athletes!

Name
Email
Read more

Coaching Up the Bottoms-up Kettlebell Carry

I love bottoms-up kettlebell carrying variations for teaching scapular control and getting reflexive rotator cuff recruitment. Sometimes, though, folks won't feel these drills in the right positions. With that said, check out today's video to learn how you can usually quickly and easily shift the stress to the right spots in the shoulder girdle:

If you're looking to learn more about our approaches to assessing and training the shoulder girdle, I'd encourage you to check out out one of our Elite Baseball Mentorships. Our next upper extremity course takes place January 17-19, 2016 at Cressey Sports Performance in Hudson, MA, with December 17 serving as the early-bird registration deadline. For more information, check out www.EliteBaseballMentorships.com 

Sign-up Today for our FREE Newsletter and receive a four-part video series on how to deadlift!

Name
Email
Read more

Get Up to Get Down: The Impact of Scapular Movement on Pitch Location

Today's guest post comes from physical therapist Eric Schoenberg. Eric is an integral part of the Elite Baseball Mentorships team.

Every baseball player on the planet has heard their coach say “stay on top of the ball”, “get out in front”, and/or “throw downhill”. It is an easy thing to say, but a little more difficult to teach. A common response that I hear from players that I work with is: “I understand what the coach is saying, but I don’t know how to actually get my body to do it”.

There are many mechanical reasons why a pitcher will struggle to create this downhill plane. (e.g. front leg stability, trunk tilt angle). However, on the movement side of things, one of the main culprits that we see is a lack of scapular upward rotation. If you are a frequent visitor to this blog, you know that EC has hit on this topic for years. I wanted to add some thoughts to this critical concept.

If a pitcher lacks the ability to “get up” (insufficient scapular upward rotation and/or elevation), he will not be able to effectively get his hand out in front to maximize velocity. Pitchers will describe this feeling as “cutting the ball off” or “feeling stuck”. The result is a decrease in velocity and difficulty “getting down” in the zone. It is very common for this to occur later in the season once the off-season training effect has been lost and the predictable loss of range of motion (shoulder flexion, upward rotation, hip and thoracic mobility) kicks in.

ScapularDownwardRotation

The most effective pitchers share three things in common: consistent velocity, consistent location, and health. None of these are possible with faulty scapular movement patterns.

The best time to establish proper scapular upward rotation is in the off-season (NOW!). The challenge comes with educating the athlete on how to not lose this motion during the season.

By now, we are aware of the importance of wall slide variations, back to wall shoulder flexion, and trap raises. However, the message of consistency with these exercises EVERY DAY during the season cannot be overstated. This is akin to brushing your teeth. A habit needs to be established and it then needs to be repeated. Every baseball player that I see in my office for elbow or shoulder pain comes in with faulty scapular movement. This is certainly not the only thing that leads to pain in pitchers, but it is certainly a good place for us to be looking early on.

A great exercise that we have been using to emphasize “getting up and out in front” is the One-Arm Band Rotational Row from a Low Setting.

This drill is much more about the deceleration phase than the actual rowing pattern, however all phases of the movement are important. I prefer to use a band instead of a cable due to the increased velocity of the recoil. This is a great drill to use in a training or warm-up program. With that said, I find the best application is to be used in a pre-throwing program (preferably the last drill before a pitcher picks up the ball to begin throwing).

Set-Up: Wide base to emphasize hip mobility. Front foot should mimic where the land foot is in the delivery. Back foot and hips are rotated fully so the athlete is “squared up” in the sagittal plane. Coaching from the Posterior View will give you a good vantage point to see this.

Instruction: Initiate the rowing motion from the hips first, then the thoracic spine, then the scapula, and finally the humerus. Make sure the athlete’s elbow doesn’t end up behind the line of his body. Back foot should rotate to mimic the position on the rubber with the hip hinged and loaded. Cue the athlete to decelerate the band with his body (core, front hip) and not just with his arm. Coaching from a 90 degree angle to the side will show this the best.

A key component for a pitcher to develop/maintain velocity and location is to make sure that their body is in a stable position to deliver their arm (and the baseball). The One Arm Rotational Row accomplishes this by via the following avenues:

1. Single Leg Strength

a. Land Leg: Proper stability and balance to accept weight, stop forward momentum, and translate force from the ground up the chain.

b. Drive leg: Ability to hinge back into drive hip and not translate forward (toward 3rd base for a RHP) or collapse into valgus. Keeping weight through the whole foot and not just on the toe

2. Stable core throughout delivery – especially as trunk and hips start to separate

Leaking into anterior pelvic tilt or lumbar extension will drive scapular downward rotation and depression (resulting in the hand moving under or around the ball, as opposed to staying behind the ball).

3. Optimal Thoracic Positioning

This drill drives thoracic flexion moment to allow for a congruent platform for the scapula to ride up and create the desired extension at ball release.

Give this drill a try with your athletes (make sure to train both sides) and emphasize consistency with their scapular upward rotation exercises in order to develop a more durable arm with improved velocity and location.
If you are interested in learning more about our approach to managing baseball athletes, we'd love to see you at one of our Elite Baseball Mentorships. The next three-day course is June 23-25, with May 23 serving as the early-bird registration deadline. 

Sign-up Today for our FREE Baseball Newsletter and Receive Instant Access to a 47-minute Presentation from Eric Cressey on Individualizing the Management of Overhead Athletes!

Name
Email
Read more

Serratus Anterior Activation: Reach, Round, and Rotate

I'm a big fan of serratus anterior activation drills for upper extremity health and performance, but one only gets great benefits if exercise technique is on point. Check out these three key coaching cues you'll want to get serratus anterior engaged during your wall slides:

I should note that "exhale" would be a fourth cue, but it doesn't being with a "R" and therefore would've ruined the good blog title. That said, adding an exhale can help to establish better rib position and enable the individual to "feel" the serratus anterior working a bit more. 

If you're looking for more upper extremity assessment and training insights - particularly with respect to serratus anterior - be sure to check out Sturdy Shoulder Solutions.

Sign-up Today for our FREE Newsletter and receive a four-part video series on how to deadlift!

Name
Email
Read more
Page 1 2 3 4
LEARN HOW TO DEADLIFT
  • Avoid the most common deadlifting mistakes
  • 9 - minute instructional video
  • 3 part follow up series