Home Posts tagged "pulled groin"

Strength and Conditioning Stuff You Should Read: 4/17/17

I normally like to publish my recommended readings on Monday, but I got off schedule over the past few weeks. Posting this today will get me back on track:

CSP Business Building Mentorship - By popular demand, my business partner, Pete Dupuis, and I are hosting a business building mentorship.  We only have 20 spots in this one-day event, and nine are already taken from an "in-house" announcement to close industry colleagues.

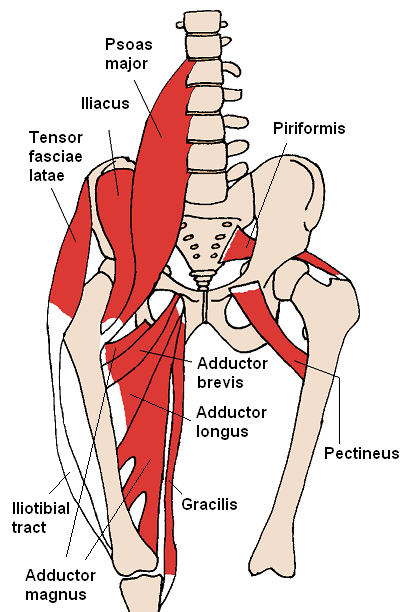
Athletic Groin Pain - This was an excellent, comprehensive article from Chris Hart on everything from differential diagnosis to rehabilitation timelines and protocols.

Anterior_Hip_Muscles_2-2

29 Years, 29 Lessons - Tony Bonvechio shares a collection of things he's learned in training, nutrition, and business.

Top Tweet of the Week

Top Instagram Post of the Week 


When people hear "in-season lifting," they seem to immediately think that the sole justifications for incorporating it is to maintain strength, power, and muscle mass. Surely, that's a huge part of the equation. However, I'm quick to point out to our athletes that in-season training includes a lot more. Each time an athlete trains at @cresseysportsperformance during the season, he's also going through his foam rolling work. And, he's working his way through a more individualized warm-up than he'd typically get at the field during practice or at games. Likewise, it's an exposure to an environment that "nurtures" good lifestyle behaviors. There are invariably discussions about optimizing sleep quality, and improving nutrition. These exchanges just don't happen as often at the field. #cspfamily #ArmCare #inseasontraining #pushup

A post shared by Eric Cressey (@ericcressey) on

Read more

Strength and Conditioning Stuff You Should Read: 7/10/13

Here's this week's list of recommended strength and conditioning reading:

Sports Rehab Expert Interview - Yesterday, Joe Heiler interviewed me about the new Functional Stability Training of the Lower Body product, although we actually covered a number of topics. The interview is free.  Also, if you're interested in checking out FST - Lower, you can do so here.

FST-DVD-COVER-LB

Elite Training Mentorship - The July update was just posted last week, and (along with an article and two exercise demonstrations), I did a webinar on evaluating scapular positioning to determine if the bench press is contraindicated for your clients, particularly those with a history of shoulder pain.

Groin Injuries in Hockey Players - This was an awesome post from Peter Nelson on Mike Reinold's blog - even if you have no interest whatsoever in hockey.  It parallels one of my presentations (Preparing the Adductors for Health and Performance) from the FST - Lower DVD set, and also leads in to some of Mike's material.  You'll get a little taste of the Postural Restoration Institute in this article, too.

Sign-up Today for our FREE Newsletter and receive a four-part video series on how to deadlift!

Name
Email
Read more

Now Available: Functional Stability Training of the Lower Body!

I am very excited to announce that my new product, Functional Stability Training of the Lower Body, is now available. This collaborative effort from Mike Reinold and me follows up on the first module in our Functional Stability Training system, FST for the Core, which was a big hit.  Since then, we've had a lot of inquiries about when the follow-up resources in this series would be available - and today's the day.

FST-DVD-COVER-LB

FST for the Lower Body is a comprehensive program that combines the way Mike approaches rehabilitation projects with how I approach strength and conditioning programs.  We talk about a ton of topics that merge our philosophies.

The resource takes a hard look at the lower extremity and how to most effectively optimize function.  By addressing alignment, strength, mobility, and dynamic motor control, you can maximize your rehabilitation and training programs to reach optimal performance.

The lower extremities work in conjunction with the core to provide mobility, strength, and power to the entire body.  Any deficits throughout the lower body’s kinetic chain can lead to injury, dysfunction, and a decrease in performance.  FST for the Lower Body aims to help formulate rehabilitation and training programs designed to optimize how the lower body functions.

The FST for the Lower Body program can be applied to rehabilitation, injury prevention, and performance enhancement programs.

For the rehabilitation specialist, the information will help you restore functional activities faster.  For the fitness and performance specialists, the information will help you achieve new progress with your clients to maximize functional and athletic potential.  For the fitness enthusiast, the information will help you gain control of your lower body, maximize functional movement, and reduce wear and tear due to faulty movement patterns.

Here is the outline of presentations and lab demonstrations in the program:

  1. Reinold: Training the Hip for FST of the Lower Body
  2. Reinold: Assessing Lower Body Alignment and Movement
  3. Cressey: Preparing the Adductors for Health and Performance
  4. Cressey: Hip Internal Rotation Deficits: Why You Have Them and What to Do About Them
  5. Reinold: Training the Foot and Ankle for FST for the Lower Body
  6. Reinold: Understanding and Implementing Neuromuscular Control Progressions into Your Programs
  7. Reinold: How to Integrate Neuromuscular Control Progressions
  8. Cressey: 15 Things I've Learned About the Deadlift
  9. Cressey: Developing Lower Extremity Strength and Power Outside the Sagittal Plane

This video resource is available as a purely-online product, or you can also order the DVD set, if you'd prefer to have a physical copy for your library.  And, this week only, it's on sale for just $79.95, far less than you'd pay for even a half-day fitness or rehabilitation seminar.  For more information and to purchase, head here.

Sign-up Today for our FREE Newsletter and receive a four-part video series on how to deadlift!

Name
Email
Read more

So You Want to Start Sprinting?

While sprinting has been around since the dawn of man, only in the past few years has it really taken off as true fitness trend. In other words, it was either what we did to kill our dinner in prehistoric times, or it was a modern athletic competition. Only recently have we realized that doing sprint work for our interval training is a tremendously effective way to get/stay lean, enhance mobility, improve athleticism, and prepare ourselves for the demands that life throws our way.

Heading out to sprint full-tilt when you haven’t been doing any running work in recent months is, however, analogous to signing up for calculus when you haven’t brushed up on basic math of late. The main difference is that you can’t rip your hamstrings off your pelvis doing calculus!

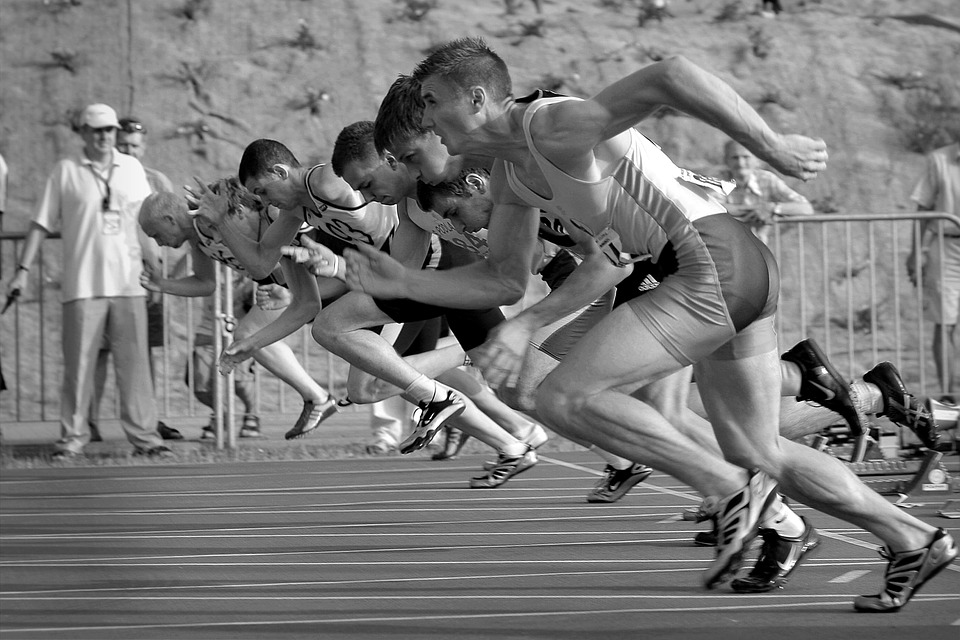
spot-862274_960_720

Sprint work requires tremendous mobility, good tissue quality, and adequate strength to tolerate significant ground reaction forces and a wide variety of joint angles. You don’t prepare for this with your “typical” gym workouts, so before I have some specific modifications in place that you’ll want to follow. To that end, below, I’ve provided you with seven tips you can apply to ease into sprint work so that you can get the benefits of it with less of the risk.

1. Do these foam rolling drills and four mobility exercises every day for a month.

These drills are like summer reading before a tough English class. You have to do them so that you can hit the ground running (pun intended).

2. Sprint uphill first.

People often get hurt when they overstride; they’ll pull the hamstrings on the front leg. Sprinting uphill doesn’t really allow you to overstride, though, and it’s also good because you go up with each step, but don’t come down quite as much. Ground reaction forces are much lower, so this is a great option for easing into top-speed sprinting. (great studies here and here, for those interested).

While it’s more ideal to do uphill sprinting outside, it is okay to do this on a treadmill. After all, you’re just trying to lose your spare tire or be a little better in beer league softball, not go to the Olympics.

I like to see a month of 2x/week uphill sprint work before folks start testing the waters on flat terrain.

3. Don’t sprint at 100% intensity right away.

Contrary to what you may have heard, you don’t have to run at 100% intensity to derive benefits from sprint work. In fact, a lot of the most elite sprinters in the world spend a considerable amount of time running at submaximal intensities, and they are still lean and fast.

The bulk of your sprint work should be in the 70-90% of top speed range. You might work up to some stuff in the 90-100% zone as you’re fully warmed up, but living in this top 10% all the time is a recipe for injury, especially if you’re over the age of 35-40 and degenerative changes are starting to kick in.

When you first start out, sprinting is new and exciting, and it's very easy to get overzealous and push the volume and frequency side of the equation just as you would the intensity side.  Don't do it.  For most folks, twice a week is a sufficient complement to a comprehensive strength training program, and the session shouldn't last for more than 30-45 minutes - most of which will be you resting between bouts of sprinting.  If you find that they're 90-120 minute sessions, you're either doing too much volume or not working hard enough.  The speed and quality of your work will fall off pretty quickly as you fatigue, so be careful about forcing things too quickly.  Beyond just injury prevention benefits, taking it slower on the progressions side of things allows you to test out your footwear of a few weeks to make sure that they're the right shoes for you.

5. Don't sprint on pavement.

I can't think of a more unforgiving surface than pavement, especially since it means that you're more likely to get hit by a car. Unfortunately, it's also the more easy accessible surface for most people. In an ideal world, I like to see folks sprint on grass, artificial turf, or a track surface. Broken glass and hot coals would also be preferable to pavement (for the record, that was a joke, people; don't be that schmuck who goes out to try it).

street-marathon-1149220_960_720

6. Don't sprint through fatigue early on.

This is a "go by feel" kind of recommendation. On one hand, you have to sprint through some fatigue to get in the volume it takes to derive the training effects you want: namely, fat loss. However, we also have to appreciate that states of fatigue drive injury rates sky-high in the athletic world. With that trend in mind, I encourage people to run conservatively in the first few months of their sprint training programs; in other words, don't allow a lot of fatigue to accumulate. Instead, take a little extra time between sprints. Then, as your sprinting mechanics and fitness improves (and you've gotten rid of the initial soreness), you can push through some fatigue.

7. Generally speaking, sprint before your lower body strength training work, not after.

People often ask me when the best point in one's training split is to sprint.  As a general rule of thumb, I prefer to have people sprint before they do their lower body strength training sessions.  We might have athletes that will combine the two into one session (sprinting first, of course), but most fitness oriented sprinters would sprint the day or two prior to a lower body session.  A training schedule I like to use for many athletes and non-athletes alike is:

Mo: Lower Body Strength Training (with athletes, we may do some sprint work before this as well)
Tu: Upper Body Strength Training
We: Sprint Work
Th: Lower Body Strength Training
Fr: Upper Body Strength Training
Sa: Sprint Work
Su: Off

In this case, the intensive lower body work is consolidated into three 24-36-hour blocks (Mo, We-Th, Sa).

timcmqdefault

Conversely, I've also met lifters who like to sprint at 70-80% effort the day after a lower body strength training session, as they feel like it helps with promoting recovery.

Closing Thoughts

As you can tell, while there are definitely some tried and true strategies for avoiding injury when you undertake a sprinting program, there are also some areas that are open to a bit of interpretation.  The value of incorporating sprinting into one's program is undeniable, though, so I'd encourage you to test the waters to see how it fits in with your strength and conditioning programs.  At the very least, it'll give you some variety and help get you outdoors for some fresh air.

If you're looking for ideas on how to incorporate sprinting in a comprehensive strength and conditioning program, I'd encourage you to check out my latest resource, The High Performance Handbook

HPH-main

Sign-up Today for our FREE Newsletter and receive a four-part video series on how to deadlift!

Name
Email
Read more

Mobility Exercise of the Week: Table Adductor Dips

In this week's mobility exercise of the week, I've got an excellent drill for reducing stiffness in the hip adductors.  I came up with this exercise when I realized that I wanted to be able to do more drills to improve hip abduction range-of-motion, but I didn't always want them to be ground-based.  And, just doing lateral lunge variations all the time can get a little boring for athletes.  Enter table adductor dips.

I especially like to use this with our throwers because it actually parallels some of the hip angles we see with the pitching delivery, so it makes for a great warm-up and off-season maintenance/improvement exercise.  I also like it for them because they can do it out on the field without having to roll around in the grass (which would be the case with a lot of other adductor mobility drills).

In terms of coaching cues, it's important to keep the weight on the support leg's heel and sit back "into" the hip.  The majority of the weight should be on the down leg, with minimal pressure put on the leg that's up on the table.

As you go through the exercise, brace the core to ensure that the movement comes through the hips (flexion and abduction) at the bottom position, rather than just allowing the lower back to round.  Having the arms out in front as I do in the video above can help as a counterbalance to prevent your butt from tucking under.  If you're super stiff, you may want to consider holding a ten-pound plate out at arm's length as an additional counterbalance.

At the top position, be sure to extend the hips all the way to stand tall between each rep.  I usually cue folks to activate the glute on the support leg to finish each rep.  This will also help guarantee that you're stretching the adductors in both flexion and a neutral position.

We'll typically do sets of eight reps on each side during the warm-up period.  This can, however, be held for a longer duration as a static stretch at the end of a training session.

For more drills like this, be sure to check out Assess and Correct: Breaking Barriers to Unlock Performance.

 Sign-up Today for our FREE Newsletter and receive a four-part video series on how to deadlift!

Name
Email
Read more

Strength and Conditioning Stuff You Should Read: 12/15/11

Here's this week's list of recommended strength and conditioning reading: Groin Strain? Get Manual Therapy - I received an email inquiry this week about training around a groin strain, and it reminded me of this old post of mine. America's Scariest Fitness Trends - This was a story by Adam Campbell for Yahoo Sports' The Postgame, and I provided a few quotes. Quantifying the Farmer's Walk - I thought this was an outstanding piece from Shon Grosse, a good friend of mine who is an outstanding physical therapist in Pennsylvania. Sign-up Today for our FREE Newsletter and receive a four-part video series on how to deadlift!
Name
Email
Read more

Groin Strain? Get Manual Therapy.

If you've had a groin strain (or adductor strain, for the anatomy geeks like me in the crowd) - or would like to prevent one in the first place - read on. Those of you who check out this website regularly probably already know that I'm a huge advocate of good manual therapy - especially disciplines like Graston and Active Release.  One area where we constantly see athletes really "gritty" is the hip adductors (groin muscles) - and it's one reason why we see so many groin strains in the general population.  Note that treatments DON'T have to be this aggressive to yield favorable outcomes; it's just an extreme example of someone with a pale skin tone that makes it even more prominent:

Soccer and hockey players really overuse the adductors during the kicking motion and skating stride, respectively.  And, even outside athletic populations, you'll see a lot of people who don't activate the gluteus maximum well as a hip extension - so you have the adductor magnus taking over to help out with this important task.  The only problem is that the adductor magnus internally rotates and adducts the hip, whereas the glute max externally rotates and abducts the hip.  Movements get altered, one muscle gets overworked and all fibrotic, and the next thing you know you've got a nasty "tweak" just south of the frank and beans (or female equivalent). Really, that's not the issue, though.  Nobody is denying that groin strains occur - but there are different treatment approaches to dealing with this issue on the rehabilitation side of things.  Some professionals use manual therapy during their treatments, while others don't.  Can you guess which school of thought gets my backing? Well, it turns out that the "include manual therapy" side of the argument gets the backing of Weir et al in light of some new research they just published.  These researchers found that athletes with groin strains returned to sports 4.5 weeks sooner when they received manual therapy plus stretching and a return to running program as compared to an exercise therapy and return to running program only.  It took the average time lost down from 17.3 weeks to 12.8 weeks in those with good long-term outcomes! For a bit more information on the manual therapy discipline utilized in this particular study, check out this abstract. Need a quick tutorial on how to come back from a groin strain? 1. Find a good physical therapist who does manual therapy. 2. Listen to and do everything he/she says. 3. If anything hurts in the gym, don't do it.  In most cases, deadlifting variations are okay, but single-leg work will really exacerbate the pain.  Squatting is usually a problem at first, and then gets better over time.  It really depends on which of the adductors you strained. 4. When you are cleared for return to full function, keep hammering on glute activation and hip mobility as outlined in Assess & Correct.

5. Make sure you're continuing to foam roll the area and getting the occasional treatment on them with that same manual therapy you had during your rehabilitation.  Here's a great self myofascial release option with the foam roller:

Sign-up Today for our FREE Baseball Newsletter and Receive and Receive a Copy of the Exact Stretches used by Cressey Performance Pitchers after they Throw!
Name
Email
Read more
Page
LEARN HOW TO DEADLIFT
  • Avoid the most common deadlifting mistakes
  • 9 - minute instructional video
  • 3 part follow up series