Home Posts tagged "Deadlift" (Page 63)

Review: High Frequency Training by Chad Waterbury

I was fortunate to receive an advanced copy of Chad Waterbury's newest project, High Frequency Training, earlier this week, so I thought I'd do a quick write-up on the product.

One of the things I've always admired about Chad is his extensive educational background; all of his programs are based on theories that are heavily rooted in both his research and anecdotal observations.  It takes a lot of time to learn scientific principles, apply them in the real world and evaluate results, then "re-program" in consideration of what did and didn't work.  Chad is one of the few people in the industry with the unique background and experience to have accomplished this, and High Frequency Training is an outstanding example of his efforts.  There are a lot of books out there that were published by schmucks with absolutely no frame of reference; this isn't one of them.

I also think Chad does a tremendous job of relating complex topics in the conversational and easy-to-understand format.  Truthfully, I often glaze over the "rationale" portions of the books I encounter - either because I already understand them, or because it's so poorly written that I'd rather just get to the meat and potatoes (the program).  Conversely, Chad's discussion of how he came to understand the how various loading protocols impact the overall volume equation was outstanding.  In short, if you want big muscles, you have to be exposed to a high training volume - but that may come from a variety of set/rep/load combinations.


One can't just haphazardly add volume, though, as overuse injuries can easily kick in if you just keep adding and adding.  Additionally, you can't simply add volume in all aspects of your program; you have to pick and choose the appropriate times and places so that you're making progress instead of just treading water. Chad's program takes the guesswork out of adding volume.  And, as an added benefit, you'll likely get a bit leaner from the increased exercise volume and frequency.

Perhaps the greatest compliment I can pay to this program, though, is that it's making me revisit how I am planning my own training.  Admittedly, I've trended toward much lower volume strength training programs as I've gotten older and the rest of the stress in my life has increased.  After reading through this e-book, I'm searching for ways to add some additional volume via increased frequency as a means of complementing my current approach, which is typified almost exclusively by work in the 1-10 rep range.  With Chad talking about incorporating some much higher rep sets, I'll be dabbling a bit more in this regard.

This program won't be a good fit for you if your primary goal is strength development, but if you're looking for a way to gain muscle, try some new exercises, and deviate from a "normal" training approach, it'd be a great fit. And, you can't beat the price, as it's on sale for $50 off as an introductory offer this week only.  For more information, check out High Frequency Training.


Sign-up Today for our FREE Newsletter and receive a four-part video series on how to deadlift!

Name
Email
Read more

The Superset Survival Guide

I’ve come to realize that over the course of my career in strength and conditioning, I’ve gotten a little spoiled. Many of my readers are some of the more educated weight-training consumers on the ‘Net. I’ve been around Division 1 athletes who have four years of strength and conditioning continuity in their lives. I’ve lifted alongside world-class powerlifters. And, now, I have a host of athletes at Cressey Sports Performance who are completely “indoctrinated” with my training philosophies, as it’s the only thing they’ve ever known.

So, I guess you could say that I’ve become a bit of a lifting snob in the sense that I assume I’m always surrounded by people who know how to interpret my programs, leaving me to just program, coach technique, help select weights, and turn up the volume on the stereo.

I came to the realization that I was just in a fantasyland, though, when my second book, Maximum Strength, was published in June of 2008.

This book, which had a bit more “mass market” flavor than the overwhelming majority of my work, was being sold online and in bookstores from Idaho to Thailand – and many of the people buying it were Average Joes who didn’t know how to interpret the programs I’d written. One question that I received in about 50 different emails sticks out in my mind:

“I've recently purchased your book and have a quick question related to the training schedules. I see the "A1 and A2" / "B1 and B2" designations, but am not sure I fully understand if I'm supposed to alternate the exercises that day (for example, do a set of one-arm DB push press and then do a set of close-grip chin-up and cycle through to complete 3 sets each) or am I supposed to pick one exercise for week 1 and then choose the other exercise in week 2?”

The answer, as the overwhelming majority of my readers knows, is that A1 and A2 indicates a superset. You go back and forth between the two (in all weeks), and once you’ve completed A1 and A2, you move on to B1 and B2, then C1 and C2, and so on. So, you do all the exercises in all the weeks. The idea is pretty simple:

Supersetting makes your training far more efficient.

So, rather than doing a set of bench presses and then standing around for two minutes before the next set, you superset the bench presses with a variation of rows or a flexibility exercise, for instance. You increase training density, and can use the pairings to bring up weak areas.

All that said, we know superset training works; it might be one of the few things that the overwhelming majority of strength coaches and personal trainers agree on, in fact! However, I often see poor choices in terms of exercise pairings in the lay population. For instance, you’ll often see people supersetting walking dumbbell lunges and chin-ups, both of which are pretty grip-intensive. As such, I thought it’d be a good time to throw out some of my favorite supersets.

1. The "Regular Ol’ Push-Pull" Superset

This is probably where we’ve come to recognize the value of supersets more than anywhere else. Do a set of presses, and instead of just waiting 2-3 minutes to go back to another set of presses, we go to a pull in the middle. Let’s look at what this works out to over the course of five sets, assuming a two-minute rest between sets and a duration of thirty seconds between sets:

Option A – Just “Press ‘n Wait”
30s set
120s rest
30s set
120s rest
30s set
120s rest
30s set
120s rest
30s set
Total Time: 10 minutes, 30 seconds

Option B – Pairing a press and a pull with a “moderate” rest between push and pull
30s set (press)
60s rest
30s set (pull)
60s rest
30s set (press)
60s rest
30s set (pull)
60s rest
30s set (press)
60s rest
30s set (pull)
60s rest
30s set (press)
60s rest
30s set (pull)
60s rest
30s set (press)
60s rest
30s set (pull)
Total Time: 14 minutes

Effectively, you’ve doubled your training density while only investing 33% more time. And, if you cut the rest intervals down to 45s between the end of a press set and start of the pull set, you actually keep the rest between sets of presses the same as you did in Option 1 and be down to 11 minutes, 45 seconds. You don’t have to be an economist – or even a graduate of the 6th grade – to know that this is a wise training investment. “More work in less time” holds merit in lifting heavy stuff just like it does in the business world.

The logical next question is, of course, what kind of “pushes” and “pulls?” It’s a pretty easy division to make, via four categories:

1. Vertical Push (overhead pressing)
2. Vertical Pull (chin-up/pull-up variations, lat pulldowns)
3. Horizontal Push (bench press and push-up variations)
4. Horizontal (rowing variations)

Pair the vertical pushes with the vertical pulls, and horizontal pushes with the horizontal pulls. And, if you’re feeling frisky, you can pair horizontal pushes with vertical pulls, or horizontal pulls with vertical pushes. Your imagination is the only limit.

A word of advice: you’ll never get completely perfect antagonist relationships. For example, the long head of the triceps is going to be at least somewhat active in every one of these variations because it is both a shoulder extensor (pull-ups and rows) and an elbow extensor (all presses). The long head of the biceps flexes both the shoulder (all presses) and elbow (pull-ups and rows) on top of contributing to shoulder joint stability in all tasks. Your rotator cuff is going crazy in all these movements.

In short, consider gross movement schemes and try to avoid blatantly obvious overlap in muscle recruitment, but don’t get bogged down in minutia when selecting your pairings.
 

 2. The “True Mark of Your Common Sense” Superset

Without further ado, here it is:

A1) Deadlift variation
A2) Heavy panting!

I throw this in here simply because I want people to realize that not everything in your training needs to be supersetted with another exercise. Sometimes standing around – or at the very most, doing an unrelated stretch or easy mobilization – is exactly what you want. I once heard about a trainer who supersetted back squats with stiff-leg deadlifts. This less-than-enlightened individual overlooked the fact that:

a) both exercises heavily tax the posterior chain
b) both movements absolutely destroy you – which just might compromise technique
c) intervertebral discs – and not just muscles and the nervous system – are relaxing between sets, too.

There are, however, a few ways to make the downtime between deadlift sets more productive…

3. The "Stiff Ankle" Superset

We do all our deadlifting variations without shoes on at Cressey Performance, as this allows athletes to keep the weight on the heels to better activate the posterior chain. It also brings the lifter closer to the ground, so hip mobility deficits can’t interfere with getting down to the bar without a rounded back.

Being shoeless also lends itself well to working on some ankle mobility, as being in sneakers typically gives us a false sense of good range of motion at this joint, so a low-key filler between deadlifts is ankle mobility work:

A1) Deadlift variation
A2) Ankle mobilization of your choice

Knee-break ankle mobilizations are one option. Here, the goal is to keep the heel down while going into dorsiflexion (knee over toe); don’t allow the knees to deviate inward or the toes to turn out, though.

4. The "Front Squat/Vertical Pull" Superset

It’s a bit easier to superset squats with other movements than deadlifts – but only in specific cases, such as…

A1) Front Squat Variation
A2) Vertical Pull Variation

As I mentioned in my article Lats: Not Just for Pulldowns, the lats are anatomically less effective as spinal stabilizers during the front squat, which accounts for some of the discrepancy between one’s front squat and back squat. If we’re not using them as much in stabilization for the front squat, we might as well use them for actually generating movement.

For variation, you can squat to various depths, from pins or a box, or against bands/chains. With the vertical pull, you have several grip choices (neutral/supinated/pronated/alternate, and plus different grip widths).

As you get stronger and stronger, though, pairing anything with a squat can get to be a pain in the butt. With that in mind, one substitute we’ve used is pairing reverse lunges with a front squat grip with any of the vertical pulling variations – and just extended the rest time a bit.

You can also use any of a number of other lunge variations that use a bar (dumbbells won’t work because of the grip challenge). We use the giant cambered bar a lot, for instance:

5. The Unilateral Superset

I get quite a few questions about how to plug single-leg exercises into supersets.

A1) Single-leg Exercise – side #1
A2) Single-leg Exercise – side #2

I structure programs this way because I want people to rest between sides on these movements. Grips falter, scapular stabilizers get fatigued, and there is always a bit of overlap from side to side on these movements. As such, I like to shoot for 30-45 seconds between sides – during which time people can regroup and focus on the quality of the next set instead of rushing right into it.

That said, we generally pair our lower body work with some kind of core stability or mobility drill. So, I guess it would technically be treated like a triset (or quad-set, if one of these drills is performed on each side). Examples might be:

A1) Dumbbell Forward Lunges – side #1
A2) Dumbbell Forward Lunges – side #2
A3) Stability Ball Rollouts

or...

A1) Dumbbell Forward Lunges – side #1
A2) Dumbbell Forward Lunges – side #2
A3) Half-Kneeling Cable Chop – side #1
A4) Half-Kneeling Cable Chop – side #2

Of course, to keep things less cumbersome, I’d simply write these up as:

A1) Dumbbell Forward Lunges
A2) Split-Stance Cable Lift

Anyway, moving on…

6. The “Miserable Lower Body Experience” Superset

As I noted above, one of the problems I see with a ton of lower body superset is that they combine complex exercises like squats and deadlifts with other fatiguing exercises – and as a result, the squat and/or deadlift form because absolutely atrocious and potentially injurious. From my perspective, effective lower body pairings are safe, but sufficiently compound and functional enough to activate enough muscle mass and have some functional carryover to the real world.

I know most of you won’t have a sled or a glute-ham raise at your disposal, but I’m throwing this out there anyway, as it makes for a great finisher at the end of a lower body day:

A1) Reverse Sled Drags
A2) Glute-Ham Raises

The reverse sled drags are about as quad dominant as you can go, and the glute-ham raises crush the posterior chain.  Don’t have a sled or glute-ham raise set-up, though? All you’ll need are a bench, a lat pulldown or seated calf raise, some balls, and a good stomach. You can instead pair dumbbell Bulgarian split squats with natural glute-ham raises. For the latter, just set up in reverse and lock your ankles under the pads, controlling yourself down slowly and (most likely) giving yourself a push off with your arms to get back to the top.

7. The “Miserable Upper Body Experience” Superset

Our entire staff trains together at Cressey Sports Performance, and this pairing is widely recognized as the most brutal upper body superset we’ve ever done.

A1) Bench Press Clusters: 4 x (4x2) – 10s
A2) Farmer’s Walk: 4x80yds – but go as far as you can on the last set

For those of you who aren’t familiar with clusters, for 4 x (4x2) – 10s, this would be four total clusters. Each cluster consists of 4 sets of 2 reps with 10 seconds rest between sets. The idea is that by putting these “mini-rests” between sets of 2, you can use a heavier weight for your sets than if you’d just done eight straight reps. So, training is more dense (anyone notice a theme here?). All told, you might wind up doing 32 reps with as much as 85% of your 1-rep max.

After the cluster, of course, we went to A2, nearly vomited, and then came back to do another cluster. The first time four of us did this, there was a 25% attrition rate after the second round, and the remaining three of us made it through all four – but couldn’t lift our arms for about three days without yelping like chihuahuas giving birth.

To the naked eye (and stomach), this would just seem like torture, but whether we recognized it or not, we were onto something. Bench presses are a push and require some lower trap activation for a good “tucked” upper body positioning. Farmer’s walk are more of a pull and rely heavily on the upper traps. Lower traps depress the scapula, and upper traps elevate it.

8. The “Productive Rest during Plyos” Superset

We do a lot of medicine ball drills, jumping, and change-of-direction work with our athletes to develop power. With this type of training, it’s important to allow for adequate rest between sets, even if athletes don’t actually feel tired. To that end, we’ll often pair these drills up with some kind of mobility or activation drill, as it allows us to:

a) slow an athlete down
b) work on an inefficiency
c) shorten the learning loop (meaning that if we work on the inefficiency from “b,” we’ll best integrate those changes with compound exercises like medicine ball throws or jump training)

Here’s an example we might use for medicine ball training for an athlete with limited shoulder flexion and an excessive anterior pelvic tilt/lorsdosis:

A1) Step-Behind Rotational Medicine Ball Shotput: 3x3/side, 6lb

A2) Bench T-Spine Mobilizations: 3x8


B1) Recoiled Rollover Stomps to Floor: 3x4/side, 12lb


B2) Wall Slides with Upward Rotation and Lift-off: 3x8

Of course, you can plug in just about anything for the A2 and B2 “fillers,” depending on what inefficiencies the athlete needs to address.

9. The “Where the Heck do I put Turkish Get-ups” Superset

The Turkish get-up is one of the most big-bang exercises you can do; it offers great core and shoulder stability challenges while testing hip mobility in a fundamental movement pattern: transitioning from the supine to upright position. It does, however, often lead to confusion in program design, as folks sometimes struggle with determining where to put this exercise in strength training programs. On one hand, it’s a technically intensive exercise that you want to put first in a training day. On the other hand, it’s probably more of a “core” exercise than a true upper extremity loading drill, so one might be tempted to put it later in a training session. What to do?

Personally, I agree with the former approach. In fact, one of my favorite places to put them is as part of a A1/A2 pairing that also includes vertical pulling. The get-up is more of an approximation exercise at the shoulder, meaning that it pushes the humeral head (ball) back into the glenoid fossa (socket). Conversely, pull-up variations are traction exercises, meaning the ball is pulled away from the socket. So, a sample pairing might be:

A1) Weighted Chin-ups: 4x5
A2) 1-arm Kettlebell Turkish Get-ups: 4x3/side

10. The “Get Out of the Sagittal Plane” Superset

Let’s face it: traditional strength training is very sagittal plane dominant. However, when it comes to participating in sports or just encountering random things in everyday life, we have to be comfortable working in other planes of motion. And, specific to our baseball players, we need to make sure that our athletes are prepared for a sport that largely takes place in the frontal and transverse planes. And, that’s why I like this superset.

A1) Kettlebell Goblet Slideboard Lateral Lunges

A2) Wide-Stance Anti-Rotation Chop with Rope

With A1, you’re building some strength in the frontal plane while improving adductor length. If you don’t have a slideboard, you can throw a towel, furniture slider, or paper plate on a tile or wood floor. Or you can just do dumbbell goblet lateral lunges.

With the second drill, obviously, you’re working on rotary stability and getting some hip mobility at the same time. When you pair two drills like this up, you’ll find that the core stability work helps to make the transient improvements in hip mobility “stick” a little better.

Supersetting My Closing Thoughts

A1) Your imagination really is your primary limit with respect to coming up with supersets you can use. Just stick to the basics and don’t get cute.

A2) Remember that good pairings are both safe and appropriate in light of your goals (e.g., not pairing two grip intensive exercises).

B1) Don’t forget that there is absolutely a time and place for rest, and it is usually better to “casually alternate” between sets, as opposed to raising back and forth.

B2) Just because I am showing you a way to make your training more dense and efficient does not mean that you should go ahead and start doing 50 sets per training session just so that you can continue to spend three hours in the gym. Keep it short and sweet.

C1) Good luck.

C2) Thanks for reading.

Looking for a comprehensive resource to take the guesswork out of your programming? Check out The High Performance Handbook, the most versatile strength and conditioning resource available today.

HPH-main

Sign-up Today for our FREE Newsletter and receive a four-part video series on how to deadlift!

Name
Email
Read more

Lose Fat, Gain Muscle, Increase Strength, Be More Awesome: Live Q&A #5

It's time for another live Q&A here at EricCressey.com!  To get your questions answered, just post your inquiry in the comments section and I'll approve it and then reply.  

My only rule is that your question must be limited to five sentences or less.  I'll answer the first 25 that are posted, so please don't bother posting questions if you come to this post days, weeks, or months after it was originally posted.

With that said, head on down to the comments section below and ask away! 

Sign-up Today for our FREE Newsletter and receive a four-part video series on how to deadlift!

Name
Email
Read more

Strength and Conditioning Stuff You Should Read: 10/11/12

Check out this week's list of recommended strength and conditioning reading:

9 Hardgainer Training Myths: Part 1 and Part 2 - I thought this two-part series from Jason Ferruggia was excellent.  It's definitely something anyone who claims they "can't put on size" should read.

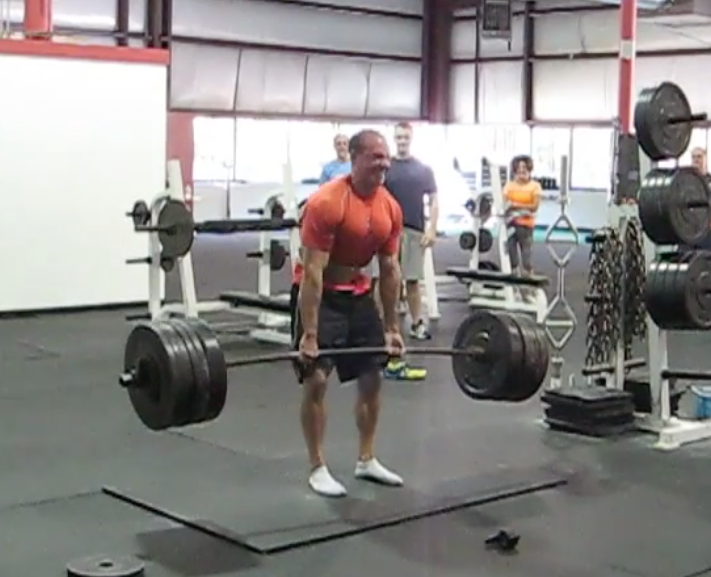
Round Back Deadlifts - This was an EPIC blog post from Mike Robertson. Of particular interest to me was his commentary on getting your breath TWICE in an ideal deadlifting set-up.  This is something I've always done - once standing, and once in the bottom position - and I suspect it's had something to do with my deadlifting success over the years. Coincidentally, I pulled heavier earlier today and you can pick up on the two points at which I set my breath before the first rep: the 10-11 second mark and the 12-13 second mark.

As an aside, you can tell I was strongly considering taking this for a third rep. I had it in me, but decided not to be stupid today.  I guess I'm getting wiser in my old age.

How to Eliminate Distractions from Your Strength and Conditioning Program - I wrote this post up last summer, and was reminded of it during a conversation I had with one of our adult clients.  If you're looking for strategies to improve your exercise adherence and the quality of your training, this post is a must-read for you.

Sign-up Today for our FREE Newsletter and receive a four-part video series on how to deadlift!

Name
Email
Read more

Quick and Easy Ways to Feel and Move Better: Installment 21

Here's this week's list of strategies to get your nutrition and strength and conditioning programs headed in the right direction.  This is a collaborative effort between Greg Robins and me.

1. Add amplitude to your conditioning.

Let's face it: jogging on the treadmill and riding the elliptical or recumbent bike is about as fun as watching paint dry.  While an exercise causing boredom doesn't mandate that it be thrown by the wayside immediately, it does become concerning with this exercise modality doesn't broaden the amplitude - or range of motion - that you encounter in your daily life.  Moving better is about improving mobility, which is defined as one's ability to reach a certain posture or position.  For some folks, this means actually lengthening short tissues or reducing tension in overly stiff tissues, while for others, it's about establishing stability in the range of motion that one already possesses.  Unfortunately, while you're burn some calories on these cardio machines, you aren't going to do much to improve your mobility.

The solution is to implement variety in your conditioning, whether it means taking a bunch of mobility exercises and doing them right after another, or integrating several strength training exercises with lighter loads.  Step-ups, sled pushing/dragging, side shuffles, lateral lunges are all ways to get your hips moving in ways they normally don't.

In the upper body, innovative rowing and push-up variations can keep things fun while improving your movement quality.

The next time you're planning to do some interval training on the bike, try substituting some wider-amplitude movements and see how you like it.

2. Get your Vitamin D right.

I've seen studies that have shown great benefits from getting vitamin D levels up to normal, but to my knowledge, those effects were most observed with respect to body composition, hormonal levels, and tissue quality.  Interestingly, I just came across this study that showed a significant improvement in power production over four weeks in the vitamin D supplementation group, as compared to the controls. These results are tough to interpret, as the subjects were overweight/obese adults; ideally, we'd study trained athletes with smaller windows of adaptation ahead of them to see just how beneficial vitamin D supplementation is on performance. However, it certainly makes sense that if we're improving body composition, endocrine status, and tissue quality, folks are going to get more out of their training and make faster progress.

Vitamin D is one of very few supplements that I view as "must-haves' for the majority of the population.  I'd pair it up with a good fish oil and greens supplement to cover one's nutritional foundation. This is one reason why I'm a big fan of the Athletic Greens Trinity Stack; you can a high quality version of all three in one place.


3. Plan out regressions and progressions.

People like to be good at things. This is especially the case when they are surrounded by a bunch of other people. In the case of group exercise, your attendees are going to have a much better time, get better results, and stay safer if they are performing movements correctly. Group settings aren't ideal from a coaching standpoint, though, as you can't spend as much individualized time coaching technique. Therefore, exercise selection becomes paramount to these classes' success.  In other words, you need to have both progressions and regressions in your exercise library.

A common flaw in group classes is that each week, there are 15 new exercise variations on the agenda. The week before, it was 15 other ones, and the following week, it will be 15 more. I know, I know; people want you to "keep it fresh." In my mind, by changing the exercises so often you are taking the easy way out.

Instead, have people become incredible at the basics. Have them squat, swing, push up, row - all basic movements. From there, set up progressions and regressions. This is much easier to do when you keep the original exercises basic.

Here are a few examples:

TRX Supported Squat > Counter Balanced Squat To Box > Goblet Squat > Double KB Front Squat > Offset KB Front Squat

Hands-Elevated Push-up > TRX Chest Press > Push-up > Feet Elevated Push-up > Push-up vs. Band

This is mostly for teaching purposes, as an example. The goblet squat is accessible to most people, and it falls in the middle, with two levels of regression and progression built in.

I'm a big fan of more work up front and easy sailing there out. You might need to take some time to develop your class program, but it will make for a better product and better results thereafter.

4. Use leftover vegetables in your omelet.

I don't know about you, but leftover vegetables never taste quite as good as they do when they've just been cooked.  They're cold, and often soggy to the point that even heating them up in the microwave doesn't really make them sound appetizing.  Rather than throw them out and skip on your veggies for a meal, try adding them to your omelet the following morning, as the other ingredients - eggs, spices, oils, cheese (if that's your thing), salsa, and ketchup - can help to liven up their taste.  I've done this with previously cooked asparagus, broccoli, peppers, onions, spinach, kale, mushrooms, cauliflower, green beans, and tomatoes.  Some vegetables - squash and turnip, for instance - don't have the right consistency to make for a good omelet ingredient, though, so experiment carefully!

5. Learn to stand correctly before you even try to train correctly.

Many people think moving well is all about picking the right corrective exercises to get the job done. While that's certainly part of the equation, the truth is that before you even talk about exercising, you have to educate yourself about how to simply stand with good posture.  As an example, if you have an excessive anterior pelvic tilt and lordosis, you need to learn how to engage your anterior core, activate your glutes, and prevent your rib cage from flaring up up when you're standing around. Conversely, if you do all your exercises in this aberrant posture, you just get good at sucking!

Have a great week!

Sign-up Today for our FREE Newsletter and receive a four-part video series on how to deadlift!

Name
Email
Read more

EC Talks Transfer of Training for Baseball Players

Back in July, I presented at the NSCA National Conferences in Providence, RI.  My topic was "Individualizing the Management of Overhead Throwers: How to Spot What Your Throwers Need."  The NSCA films all the presentations, and this excerpt was just made available online, in case you'd be interested in checking it out. You can access this video HERE. A special thanks to the NSCA for making this available online.

Sign-up Today for our FREE Newsletter and receive a four-part video series on how to deadlift!

Name
Email
Read more

How to Train Harder and Smarter Without a Power Rack

Q: Unfortunately, my gym doesn't have a power rack.  I don't want my strength training program to completely fall to pieces without it.  Any ideas?

A: First off, in most cases, you have the option of finding a new gym - even if it just means driving a bit further and buying a day pass for the day of the week that you'd need a power rack for one or more of your strength exercises.  Of course, all this additional planning can throw you for a loop if you've already got a busy schedule.

Luckily, this is something we addressed in the "Exercise Modifications" chapter of Show and Go: High Performance Training to Look, Feel, and Move Better, so there's no need for me to reinvent the wheel!

This is a common limitation that is surprisingly easy to work around in your training. To be honest, the only components you’ll miss are squatting, barbell overhead pressing (and push presses), and barbell incline pressing (this, of course, assumes that you have a flat bench press set-up).

You might also be surprised to know that we actually have quite a few athletes who we don’t allow to squat because of functional (e.g., poor thoracic spine mobility, short hip flexors) or structural (e.g., rigid ankle anatomy, femoroacetabular impingement) mobility limitations.  These athletes rely predominantly on extra deadlifting variations and plenty of extra single-leg work. My personal favorites for replacing squatting variations are barbell lunge and split-squat variations because they provide the benefits of axial loading.  If you're strong enough to clean the weight up and get it into position, you can do these for higher reps and get a good training effect.

Unfortunately, without a power rack in place, it's tough to set up for these single-leg variations.  Fortunately,  you can also use variations where dumbbells are held at the sides and still get appreciable loading.  Heavy sled pushes can also provide variety, if you have access to the appropriate equipment; the only downside is that you don't get much of an eccentric stress challenge.

So, a "typical" lower body training session for someone with no power rack might include sumo deadlifts, walking dumbbell lunges, and barbell supine bridges.  Even if you aren't squatting, you're still getting a hefty lower body challenge.

With respect to barbell overhead pressing, simply replace it with dumbbell overhead pressing, or have two training partners hand the bar up to you so that you can receive it in the “rack” position. Incline pressing can be replaced with either dumbbell pressing from this position or a flat bench press variation.

To take the guesswork out of your programming as you take your training to a new level, check out Show and Go: High Performance Training to Look, Feel, and Move Better.

Sign-up Today for our FREE Newsletter and receive a four-part video series on how to deadlift!

Name
Email
Read more

Strength and Conditioning Stuff You Should Read: 10/3/12

Here's this week's list of recommended strength and conditioning reading:

4 Things That Will Kill You Way Before Cholesterol - This was an excellent post by Dr. Jonny Bowden. As an interesting aside, he references the book Blue Zones (about the longest living folks in the world) in this post.  I actually got to spend an entire day with the author, Dan Buettner (of National Geographic), in Costa Rica.  Purely by coincidence, my wife and I were on the same snorkeling trip as his family while we were on our honeymoon. It was fascinating to chat with him (he'd been on "Oprah" the week before, so I joked that hanging me was obviously the next step in career advancement!).

Outmuscling Major Depression with Creatine - Here's a cool Science Daily report on recent research that shows creatine may have merit in combating depression.  It's nice to see that people are realizing that creatine isn't just safe, but actually has far more benefits than we previously thought.

Why President Obama Throws Like a Girl - I just realized that with the upcoming election, there's an outside chance that I might not be able to refer back to this old post because we might have a new president.  So, I figure I ought to milk it for all it's worth now.

Sign-up Today for our FREE Newsletter and receive a four-part video series on how to deadlift!

Name
Email
Read more

Quick and Easy Ways to Feel and Move Better: Installment 20

In this momentous installment of this series, Cressey Performance Coach Greg Robins introduces you to some valuable lessons he's learned from the past 14 months of competitive powerlifting training.

With this being the 20th Installment of the series (whoa!), I decided I want to do something different. This post will be longer than the others, but I urge you to read it in its entirety, as the lessons from this past 14 months of training will be worth your time. These tips are based on my own experiences and are applicable to any fitness goal.

“It is not the critic who counts: not the man who points out how the strong man stumbles or where the doer of deeds could have done better. The credit belongs to the man who is actually in the arena, whose face is marred by dust and sweat and blood, who strives valiantly, who errs and comes up short again and again, because there is no effort without error or shortcoming, but who knows the great enthusiasms, the great devotions, who spends himself for a worthy cause; who, at the best, knows, in the end, the triumph of high achievement, and who, at the worst, if he fails, at least he fails while daring greatly, so that his place shall never be with those cold and timid souls who knew neither victory nor defeat.”

-Theodore Roosevelt

The quote above has followed me for a long time. I keep it in my wallet (it was on a business card I once received). I kept it in my locker when I played baseball, and I taped it inside my wall locker when I went through basic training. My powerlifting journey began at Total Performance Sports in June of 2011. I noticed a corkboard on the wall, and in bold letters, this quote was pinned to the top corner. Surrounding it were updates from different powerlifting and strongman events.

At first, it didn't convince me to train for a powerlifting meet. However, it did kind of bug me. I’m like that; if you can do it, I can do it. For better or for worse, that’s largely how I operate. Give it a month or so, and training with a group of guys who are all trying to get brutally strong rubs off on you. It’s sort of a survival of the fittest environment. It wasn't just a pride thing; it was a challenge. If you know me well, you know I am always working on a physical challenge.


Fast forward to July 2011, and the quote got taped inside my training journal; I decided I wanted to do this.
The process was a major change in how I was used to doing things. I had just finished OCS that summer, and for the past two years, my training had been focused on building a lot of relative strength and aerobic capacity. I decided if this was my goal, then I’m going to go after it hard. This included eating a ton, training hard, and taking time to recover. When it was all said and done, I could reassess and see what I thought. This was my first lesson:

1. Embrace a three phase training mindset.

The three phase training mindset is something I live by now. I first learned to embrace it after reading this post from strength coach Dan John. I encourage you to read it, but the important part is in the last paragraph. It reads "Plan the hunt, hunt the hunt, discuss the hunt." This boils down to approaching training in three phases. 

First, you plan your training. With the help of my training partner, and co-worker at the time, Jamie Smith, a 12-16 week training cycle was born. Additionally, I had always been someone who, in retrospect, was held back in possible strength gains by constantly avoiding gaining too much weight. I decided on day one that I would forgo the constant nutritional dilemma in my head, as well as the urge to finish every workout, and fill every off day, with "conditioning". I had a plan: do the program to a tee, execute the assistance work I decided ahead of time would target my weaknesses, stop conditioning excessively, and eat like a horse. When it was over, and not before, I would discuss the results.

If you are going to go after a goal, sit down and figure out the best way to get there. Furthermore, assess what you are doing now that may interfere with your success. Prioritize what will have the best transfer and execute with unyielding intensity. As I tell all the athletes at CP, train with a purpose. Once you have carried out your plan with a 100% effort, then you can sit down again and re-evaluate.

This is precisely what I did, and I got exactly what I wanted. I improved all my lifts dramatically, gained 25lbs, and had a whole host of ideas to bring to the table for my next planning session. This leads me into lesson #2.

2. Learn to tweak a program, not "change" it.

Coming off my first meet, I was very happy that our program had produced results, I stuck to my guns with regards to my nutritional approach, and avoided any extra conditioning. That being said, I had managed to gain a fair amount of not-so-lean body mass in addition to a lot of new muscle. Likewise, I was slowly developing into a one trick pony – or a three trick pony (Squat, Bench, Deadlift), as the case may be. While I was surely able to lift a heck of a lot more than ever before, I was getting winded walking up multiple flights of stairs, and feeling a little disgusted in my physique.

While the power lifting purists may scoff at that comment, I knew enough to know that progress could ensue without continuing to become a sloth. I had lived the first two phases of my training mindset, and now it was time to re-evaluate. The important lesson here is that I kept the nuts and bolts of my training program the same. I planned to work off the same percentages, hit the same supplemental lifts in the same sequence, and choose accessory movements that targeted my weakness.

The difference this time around was in how I approached my nutrition, and additional "moving." Common sense would tell us that you can't remove two sources of energy (calories, and the addition of more physical activity) and continue to gain. So. I chose to remove one source of energy, and tweak another. I made sure that my calories were still very high, but that they came from better sources.

On top of that, I decided to utilize a nutrient timing protocol to make my calories work towards my goals more productively. I did that by slowly adopting the principles of Carb Back Loading, which you can read about here.

Knowing that my caloric intake was more than enough to gain muscle and strength, I simply placed in "movement" days in a fashion that would promote more calorie burning, but also enhance recovery. This was done by intelligently approaching these days with less intensity, as well as by optimizing the means. An example of this would be running sprints at low intensities 50 - 70% on an elevated (hill) soft surface (grass).

Fast forward 16 weeks, and the new plan had worked as well. I was stronger, leaner, and much more confident in my physique. I even got girls to like me again...phew!

Too often people jump from program to program. Most people jump before the first one is even done; this is silly. There are also a fair amount of people who finish one program and think the most logical choice is to scrap it and start something completely different. This isn't always stupid, depending on certain factors. However, I would strongly encourage you to think about tweaking programs, rather than abandoning them all together. Conveniently, this leads me to lesson #3.

3. Know thyself.

Being able to put lesson #2 into practice is largely a function of learning to know oneself as a lifter. At this point, I am 3 weeks out from my second powerlifting meet. It is also the 30th or so week I have followed the same program.

It's pretty funny to think back on the three separate training cycles and how I felt at any given point during the training. I remember saying to myself in week 10 of my second go: "Wow, I feel horrible." Then, I thought about how I felt during week 10 the first time around: the same. Come week 10 this time, it was same thing. It's important because I was able to locate an exact point where the volume was getting to me. This means I was able to do two things.

First, I didn’t abandon ship, because this was normal, and I was beginning to taper the volume anyhow. Second, I was able to slightly tweak training sessions in order to optimize my training. As a young fitness enthusiast, I would read about the difference between advanced and novice lifters. A common theme was that the advanced lifter was able to auto-regulate his training. He or she could make calls on how they felt while staying within the parameters of their training approach as a whole. I even thought a few years ago I was one of these people. I would smash it when I felt good, cut back when I felt crappy. In some ways this was beneficial. However, now I am able to do this on an entirely different level, and I'm still new to understanding it. This is a little over a year of understanding how to train for optimal outputs; the best have decades of experience!

If you want to be great, and have great success in the gym, you need to understand how you react to all the stresses put upon you. It may be possible for some of you already, but I guarantee you it is possible for all of you if you stick with a certain approach over an extended period of time and remain cognizant of how you feel under different circumstances.

Bottom line: do something consistently enough to be able to determine what works, what doesn't, and what can be improved. Furthermore, listen to your body. As a side note to coaches: listen to your clients and athletes.

Moving on, my next two lessons don't flow from the previous ones quite as smoothly as the others. I’ll never be described as a literary genius, but nonetheless, they are good ones!

4. Hammer home technique, technique, technique!

Powerlifting has filled a void in my life. One thing I loved about playing baseball was working on my swing, and receiving skills as a catcher. The neat thing about sport performance is that the most elite athletes are able to blend both tremendous physical outputs with mastery of their sport skill. When a high level of each is achieved, the result is simply amazing to watch.


When I would lift weights in the past, I knew form was important, mainly so that I didn't get hurt. After all, my weight room antics were mainly done in order to improve performance in activities outside the weight room. Now lifting weights is my sport, and technical mastery of the three lifts is hugely important. While I have obviously gotten a lot stronger over the past year, I attribute a large amount of my success to dissecting my form. I have well over 250 videos of different lifts saved on my computer, and I’ve watched each multiple times and scrutinized for flaws in technique. If you have seen some of my videos on Facebook, you are probably wondering what the heck I am looking for, as it isn't always pretty. In all seriousness, it has been the single biggest factor in improving my squat and bench press, and a good way to locate little mishaps in timing with my deadlift. If you are a competitive lifter, break down your technique and learn the nuances of each lift from people who have lifted weights you hope to someday lift. If you are a coach or fitness buff, I would advocate the use of video on the big lifts. I also think becoming meticulous with your technique will add a rewarding piece to your training as a whole!

The last lesson is the most important, and in light of what it is, and the fact this article is already a short novel, I will keep it short.

5. Do Less, get more.

If powerlifting has done one thing for me, it has proven this mantra. My training has become focused. I have three lifts I am looking to improve. I have learned that doing too much physically outside of these lifts will negatively impact them. I have learned that doing more mentally (looking at video, crunching numbers, assessing training stress) with these three lifts will improve them.

This is the lesson that can be most easily applied to everyone's training and life. Don't do so much that you become mediocre at a lot, and great at nothing. Don't create so many variables that you cannot locate and manage the ones that matter.

Sign-up Today for our FREE Newsletter and receive a four-part video series on how to deadlift!

Name
Email
Read more

7 Strategies to Get More Vegetables in Your Diet

Today's guest post comes from Cressey Sports Performance coach Chris Howard.

As a “nutrition guy” at Cressey Sports Performance, I spend a considerable amount of time looking over three-day food logs from our clients and athletes to help them create healthy food options for their menus. A common dietary trend among our young athletes and even some of our adults is a serious lack of vegetables. As a way to help the world at large consume more vegetables, I have come up with this list of seven strategies to get more vegetables in your diet.

1. Learn to Cook (or at least follow a recipe).

This strategy is a bit different from the other six, but it’s really where getting more vegetables in your diet has to start. Sure, you can eat vegetables raw; in fact, it’s encouraged, but you certainly get more variety from cooking them. Use Google as your friend and search for recipes that include vegetables or just different ways of making something as simple as broccoli. See some of the recommendations below for more information.

2. Include Vegetables in Smoothies.

In this post, Greg Robins talked about eating more pumpkin, and it made me think of a great smoothie recipe to enjoy this time of year. Here it is:

½ cup Canned Pumpkin (make sure it’s the pure pumpkin, NOT the pie filling)
½ cup Plain Greek Yogurt
1 scoop Low Carb Vanilla Protein Powder
¼ cup Walnuts
¼ cup Old Fashioned Rolled Oats
1 tsp Ground Cinnamon
8oz. Vanilla Unsweetened Almond Milk
4oz. Water (just to thin it out a bit)

Throw all the ingredients in a blender and enjoy!

pumpkin-1679827_1280

Of course, adding vegetables to smoothies doesn’t begin and end with pumpkin. Spinach is another smoothie-friendly vegetable common among the CP staff. It works in pretty much any smoothie and will usually be overpowered by the other ingredients so that you won’t even taste it. Still, you may get some weird looks from classmates and colleagues as they wonder what is in the green sludge you are drinking.

3. Make Soup/Chili.

Soup and chili recipes are a great way to hide vegetables. Brian St. Pierre has written extensively about his wife’s chili recipe, which is still one of my favorites. However, I have a new recipe that while technically not chili, looks, feels and tastes pretty darn similar. The recipe comes from Sarah Fragoso’s Everyday Paleo website. Be sure to check out her version of the recipe here. To make this recipe easier and quicker to make, I have chosen not to stuff the green peppers with the meat mixture, but to chop up the peppers and include them in the meat mixture, instead, which makes it more like a chili. Give it a try and let me know what you think.

4. Don’t Forget about Stir Fry.

While participating in the Precision Nutrition Lean Eating Coaching Program, I was introduced to Robb Wolf’s Food Matrix. He outlines a simple set of instructions that really hammer home how simple cooking and eating healthy can really be. Try this “recipe” with your next stir-fry:

1. Put oil in a skillet or wok;1-2 tbsp coconut or olive oil will work well.
2. Put some meat on the skillet or wok; think chicken, beef, or whatever you like
3. Let the meat cook for a minute or so.
4. Add a ton of veggies; I tend to use frozen broccoli, cauliflower, or stir-fry mixes.
5. Stir it around a few times.
6. Let it cook for 5-10 minutes, until the veggies and meat are cooked to your liking.
7. Eat and Enjoy! It's as simple as that.

This is not only easy to do, but you can also literally change the recipe every night for variety while still using the same cooking methods. Plus, I think this is something that even high schoolers can manage to do without burning down the house.

athletic-greens-pack

5. Add Flavor with Spices/Dressings.

Learning how to use spices on foods can really liven up a dish. Sure, there’s going to be some trial and error here, but it’s definitely worth a shot. Here’s a simple way to make kale, a superfood, taste better in the hopes of becoming a staple at your dinner table:

Ingredients
1 bunch kale
1 tablespoon olive oil
1 teaspoon seasoned salt (you can substitute any spice you like here)

kale-852033_1280

Directions
1. Preheat an oven to 350 degrees F.
2. With a knife or kitchen shears carefully remove the leaves from the thick stems and tear into bite size pieces. Wash and thoroughly dry kale with a salad spinner. Drizzle kale with olive oil and sprinkle with seasoning salt.
3. Bake on a cookie sheet until the edges brown but are not burnt; it'll be approximately 10 to 15 minutes.

6. Make omelets a regular breakfast selection.

One of the questions I always get is how to get vegetables in at breakfast. I usually suggest either a smoothie with spinach or pumpkin (see above), or - even better - an omelet. Again, from a variety standpoint, the options are really endless with an omelet. Here are some ideas:

a. Peppers
b. Onions
c. Tomatoes (Yes, they're technically fruits, but who cares? They are good for you.)
d. Salsa (best for those who are “easing” their way into vegetables)
e. Spinach
f. Mushrooms
g. Asparagus (if you're feeling bolder)
h. The list goes on and on…

kitchen-775746_1280

7. Substitute Lettuce for Tortillas on Tacos and Fajitas.

What kid doesn’t love tacos? I know I could eat them every day for the rest of my life and never get sick of them. One way to make them healthier - and maybe a bit messier - is to substitute lettuce for the tortilla. Try experimenting with different types of lettuce to see which you like the best.

Eating vegetables doesn't have to be boring as long as you're willing to put a bit of thought into preparing them.  Give these tips a shot - and by all means, share any additional strategies you may have in the comments section below.

Note from EC: While we're on the topic of healthy nutrition, in case you haven't heard, here's a quick heads-up that Metabolic Cooking - my favorite cookbook of all time - is on sale for just $10 through the end of this week. My wife and I have used the recipes in this resource for years with great results. You can learn more HERE.

5

About the Author

Christopher Howard received his his Bachelor’s of Science in Exercise Science and Masters of Science in Nutrition Science from the State University of New York at Buffalo. In addition, Chris is a Certified Strength and Conditioning Specialist through the National Strength & Conditioning Association, a Licensed Massage Therapist in the state of Massachusetts, and a Level 1 Certified Precision Nutrition Coach. Chris has been a strength coach at Cressey Sports Performance since 2010. You can follow him on Twitter here.

Sign-up Today for our FREE Newsletter and receive a four-part video series on how to deadlift!

Name
Email
Read more
Page 1 61 62 63 64 65 84
LEARN HOW TO DEADLIFT
  • Avoid the most common deadlifting mistakes
  • 9 - minute instructional video
  • 3 part follow up series