Today, I've got the second video in my series on how we utilize the Acumobility Ball to perform self myofascial release in the upper extremity - and, in particular, the neck. As a reminder, the crew at Acumobility have been kind enough to provide my readers with 10% off by using the coupon code cressey at www.Acumobility.com. Today, we'll talk about the scalenes.
I'll be back soon with another video to keep this series going.
Sign-up Today for our FREE Newsletter and receive a four-part video series on how to deadlift!
In a recent Instagram post, I discussed how big of a fan I am of the Acumobility ball, and I got a lot of questions about how we integrate it for upper extremity and neck self-care. With that said, I wanted to kick off a series this week with a look at where we start when it comes to implementing this tool. The good folks at Acumobility have been kind enough to provide my readers with 10% off by using the coupon code cressey at www.Acumobility.com.
To kick things off, let's talk about functional anatomy and self myofascial release for the sternocleidomastoid (SCM):
I'll be back soon with a new video to keep this series going.
Sign-up Today for our FREE Newsletter and receive a four-part video series on how to deadlift!
I'm a big fan of utilizing the Acumobility Ball for self-myofascial release. You just need to be very careful to not work too intensely around the more delicate structures of the neck.
Check out this five-part video series on how we integrate this great tool:
Sign-up Today for our FREE Newsletter and receive a four-part video series on how to deadlift!
Today's guest post comes from Cressey Sports Performance coach, Frank Duffy. Enjoy!
The word “mobility” gets thrown around a lot in the fitness industry, and rightfully so. However, the context in which we use it often doesn’t correspond properly with the movements we prescribe to our clients.
In order to appreciate what true mobility training is, I think it’s important to first understand what it isn’t. Wrapping a band around a squat rack and stretching your upper back might feel great and improve passive flexibility when done for long enough periods of time, but improvements in active mobility will not be an outcome. This goes for practically any drill you see within a warm-up prior to a training program. I prescribe a lot of mobilization drills to our athletes where the primary intent is to get them feeling good for their training session. I love Split-Stance Kneeling Adductor Mobilizations, but I’m not going to sit here and say that – by themselves – they are a great way to improve long-term hip abduction mobility.
When training to improve joint mobility, the goal is to improve active range of motion. Mobility, just like any training stimulus (strength, power, muscular endurance, aerobic capacity, etc.) we’re looking to improve follows the same principles of progressive overload in order to elicit an adaptation. Connective tissue, whether it’s a muscle, tendon, ligament, capsule, or bone (to name a few), needs to be placed under mechanical stress to remodel the tissue being addressed.
When implementing the Functional Range Conditioning (FRC) system, I like to expose new clients to Controlled Articular Rotations (CARs) in order to help them understand how to properly train for long-lasting joint range of motion improvements. While CARs will not directly improve our joint mobility, they do provide us with four main benefits that I’ve listed below.
1. Assessment: CARs are a great tool for assessing the overall ranges of motion at each joint. They allow us to move each joint throughout its full range of motion under voluntary muscular contractions. When active mobility is restricted and joint function is poor, CARs also allow us to determine what our mobility training goals should be.
2. Mechanoreception: The capsule of our joint articulations is home to a high concentration of mechanoreceptors. When stimulated through end-range movements, mechanoreceptors supply the Central Nervous System with afferent feedback with information about the joint’s position in space.
3. Injury Prevention/Training Stimulus: Because CARs are performed under active contractions, the force applied to the surrounding connective tissue is below the threshold for injury (amount of force a tissue could safely absorb). When done at high enough intensity via voluntary muscular contractions, CARs could also provide a strength training stimulus for force production at the targeted joint.
4. Maintenance of Joint Range of Motion: The primary goal of executing CARs daily is to move our joints throughout their full range of motion under some degree of force. This will allow us to maintain our current ranges over time due to consistent exposure.
As mentioned above, CARs are a great way to assess the quality of each joint because they isolate the articulation being moved. Of course, our joints move interdependently with virtually every movement we perform. However, if a joint doesn’t work effectively on its own, it’s not going to work well in a global system under load. A sure-fire way to induce injury is to repetitively load a position when you haven’t prepared the involved joints for force absorption.
To break out even further, the “sticking points” of your CARs allow you to determine the appropriate joint angles at which to perform isometric contractions for both the progressive (lengthened) and regressive (shortened) tissues. By figuring out your active range of motion limitations, you’re able to create positional isometrics to learn how to expand these ranges further.
With individuals that present osseous restrictions like Femoroacetabular Impingement (FAI), I still recommend CARs on a daily basis. Regardless of structural orientation, it’s important to move through whatever active range of motion you currently own. As cliché as it sounds, if you don’t use it, you lose it. However, if CARs elicit pain, there’s an underlying issue that should be referred out to an appropriate rehabilitation specialist. Cranking a joint through a painful range of motion and hoping it will get better is just a recipe for further irritation – and an articulation that continues to function at less-than-optimal quality.
Whether you’re the most nimble yogi on the planet or a powerlifter that’s as stiff as a board, you should always seek ways to expand and control your mobility. Remember, mobility always comes back to active range of motion. With this in mind, it’s important to understand that there’s no such thing as having “too much” mobility. The more range you can control, the better off you’ll be.
If you’re interested in learning more or finding a provider near you, check out the following links: FR/FRC and Kinstretch.
About the Author
Frank Duffy is the Coordinator of Strength Camps at Cressey Sports Performance-Massachusetts. He is a Functional Range Conditioning Mobility Specialist (FRCms) and Kinstretch Instructor. You can contact him via email at frankduffyfitness@gmail.com, check out his website, and follow him on Instagram.
I received the following inquiry via email the other day, and thought it might make for a good Q&A post:
I've come to the unfortunate realization that 15 years of sitting at a desk - combined with the simple fact that I'm almost 40 - have left me severely lacking in mobility. And, it's something I now want (and need) to really address. However, I'm also a realist and know that with a busy work and family schedule, getting to the gym is hard enough - but adding a lot of mobility work on top of that could be really challenging. So, I'm wondering what the best way to efficiently tackle this problem is? Should I do a little bit each day? Is it better to go to a yoga class 1-2 times per week? Or something else? I'd like to make some positive changes, but ideally without completely overhauling my weekly schedule. Thanks for any direction you can provide.
The short answer to this question would be a blunt one:
[bctt tweet="If it's really important, make time instead of finding time."]
That wouldn't make for much of an educational blog, though, so let's explore this in more detail. Here are ten things I'd consider if you'd like to really dedicate yourself to improving your overall mobility as efficiently as possible.
1. Frequency is everything.
Remember that - simply stated - mobility is your ability to reach a certain position or posture. It's different than flexibility in that mobility necessitates stability within a range of motion, not just the range of motion of a joint (or series of joints). In other words, you need motor control to have motor control.
Think back to when you were learning to ride a bike. Did you go out and try for 5-6 hours every Saturday morning, or did you put in several runs every day for a few weeks? If you're like most people, it was definitely the latter option.
[bctt tweet="Frequent exposure is key for motor learning, and you can't improve mobility without motor control."]
What does that mean in the context of mobility work? You need to do something every day - and possibly even multiple times per day.
For most folks, a quality pre-training warm-up is an important first step. If you look at my High Performance Handbook as an example, each pre-training warm-up consists of about five minutes of foam rolling and ten mobility drills that should take about ten minutes total.
2. Find new planes and ranges of motion in your strength work.
Most training programs are very sagittal plane (front-to-back) dominant. In other words, a lot of exercisers do very little in the rotational (transverse) and side-to-side (frontal). While you do have to do work in these planes during single-leg work, that doesn't mean much for actually taking them close to their end-range of mobility. Simply adding in some lateral lunges to your warm-ups and strength work can go a long way.
3. Sign up for classes if you really need the accountability or the instructor is absolutely fantastic.
Yoga and Pilates can be absolutely fantastic tools for helping you to improve your mobility if:
a) They improve your accountability so that you're more likely to actually make this a priority.
b) You have an outstanding instructor that both motivates you and teaches you about how your body works.
These options can also be terrible approaches if you have unqualified instructors or attending them absolutely destroys your schedule - and therefore becomes a burden more than a blessing.
4. Mix in a little work at night before bed.
This piggybacks on the aforementioned "frequent exposures" theme. I know of a lot of people who'll do a bit of foam rolling and stretching at night while watching TV or getting ready for bed. Anecdotally, it does seem to help some people unwind - possibly by kicking the parasympathetic nervous system on (especially if combined with a good focus on breathing during this work). If getting in some stretching and rolling before bed doesn't exactly thrill you, just pick 1-2 high priority drills and do them. Or just stretch out your calves while you're brushing your teeth!
5. Break up prolonged periods of immobility.
Each spring, I drive from Florida to Massachusetts. Then, in the fall, I drive back to Florida. It's a lovely 23 hours in the car over two days.
The first time I did it, I tried to be a cowboy and just plow through it with as few stops as possible. My hips hated me for about three days after the trip was done.
Since then, I make sure to stop every 2-3 hours. In fact, on my ride back this spring, I even stopped twice to train along this journey. I felt dramatically better in the days that followed.
I think you can extend this logic to how we break up our days, too. If you have to be at a computer for the majority of the 9am-5pm work day, try to get up and move around every 20-30 minutes. Walk to get some water, or do a doorway pec stretch.
It's a lot easier to do a little to maintain your mobility than it is to lose it and try to get it back.
6. Incorporate a bit more unilateral work.
When you take a lifter who's never done much single-leg work and start incorporating these unilateral movements, good things always seem to happen. I suspect that it has to do with the fact that a lot of these individuals are actually extending their hips past neutral for the first time in years, but I doubt that's the only mechanism.
To be clear, this doesn't mean that the hardcore squat/deadlift enthusiasts need to drop (or even tone down) these movements. It just means that it'd be a good idea to work in some more single-leg drills to the warm-up period, and to do some as an assistance exercise. They don't need to be loaded like crazy, either, particularly early-on. It's not uncommon to see groin strains (or very pronounced soreness) when someone incorporates single-leg work to a previously 100% bilateral program, so incorporate them gradually in terms of loading and volume.
7. Be patient and don't skip steps.
Getting transient (quick) improvements to range of motion isn't particularly difficult. You can get that from manual therapy, increased body temperature, or "tricks" to the nervous system. After these initiatives, we need to incorporate some stability training to make these changes "stick."
They won't magically improve dramatically from one session to the next, though. In fact, you may only hold 5% of that change from one session to the next - and that's why you need to stay patient and persistent with these drills over an extended period of time to see pronounced results.
With that said, it's important not to skip steps in this process. Just because your squat pattern improved a little doesn't mean you're ready to sink a 500-pound front squat to the "butt-to-heels" position the right way. And, just because you experienced subtle improvements to your active straight leg raise doesn't mean that you're ready to run a sub-10-second 100m dash. Own the changes before you try to challenge them in more chaotic environments.
8. Manage your breathing.
We'll keep this one really simple and watered-down:
Inhale = tension = stress
Exhale = relaxation = destress
If you're holding your breath while doing your mobility drills, stop! You're just stretching your lats, not attempting a 700-pound deadlift. Control your breathing, and think about fully exhaling at the lengthened position to give your system a chance to perceive it as a "new normal." The yoga folks have been preaching this for thousands of years, but us meathead strength and conditioning coaches have only started to figure it out in the past decade or so.
One drill I love for teaching this is the TRX deep squat breathing with lat stretch. Just sink down into this bottom position and exhale fully on each breath. Give it a "two-one-thousand" count before inhaling again. I usually program five breaths per set.
9. Choose comprehensive mobility drills.
If you only have 10 minutes per day to devote to improving your mobility, you are best of focusing on drills that provide plenty of bang for your buck. In other words, you want drills that challenge multiple joints and planes of motion at the same time. Here are a few good options as examples:
10. Balanced programming and optimal technique help to improve mobility.
Sometimes, the best thing you can do is "audit" your programs and training technique to see if they're pushing you further into your mobility deficit. Maybe you're benching too much and rowing too little? Or, perhaps it's been a lot of squatting and not enough deadlifting? Could it possibly be that you've been board pressing a ton and omitting full range-of-motion benching that could actually be really helpful for your shoulder? There are countless programming pitfalls into which one can fall, but you'll never identify them until you take a step back to review what you've been doing.
Moreover, crappy technique under load reinforces bad patterns and loss of mobility. Additionally, it can turn soft tissue and neuromuscular control restrictions into joint restrictions (laying down bone that shouldn't be there). You can't just fix reactive changes to the joint with stretching, either. Train hard, but train smart and with solid technique.
Wrap-up
These are only ten thoughts off the top of my head, and there are surely many more. At the end of the day, though, most of the mobility improving strategies come back to common sense. Your body desperately wants to move, and you need to make time for that movement - and approach it with a plan as you would any other priority in your life.
Sign-up Today for our FREE Newsletter and receive a four-part video series on how to deadlift!
Today's guest post comes from Dean Somerset, the creator of the excellent resource, Ruthless Mobility, which is on sale for 60% off through the end of the day on Monday, July 4. Dean is a tremendous innovator and one of the brighter minds in the fitness industry today, and this article is a perfect example of his abilities. Enjoy! - EC
Mobility can be described in a number of different ways, depending on who is writing the story: yoga, flexibility, stretching, movement training, dynamic warm-ups, bendy stuff, and in some cases “how the heck do you even do that?” Regardless of what it’s called or who’s doing it, there are some basic rules and physiologic elements to be aware of when it comes to understanding mobility and how to use it in training programs. Today I wanted to outline the "three big rocks" of developing, using, and maximizing mobility in a safe and progressive manner.
1. Structure Determines Function.
It’s easy to say that genetics are a separating feature for those who can gain a lot of muscle and those who have trouble adding a pound. The same can be said of those who are congenitally lax (via something like a higher Beighton hypermobility score or a diagnosis of Ehlers Danlos syndrome), compared to people who move like the tin man. Some of this could be connective tissue related difference in collagen to elastin ratio, but much of it could also be considered by the shape and orientation of the joints themselves.
In terms of the acetabular angle, D’Lima et al (2011) found in a computerized prediction model for prosthesis implantation that:
a. those with more acetabular anteversion (forward placement on the pelvis) had greater flexion range of motion and less extension
b. lateral placement of 45-55 degrees gave the best overall mobility
c. a lateral angle of less than 45 degrees gave more flexion range of motion and more than 45 degrees gave less rotation capability
d. if the femoral neck was thicken by 2 mm in diameter, it significantly reduced the range of motion in all directions, irrespective of placement.
Higgins et al (2014) even showed there was a large difference in anteversion angles bilaterally in the same individual (potentially lending some validity to PRI concepts of inherent asymmetry), with as much as a 25 degree difference in anteversion angle between left and right hip. This could translate to a difference in flexion range of motion of 25 degrees between your two hips, without any other feature affecting the outcomes. Zalawadia et al (2010) showed there’s a big variance in the femoral anteversion angle (whether the head of the femur pointed more forward or possibly backward) as the femoral neck attaches to the acetabulum, with the majority being between 10-20 degrees.
Additionally, some acetabulums have too large of a center edge angle, where the socket faces more inferiorly than laterally, which makes impingement during abduction more likely compared to a smaller center edge angle.
These structural differences are primarily set and unchanging after puberty when bones don’t deform as easily to external forces as with young kids. Baseball pitchers can undergo deformational changes at the proximal humerus (upper arm) to allow a much greater external rotation range on their throwing arm compared to adults who pick up the sport later in life. Eric showed that with his comparison of presidential first pitches HERE.
With advancing age, joint range of motions tend to reduce further with degenerative changes to the structures involved, either with an increase in concentration of cortical bone at contact areas, a reduction of cartilage thickness, or decreased fluid content of the joint space itself. The end result is a tighter joint that doesn’t move as easily.
Most of these types of changes, barring injury or disease, tend to not be limiting factors in mobility until many decades have passed, so if you’re in your 20s and concerned about your lack of mobility, it’s pretty safe to say that it’s likely not related to degenerative changes just yet. If you’re 50 or 60, it’s much more of a likely scenario.
This Canadian study showed that men lost an average of 5 degrees of shoulder abduction and 6 degrees of hip flexion per decade between 55 and 86 years old, while women lost an average of 6 degrees of shoulder abduction and 7 degrees of hip flexion in the same age range, and that this loss sped up after 70 years old and was actually not linked to self-reported activity levels. Being more active is better for everything as you age, but based on this study, not necessarily for keeping your mobility into your golden years.
What this means is that everyone will be different in terms of how much mobility they have and in which directions or movements. One person may be able to press overhead because they have joints that easily allow it, while another may never get there due to specific limitations, and a third may just not be ready to press yet. They may have the specific ability to do the motion, but don’t have the control or strength at the moment to do it effectively, which is where part 2 comes in.
So how do you determine a structural limitation? The best mechanisms are simply to see what the range of motion looks like in a couple of scenarios:
a. passive – have someone move you through the range while you’re relaxed)
b. supported - pull the joint through a range without using the muscles involved in the action. (Think a hamstring stretch with a towel wrapped around the foot and pulling on it with your arms)
c. in a different position or direction – in looking at hip flexion, compare a squat to a rock-back or Thomas test to look at the same range of motion.
If you consistently get the same joint angles in different motions or positions, it’s reasonable to believe that could be the true limit of your flexibility based on structural aptitudes. There’s always a potential that the limitation could be something else, and if you involve some of the training practices and options used later and notice an improvement, it’s a happy bonus. Short of developing X-ray vision, these are some of the best options for determining structure that everyone has available to them, whether we’re talking about the clinician, trainer or average meathead looking to get all bendy and stuff.
2. Can you actually get there?
Now, let's consider shoulder mobility; imagine that we look at an individual in supine and there’s no limitation standing in the way of going through full shoulder flexion.
However, when this same individual is asked to bring their arms overhead in an upright position, they do some wonky shoulder shrug, low back arch, and their upper lip curls for some reason. In short, they aren’t able to access that flexion movement very well, even though they have the theoretical aptitude to get there on their own.
We’re looking for the image on the right, but wind up getting the image on the left:
Now the great thing about the body is it will usually find a way to get the job done, even if it means making illegal substitutions for range of motion from different joints. In this case, the lack of shoulder motion is made up with motion from the scapula into elevation instead of rotation, and lumbar extension in place of the glenohumeral motion.
This by itself isn’t a problem, but rather a solution. It’s not bad to have something like this happen by itself, but it does alter the specific benefits of an exercise when the segments you’re looking to have do the work aren’t actually contributing, and you’re getting the work from somewhere else. There’s also the risk of injury from poor mechanical loading and improper positioning that increases the relative strain on some areas that aren’t meant to be prime movers for the specific exercises.
Now, the big question is whether someone is willing to not do an exercise because they’re demonstrating that they’re not ready for at the moment. If a client wants to squat in a powerlifting competition, but his hip range of motion makes it very difficult to get below parallel to earn white lights without losing lumbar positioning or grinding the hip joints to pieces, how willing would he be to adjust his training or eliminate that possibility to save a lot of hassles? Some people identify themselves by their sport, so telling them not to do what they love isn’t an option. I’ve worked with a lot of runners, and saying “don’t run” tends to go in one ear and out the other.
Back to the overhead example, maybe going right overhead isn’t possible at the moment, but a high incline press can be done easily. This is working in what Mike Reinold calls on Functional Stability Training: Optimizing Movement “Green Zone vs Red Zone training.” Overhead at the moment is a red zone movement as they can’t get there easily and on their own. Green zone would be a landmine press, where they’re still working on flexion, but not moving into a range they can’t easily access.
One manner that could help an individual access this range of motion if they have shown an ability to get there passively is through what Dr. Andreo Spina calls eccentric neural grooving of the motion. Use either a support or pulley to get into the terminal range of motion, release the support or pulley and try to maintain the terminal position while slowly moving out of the end range as controlled as possible. Here’s Dr. Spina doing ENG work on the ankle and anterior shin for some dorsiflexion work.
Here’s another version with yours truly working on a similar variation via controlled hip abduction:
You could do this for the shoulder easily enough as well by grabbing a rope, pulling the shoulder into flexion, releasing the rope, and trying to maintain the position before slowly lowering the arm out of terminal flexion. Just make sure you’re not letting your low back arch or shrug up your shoulder blades in to your neck.
3. Can you use it with force when needed?
So now you’ve shown you have the joints to do stuff, you can get there on your own without assistance, and you want to train the heck out of it to look like your favorite Instagram bendy people.
One thing to consider when exploring these ranges of motion is that force production tends to be greatest in mid-range positions, likely due to the greatest torque development required to overcome natural leverage elements and also due to spending less time in the end ranges. There’s also the reduction of cross bridge linkages in these positions, limiting sarcomeric action when you’re gunning your biceps in peak flex.
Controlling these end ranges (even if the goal may not be to develop maximal force in them for moving the biggest weight from point A to B) can help expand the usable range of motion where peak torque development occurs, as well as provide the potential for expanding sub-maximal torque percentage ranges of motion. These movements aren’t easy and tend to take a lot of mental energy coupled with physical effort, but if getting awesome was easy, everyone would already be there.
Summary
To round things out, understanding and developing mobility comes down to:
a) having the structure to produce the range of motion
b) being able to get into position to effectively use that range of motion
c) building strength and conditioning within that range of motion to keep the ability to use those ranges for a long time, and through as many positions and directions of movement as possible.
Some specific movements or positions may not be possible due to your own unique structure and abilities, but work hard at using everything you do have, build strength throughout the entire range of motion, and enjoy the process as much as the outcomes.
Note from EC: If you're looking for more mobility tips and tricks - and the rationale for their inclusion in a program - I'd encourage you to check out Dean's fantastic resource, Ruthless Mobility. Your purchase includes lifetime updates and continuing education credits. Perhaps best of all, it's on sale for 60% off through this Monday (7/4) at midnight.
If you've read EricCressey.com for any length of time, you're surely aware that I'm not a fan of distance running for pitchers. I've published multiple articles (here, here, here, and here) outlining my rationale for the why, but these articles have largely been based on theory, anecdotal experience, and the research of others. Today, I wanted to share with you a bit of data we collected at Cressey Sports Performance - Florida not too long ago.
First, though, I should make a few important notes that "frame" our training recommendations and
1. Athletes absolutely must have a well-developed aerobic system in order to recover both acutely (during the training session or competition/games) and chronically (between training sessions and competitions/games). It's relatively easy to improve if approached correctly, and can yield outstanding benefits on a number of physiological fronts.
2. As long as the intensity is kept low enough during aerobic training initiatives, it won't compromise strength and power development. I wrote about this all the way back in 2003 with Cardio Confusion, but many industry notables like Alex Viada, Joel Jamieson, Mike Robertson, Bill Hartman Eric Oetter, Pat Davidson, and Charlie Weingroff have done a far better job describing the mechanisms of action in the 12 years since that article was published. Speaking generally, most folks put the "safe zone" intensity for aerobic development without strength/power compromise at approximately 60-70% of max heart rate (Zone 2, for the endurance savvy folks out there).
3. It might be a large amplitude movement (great ranges-of-motion achieved), but baseball is a low movement variability sport. Pitchers are the most heavily affected; they do the exact same thing for anywhere from 6-9 months out of the year (or up to 12, if they're making bad decisions by playing 12 months out of the year). Distance running to me does not offer significant enough movement variability to be a useful training option for developing the aerobic system.
4. The absolute best time to develop the aerobic system is early in the off-season. For the professional baseball player, this is Sep-Oct for minor leaguers, and Oct-Nov for major leaguers. This is one more strike against distance running; after a long season of being on their feet in cleats, the last thing players need is a higher-impact aerobic approach.
With these four points in mind, two years ago, I started integrating aerobic work in the form of mobility circuits with our pro guys in the early off-season. The goals were very simple: improve movement quality and build a better aerobic foundation to optimize recovery – but do so without interfering with strength gains, body weight/composition improvements, and the early off-season recharge mode.
The results were awesome to the naked eye – but it wasn’t until this week that I really decided that we ought to quantify it. Lucky for me, one CSP athlete – Chicago White Sox pitching prospect Jake Johansen – was up for the challenge and rocked a heart rate monitor for his entire mobility circuit. A big thanks goes out to Jake for helping me with this. Now, let’s get to the actual numbers and program.
Jake is 24 years old, and his resting heart rate upon rising was 56 beats per minute (bpm). If we use the Karvonen Formula for maximum HR (takes into account age and resting HR) and apply our 60-70% for zone 2, we want him living in the 140-154bpm range for the duration of his session. As you can see from the chart below – which features HR readings at the end of every set during his session – he pretty much hovered in this zone the entire time. The only time he was a bit above it was during an “extended” warm-up where I added in some low-level plyo drills just to avoid completely detraining sprint work (he’d already had a few weeks off from baseball before starting up his off-season).
When all was said and done, Jake averaged 145bpm for the 38 minutes between the end of his warm-up and the completion of the session.
He bumped up a little bit high in a few spots, but that’s easily remedied by adding in a slightly longer break between sets – or even just rearranging the pairings.
To that last point, I should also note that this approach only works if an athlete is cognizant of not taking too long between sets. If he chats with his buddies and heart rate dips too much between "bouts," you're basically doing a lame interval session instead of something truly continuous. Jake did 44 sets of low-intensity work in 38 minutes. You can't get that much work in if you're taking time to tell a training partner about the cute thing your puppy did, or pondering your fantasy football roster.
Think about the implications of this....
What do you think this kind of approach could do for the foundation of movement quality for a typical high school, college, or professional pitching staff?
Don't you think it might make them more athletic, and even more capable of making mechanical changes easier?
Don't you think they'd be less injury-resistant performing an individualized mobility circuit instead of one-size-fits-all distance running?
Do you think that maybe, just maybe, they'd feel better after an 11-hour bus ride?
Don't you think they'd bounce back more quickly between outings?
What is difficult for some coaches, though, is admitting that distance running to "build up your legs" is like changing the tires on a car with no engine, or studying for the wrong test. Just because "that's how it's always been done" doesn't mean that's how it has to stay.
Give some of these a try in the early off-season - and even during the season in place of "flush runs." They'll be a big hit with your athletes both in terms of performance and health.
And, for those of your looking for another Z2 training option, look no further.
Sign-up Today for our FREE Newsletter and receive a four-part video series on how to deadlift!
Today's guest post comes from Dean Somerset, the creator of the excellent resource, Ruthless Mobility, which is on sale through the end of the day today for 60% off. Dean is a tremendous innovator and one of the brighter minds in the fitness industry today, and this article is a perfect example of his abilities. Enjoy! - EC
Mobility is one of those nebulous concepts that get thrown around the fitness industry a lot. You either have it or you don’t, and if you’re one of those lucky Tinman stiff-as-a-board folks who can’t touch their toes without a yardstick, you’re told to stretch and do more mobility work, which seems akin to carving out Mount Rushmore with nothing more than some sandpaper. We might be here a while if all you have available to you is simply stretching to make your mobility improve.
What we forget to do is ask a very simple question: Why do you feel tight in the first place? Muscles are incredibly dumb and won’t contract on their own. They’re usually told to contract, and they’re good soldiers that do what they’re told. You could cut a muscle out of the body and hook it up to a car battery and have it contract until either the proteins are ripped apart or until you turned off the battery. Also, muscles can’t get confused, so let’s stop using that term while we’re at it, shall we?
Typically a muscle will tense in response to a few different things. The first is the desire to produce movement, which means the normal shortening response happens and people awe and admire the massive weight EC pulls on a daily basis.
The second is as a protective means. A joint that may be unstable or a step away from being injured could cause the body to contract muscles around it in a protective “casting” method that restricts movement in the joint and calls up muscles that may cross more than one joint. An example of this would be the psoas tensing in response to anterior lumbar instability. The runners with chronic hip flexor pain and a forward lean when they pound the pavement, but who stretch their hip flexors (usually poorly and into spinal extension) 3 times a day for 20 years and still have tight hip flexors are a prime example of this. They stretch but don’t improve stability, so the psoas continues to hate life.
The third is in response to nervous system tone, specifically sympathetic and parasympathetic tone. Sympathetic is best exemplified by that one kid who is always bouncing and tapping their foot, can’t seem to sit still, and always wants to run and jump everywhere, whereas parasympathetic would be the stoner who looks perennially half asleep. If you’re constantly jacked up like a cheerleader on a mixture of crack and RedBull, flexibility won’t be a strong suit of yours, even though you could probably pull a tractor with your teeth or scare old women and small children.
The Ultimate Warrior was definitely NOT parasympathetic, nor was he likely to be hitting the splits anytime soon, but he could always bring the house down.
If you’re constantly a ball of stress, your muscles will be in a constant state of “kind of on,” which is to say their contraction is like lights on a dimmer switch. They’re not all the way on, but they’re not off either, they’re just “kind of on.” Being all jacked up all the time might sound cool, but in reality it tends to cause some issues if you can’t turn it down once in a while.
Lastly, and one of the most simple of all, is alignment. If you have a muscle held in a stretched position, it’s going to reflexively increase tension to prevent the muscle from stretching too far and potentially creating an injury.
I know it’s kind of counterintuitive that a chronically stretched muscle would be tight, but consider the effects of something like low back erector muscles and posterior pelvic tilt. If your pelvis is tucked under like Steve Urkel (I’m dating myself here, but it’s a fun game trying to confuse the 20 year olds), the erectors are already on stretch without having to do anything, plus they’re contracting to keep your spine from sliding further into extension. Trying to touch your toes will result in embarrassing results.
So now that you know why muscles can be tight, we can work on them and produce much better results.
Strategy #1: Change your breathing.
One of the first things I usually see when someone tries to stretch into a bigger range of motion than they’re used to is that they wind up holding their breath. This works against you in two ways. First, when you hold your breath, you crank up your sympathetic system, which drives more neural tone to all muscles of the body and causes reflexive tensing. Second, by not breathing you pressurize the entire thoracic spine: all of the intercostal muscles between your ribs, your diaphragm, and even your obliques tense to help increase intrathoracic pressure against that held breath. This causes muscles to hold tension even more.
In many instances, people will hit an end range of motion while holding their breath, and I tell them to breathe. They, in turn, gasp like they just surfaced from diving with Jacques Cousteau, and wind up getting another few inches into their range.
When trying to get range of motion, long deep inhalations and exhalations where you reach on the exhale makes a massive difference. The length of the breath increases stimulation of the vagal nerve, which is responsive to the heart and drives cardiac rate and parasympathetic stimulation into the medulla oblongata, and as a result muscle tension reduction through the whole body. Lower heart rates means a less energy demanding system, which is commonly results in lower arousal, meaning less tense muscles at rest.
Here’s a simple breathing drill you could do to help increase your overall mobility through your shoulders and hips.
Timely to give Eric a baby breathing exercise, huh?
Try this out: Test your toe touch ability and range of motion bringing your arms up over your head. Make a note of both how far you get and also how easy they both felt. One way to gauge overhead range is to stand against a wall, then bring your arms up overhead without arching your low back, and either mark the wall or make a mental note as to how high you bring your arms. Try the breathing drill and then retest your mobility and see whether it resulted in any changes.
Strategy #2: Build stability to create mobility.
As I noted earlier with respect to stability, if a joint is perceived as unstable and potentially about to be injured, the body will clamp down muscles around it. One way to see this in a graphic manner is to look at hip rotation and core function.
Try this out and see what happens: From a seated position, turn your hips side to side and see whether you have good rotational range of motion through both external rotation (where you look at the inside of your knee) or internal rotation (where you look at the outside of your knee). If you find you have poor external rotation, try doing a hard front plank and then retest. If you find you have a poor internal rotation, hit up a side plank and see what happens. Here's the test:
Here's the front plank:
Here's the side plank:
If you noticed a big increase in mobility, you likely had your hips putting on the brakes and donating some stability up to the lumbar spine. By reinstating some of that stability, the hips opened up and had lots of freedom since they weren’t working double time anymore.
Strategy #3: Change alignment from the bottom up.
Foot position can play a massive role in how well you move. Most people who tend to be flat footed wind up with tibial internal rotation, which results in internally rotated femurs. This rotation increases tension through the anterior hips and up the chain further which reduces the range of motion for overhead movements. It also reduces the force production capability through the legs, which makes you less awesome.
If you roll to the outside of the foot, more supination, you increase tension through the posterior aspect of the hip and pushes you into more external rotation, which reduces the amount of internal rotation your have available, and also reduces your ability to move freely down into hip flexion.
Use this little test and see what happens: stand up and roll your feet so that you put most of your weight on the inside, in line with the big toe, and bring your arms overhead and then touch your toes. Make a not of how high and low you go and also how easy they felt. Then roll to the outside of your feet, more weight on the baby toe side of the foot, and see what the movement results are looking like. You might find it’s different in each example, and will showcase how foot position can affect your overall mobility.
Strategy #4: Change alignment from the top down.
Neck position can play a HUGE role in not only arm movement but also hip mobility, and it plays down in a couple of simple anatomical means. For the shoulder, every muscle that holds the shoulder to the body and keeps it from falling down, is held up by the neck. If the neck is in a forward head posture, muscles like the sternocleidomastoid, scalanes, levator scapulae, and upper traps will be all jacked up. If you stand with your head jammed into the back of your neck, you’ll have some smashed up pteryhyoid and stylohyoid muscles, which will alter (not necessarily improve or decrease, but alter) the ability to move the arms around.
Secondary to this, head position will play a role in hip mobility due to the anatomical link to the spinal chord. The chord has the ability to slide up and down in the spinal canal in order to adjust for different positions. Since the nerves can’t stretch, they accommodate range differently by moving along with the rest of the body. When you’re in standing and you tuck your chin to your chest, the spinal chord moves up in the spinal canal. When you look up, your give some slack to the chord and it moves slightly lower.
What this means is that if you were to bend down to grab a bar for something like a deadlift, and you tucked your chin, your available range that the spinal chord could allow movement to occur before it was stretched would be less than if you had a neutral neck, and much less than if you were to look ahead slightly. Additionally, if you have any restrictions through areas like the sciatic arch, it will prevent movement of the nerve through this area and make your range of motion somewhat limited.
Try this out: stand tall and tuck your chin to your chest, then try to touch your toes. Right after, keep your head level with the horizon and try to touch your toes again and see where the change in range of motion comes from. If you noticed a pronounced change, it's time to get cracking on "packing the neck" during your training and everyday life.
Strategy #5: Clean up cranky fascial lines.
This is where some voodoo starts creeping in. The body is more than a collection of individual muscles that all connect to bones and do stuff. They have lines of action where multiple muscles along specific pathways will contract and relax together to produce movement. These pathways are visually represented through the work of Thomas Myers in his outstanding book Anatomy Trains, but can be shown in real time with some simple tricks.
One fun fascial line to work with is the spiral line. It’s a really cool powerful series of tissues and muscles that runs from one foot around the spine and connects to the opposing shoulder, both on the front and the back. By “tuning” fascia in the leg, you can see some pretty immediate changes in range of motion at the shoulder.
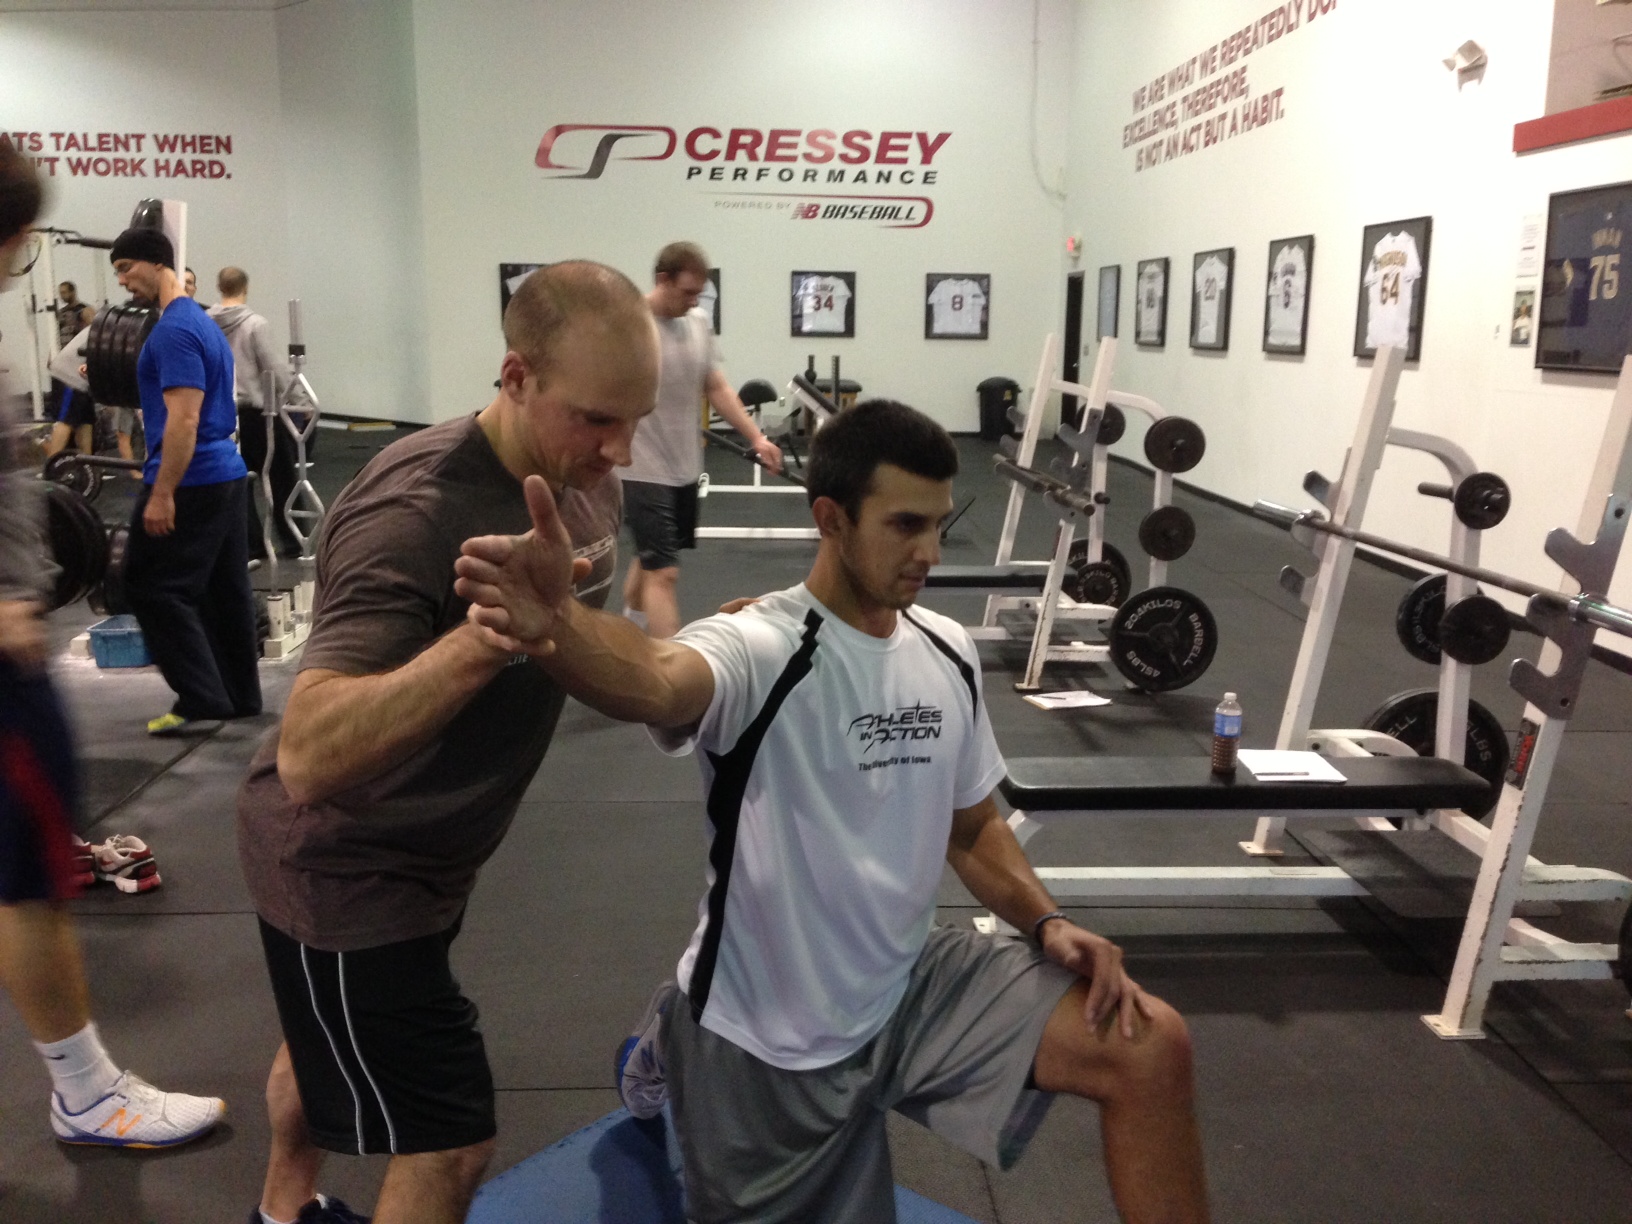
I showcased this with a live demo in a recent workshop in Los Angeles, where a participant had some shoulder issues. I had Tony Gentilcore of Cressey Sports Performance fame stretch him into external shoulder rotation, then applied some light pressure to his opposing adductor group to simulate what he would do with foam rolling. Within 5 seconds, he started to get more external rotation, all without me doing anything at his shoulder and with Tony only holding his arm in a position and letting gravity pull him down.
Try this out: If your shoulders are restricted through external rotation (like laying back to throw a baseball), foam roll your inner thigh, spending time hating life and breathing deep to try to get them to reduce tension and pain, then retest the shoulder external rotation. If you’re restricted through internal rotation, try rolling out your IT bands and see what happens.
Wrap-up
These methods aren’t guaranteed to work for every single person, but they are simple tricks that seem to work well with a lot of people. The good thing is if one of them works really well for you, you could use it on a regular basis to keep your mobility high and to use it in a new way you never had before.
Note from EC: If you're looking for more mobility tips and tricks - and the rationale for their inclusion in a program - I'd encourage you to check out Dean's fantastic new resource, Ruthless Mobility. Your purchase includes lifetime updates and continuing education credits. Perhaps best of all, it's on sale for 60% off through the end of the day today (7/4).
Sign-up for our FREE Newsletter to receive a video series on how to deadlift!
It's been 15 years since Mike Robertson and I introduced our Magnificent Mobility DVD set. This popular DVD set certainly helped a lot of people, but as with all aspects of the incredibly dynamic strength and conditioning and rehabilitation fields, we've learned a lot about mobility over the past decade. In other words, there are a lot of things I do differently with my training programs these days. I mean, seriously, I looked like I was 12 years old in this video.
Very simply, mobility is one's ability to reach a desired position or posture. Because many folks erroneously confused it with flexibility (range of motion at a specific joint), the industry as a whole trended toward labeling all mobility issues as true shortness of tissues that crossed the joint(s) in question. As the years have progressed, though, we've smartened up to realize that folks may struggle to get to specific positions because of joint structure (e.g., femoroacetabular impingement), insufficient stiffness at adjacent joints (e.g., poor core control "presenting" as bad hip mobility), density (rather than just length) of the aforementioned tissues that cross the joint, and a host of other factors. To be more succinct, mobility is dependent on much, much more than just tissue length!
1. Soft tissue work is important, even if we don’t know exactly why.
I'm honestly entertained when I hear someone insist that foam rolling is the devil, and we should never do it. People feel and move better after they do it, and it always seems to improve the quality of mobility initiatives that take place subsequently.
I certainly don't think it's truly mechanically breaking down scar tissue, but it's absolutely transiently reducing stiffness in the targeted tissues via one or more of a number of other mechanisms. Just because we can't explain them in complete certainty doesn't mean that "good" isn't being done.
2. Breathing can reduce bad stiffness and establish good stiffness.
This point could also be called, "The yoga folks have been right about breathing for a long time."
It's not uncommon to incorporate positional breathing drills that will transiently improve both flexibility and mobility. To me, that's an indicator that we're both reducing bad stiffness and establishing good stiffness. As an example, take all fours breathing in a flexed position:
I've utilized this with athletes and seen supine shoulder flexion range of motion increase by 10-15 degrees in a matter of 15-20 seconds without actually stretching the shoulder anywhere near its end-range. Additionally, scapular upward rotation (which takes place against gravity) usually improves a bit, presumably because of both the increased recruitment of serratus anterior (which helps preserve the convex/concave relationship of the rib cage and scapula) and reduced downward pull of the lats. Again, this is very much a theory, but it's consistently being tested with great results in our training each day. And, it's much easier than doing loads of manual therapy and time-consuming static stretching (although there are still places for both of those initiatives).
3. Not everyone conforms to the joint-by-joint approach.
The joint-by-joint approach was first introduced by Gray Cook and developed further by Mike Boyle. The concept is very sound: the body is a system of joints/segments that alternate in the need for mobility or stability. For instance, the ankles need mobility, the knees need stability, the hips need mobility, the lumbar spine needs stability, the thoracic spine needs mobility, the scapula needs stability, etc. This all makes a ton of sense, especially in the general population that is more predictable.
However, there are some glaring exceptions to this rule. You'll see folks with hypermobile hips, and excessively stiff lumbar spine segments. You'll observe thoracic spines that are so flat/extended that they shouldn't be mobilized, and shoulder blades that are so locked down that they demand more mobility training to achieve optimal function. Shoulders and elbows can really go either way.
The point is not that the joint-by-joint approach doesn't hold water; it's actually a tremendously useful paradigm I use on a daily basis. Rather, the point is that you can't "one-size-fits-all your mobility approaches." Everyone needs something slightly different, and every joint really needs a combination of mobility and stability.
4. A lot of people mistake laxity (or, worse yet, instability) for mobility.
Building on my last point, you'll find a lot of people who have so much congenital laxity that they don't need any stretching. Their mobility training is really a matter of attention to soft tissue quality and stability training.
The problem with these folks is that they can often "cheat the tests." For example, they might have unbelievably perfect overhead squats and shoulder mobility to the naked eye, but if you actually pair these tests up with stability-oriented screens, they may fall well short of what you'd deem "acceptable" movement.
Instability - or an acquired, excessive joint range of motion - is even more problematic. This is where folks will literally "blow out" their normal anatomy to acquire a desired range of motion. An example is the anterior shoulder capsule in throwers; they'll do whatever they can to get the arm back to help generate range-of-motion to support velocity production. Eventually, the shoulder can get so loose that the active restraints (rotator cuff and biceps tendon) can't effectively hold the ball on the socket, and pain occurs with throwing.
In consideration of both laxity and instability, just because you can get to a position does not mean that you're sufficiently stable in that position.
5. Building and maintaining mobility is like managing a bank account.
It goes without saying that it's easier to maintain mobility than it is to lose it and get it back. Everyone uses the analogy of babies and young children having freaky range of motion and perfect squat patterns, but losing them as time progresses. The assumption is that this occurs because they "make enough deposits:" targeted mobility work and a wide variety of activities throughout their days. Certainly, this is an issue, but I'd argue that it's because of excessive withdrawals, too.
Withdrawals could be sports participation where eccentric stress or direct trauma to tissue beats them down. It could be lifestyle factors like alcohol or tobacco use that negatively impact tissue quality. It could be pushing through faulty movement patterns until bone spurs result. What we take out is just as important as what we put in.
We all start with some money in the bank as children, but it's up to us to have more deposits than withdrawals in this mobility account over the course of the lifespan.
These are really just a few of many observations I've made over the years; there are countless more that could turn this article into an entire novel! With that said, if you're looking for both some governing principles on this front - and specific examples across the entire body - I'd recommend you check out Functional Stability Training.
Sign-up Today for our FREE Newsletter and receive a four-part video series on how to deadlift!
Today's guest post comes from Cressey Sports Performance Pitching Coordinator, Matt Blake. Matt is a key part of the Elite Baseball Mentorships team. Enjoy! -EC
In today’s video, we’re going to be discussing stride dynamics in the high-level throw. In order to do that, we’re going to use Zach Greinke as our pro model and then show a few other amateur variations, while going into some detail on how strength and mobility play into the equation for developing this powerful stride.
This is important to understand because a lot of the other qualities we look for in a high-level throw – such as achieving efficient “extension” at release, repeating the delivery, and executing our deceleration pattern consistently in an effort to reduce stress – all rely on having a stable stride pattern. In order to understand how this works, let’s take a look at some of the components that make up Greinke’s stride:
As you can see, one of the defining features of Greinke’s stride is the efficient action of his back leg and hip directing the pelvis down the target line early to set the direction and momentum for the stride. The way this is achieved is often overlooked and ultimately results in “offline” or unstable landings.
If you’ll notice the move that Greinke is making here is a posterior weight shift where he actually pushes his hips back in the delivery by hinging at the hip and not drifting his knee forward over his toes like most amateurs do. By engaging his posterior chain in this manner and not relying simply on his front leg to swing him into landing, he’s able to create a more balanced stride phase that unfolds in a more rhythmic manner, using the lead leg as a counter-balance to the delivery and not the primary power source.
For those familiar with the strength & conditioning world, I typically like to relate it to the initial movement of a one-legged squat to feel the glute and hamstring engagement and then a lateral lunge to stay engaged in the adductors for control of the pelvis. The lead leg action is ultimately just a relaxed extension to counter the posterior weight shift and then a swivel in the hip socket to align the foot for landing.
The effect of engaging the rear leg’s posterior chain allows us to create both extension and rotation out of the back-side, which is important for maintaining the direction of our force into the ground at landing. If we can’t control the force of our action into the ground, we won’t be able to stabilize our landing appropriately, which has ramifications up the chain into our pelvis positioning, core stability and ultimately into our hand positioning on the ball at release.
If we’re trying to create a level of “extension” at release and maintain our leverage on the ball to throw it with angle, we need to take ownership of our pelvis positioning. If we don’t actively control the pelvis movement into landing, we’re going to have a hard time centering the head of the lead leg in the hip socket, and in turn, accepting the ground reaction force that we’re trying to create. This happens when we lose the tension of our back hip too early, because we swung our lead leg out as the power source and “chased it” into landing. This means we won’t have control of the pelvis upon landing and we’ll be unable to properly pressurize the front leg to keep leverage in the delivery.
This pelvis leverage is essential in making sure we can keep our core stable and allow it to translate the thoracic region forward, instead of rely on it to create motion, which isn’t the primary role of the lumbar region. We want the “core” to simply transfer the energy we created from the lower half efficiently. If we can do that, we allow ourselves to accelerate on a longer line to release, because our path of deceleration is set up to be fully accepted on the front hip’s internal rotation and flexion. If the pelvis is too flat, and relies purely on rotation and not flexion, our line of deceleration becomes much shorter and forces us to handle more of the stress in our throwing arm, which isn’t ideal.
A good example of how both length in the adductors and strength in the posterior chain helped an athlete achieve a more athletic and powerful stride can be seen here. The first clip is a video of a 17 yr old LHP, who was 6’4” 180lbs, and 82-84 at the time of the video:
Notice how his stride pattern is very limited not only in his length toward home, but in its inefficient direction and its ability to allow for a full finish to protect the arm. As you can see, this athlete struggled to get a posterior weight shift out of his gather position, drifted into a closed stride position, and then had too flat of a pelvis position to achieve a proper flexed hip position. As a result, he runs out of lateral rotation in the lead hip and the finish buckles on him. This could be a result of many things, including limited adductor mobility, poor single leg stability, weakness of the anterior or rotary core, etc. Candidly, though, you usually see all these things in untrained pitchers!
Fortunately, this same athlete took it upon himself to devote some quality time to making himself a better athlete, getting stronger, and gaining awareness for the movements the high level delivery was asking of him – and he’s now turned himself into a legitimate prospect. In this more recent video, the athlete is 20yrs old now, 6’5” 215lbs, and 88-91mph, topping at 92mph:
By no means is this athlete a finished product, but you can see where the added strength, mobility, and movement awareness allows him to get into a deeper hip-hinge position, ride out of the stride longer, and certainly take the finish deeper to allow for a longer line of deceleration. The next step for this athlete will be continuing to work on his single-leg stability, as you can see a slight wobble in the landing and a touch of misdirection, but certainly leaps and bounds ahead of where he was three years prior.
To give you an example of where this stride pattern can go, here is an example of one of our more accomplished athletes, Tyler Beede, who was the 14th overall pick in this year's draft and had one of the best amateur stride patterns I’ve seen:
From time to time this athlete will struggle with slight misdirection and postural control, but his ability to pitch 92-96mph with above average off-speed offerings is a testament to the balance and power in the lower half of his delivery.
At the end of the day, everyone is going to present with different levels of mobility, stability and coordination, so you certainly have to leave room in your model to account for individual variance. However, these athletes are good examples of how properly maintained mobility and stability can tie into the high-level delivery to make you a more powerful and durable pitcher in the long run.
Looking for more video analysis and training insights like this? I'd encourage you to sign up for one of our upcoming Elite Baseball Mentorships. We have events in both October and November, and you won't find a more intensive baseball educational course.
Sign-up Today for our FREE Baseball Newsletter and Receive Instant Access to a 47-minute Presentation from Eric Cressey on Individualizing the Management of Overhead Athletes!