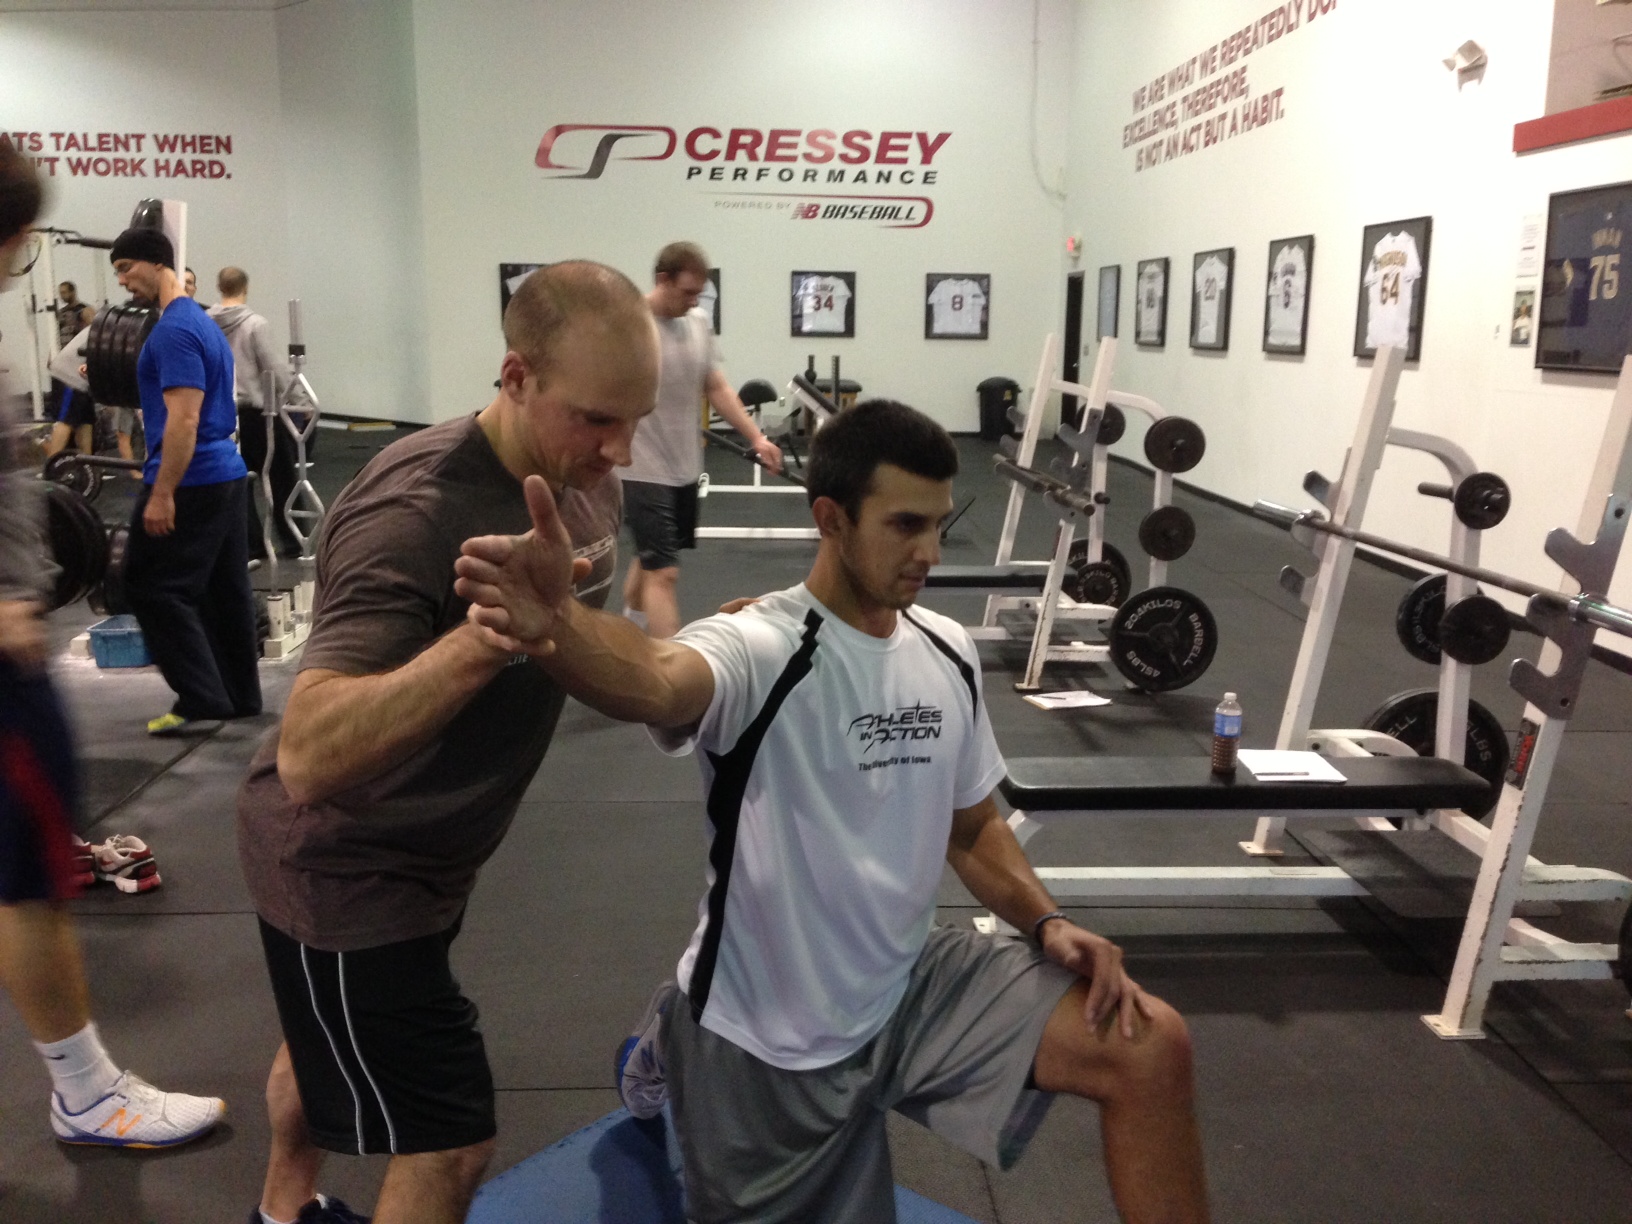
Today's guest post comes from current Cressey Sports Performance - Florida intern, Chris Larrauri.
Athletes often ask coaches, “How does this relate to my sport?” And, my internship at Cressey Sport Performance – Florida was no exception; athletes want to know how the work they’re doing is going to transfer to baseball performance. Some athletes are adamant that everything they do should be specific to their sport, and although I wouldn’t stick to SPP (Specific Physical Preparation) year round, I believe that it is necessary to get as specific as we can in the weight room when the time calls for it. This is where a method like French Contrast comes into play.
French Contrast training has been a hot topic in the S&C field for quite some time. Invented by a former French track and field coach, Gilles Cometti, but widely popularized by one of my mentors, Cal Dietz, the French Contrast method has shown to increase explosive strength and speed endurance. Strength may be king, but sometimes it’s necessary to stimulate the organism to create a different training effect. It’s great to produce high amounts of force, but as we know the rate at which an athlete develops that force also matters. In baseball, this impulse could be the defining factor between a 89mph and 95mph pitch, or a weak ground ball and 400-foot homerun.
Figure 1.1 – Graphic showing the difference in rate of force development and overall power output. Ben’s impulse is higher causing more total power output. Graphic is from “Triphasic Training: A Systemic Approach to Elite Speed and Explosive Strength Performance”
If an athlete already has a great strength foundation, then methods such as the French Contrast can take them to the next level. Now, I know what you are thinking: “How are some jumps going to increase velocity on the mound?” My response is, “Does it have to be jumps?” I love jumping for various reasons, but when it’s time to transfer skill acquisition to the field of play, jumps aren’t all that specific to the rotational proficiencies baseball requires. There is a time and place for jumps with rotational athletes, but more during the GPP (General Physical Preparation) phase. For the SPP phase, let’s break down what French Contrast training is.
The French Contrast method is simple. It’s a combination of complex and contrast training. Complex training is a heavy compound lift (around 85% 1RM) followed by a plyometric that’s close to the same motor pattern. Contrast training is a maximal or near maximal compound lift paired with a “back-off” lift around 50-60% of the initial lift or something that mimics the initial lift’s motor pattern. In both situations, the heavy lift is causing a PAP (Post Activation Potentiation) effect for the subsequent movement. French Contrast put its own spin on these two methods to create its own stimulus. The sequence of French Contrast training is as follows:
When people think of French Contrast, they typically think of the basic exercise selection in the table above, but what if we apply the principles to focus more on the transverse and frontal planes instead of sagittal? I believe this can be a game changer for the rotational athlete.
Let’s take a look at what a plyometric is so we can better understand the principles behind French Contrast training and how we can apply them in different ways. Yuri Verkhoshansky created what’s known as the “Shock Method,” and later, an American named Fred Wilt pioneered the term “plyometric,” (plyo, for short) from Verkhoshansky’s research on the method. Fred’s interpretation of a plyo is “an overload of isometric-type muscle action which invokes the stretch reflex in muscle.” This is crucial because you can get this muscle action in other ways besides just jumping. Medicine balls are a great way to replicate this action. We can replace the jumps with, say, rotational medicine ball shotputs and scoop tosses to get an adaption that is more specific to the rotational athlete.
With this premise in place we can now put our attention toward exercise selection. Below are a few examples that can be used (you'll rest 30 seconds between each exercise, but I've edited the videos to cut out the rest time) :
1. Split Squat Overcoming Iso (Maximal Effort): 7s/side
2. Rotational Med Ball Shotput (6lb): 3/side
3. Proteus Shotput (30% or 3-4RPE): 3/side
4. Accelerated Rotational Med Ball Shotput (6lb + band): 3/side
1. 1-arm DB Bench Press w/Bridge (85% 1RM w/330 Tempo): 2/side
2. Med Ball Drop Chest Pass (6lb): x4
3. Rotational Landmine Press (30% or 3-4 RPE): 3/side
4. Accelerated Rotational Med Ball Shotput (6lb + band): 3/side
In conclusion, the principles of French Contrast can be manipulated to optimize transfer for almost any sport. That said, although this article may be covering how to adapt French Contrast training for different sports, I now understand that it may not be for every individual. So, you’ll need to assess the person in front of you to determine if it is appropriate or not. I will say that a nice discovery with using this method is that it’s not only effective, but also a lot of fun. And, if you come across an approach that safely delivers results while keeping athletes engaged, chances are that it deserves a place in your overall programming strategy.
References
Dietz, C. & Peterson, B. (2012) Triphasic Training: A Systematic Approach to Elite Speed and Explosive Strength Performance. By Dietz Sports Enterprise.
Verkhoshansky, Y. & Siff, M. (2009) Supertraining. Sixth Edition. Ultimate Athlete Concepts.
Verkhoshansky, Y. & Verkhoshansky, N. (2011) Special Strength Training Manual for Coaches. Verkhoshansky SSTM.
About the Author
Chris is a current intern at Cressey Sports Performance-Florida, where he works with baseball players at all levels ranging from professional to middle school. He assists in initial evaluations and exercise supervision. Prior experience to CSP includes time spent at the University of Minnesota under Cal Dietz; Jenks High School; Oklahoma Christian University; and as Owner of Synergy Performance. Chris graduated with a Bachelor’s Degree in Kinesiology from The University of Central Oklahoma. He is certified through the NSCA, PN-1, RPR & FRC. For more information, follow Chris on Instagram at @chris_larrauri.
Sign-up Today for our FREE Baseball Newsletter and Receive Instant Access to a 47-minute Presentation from Eric Cressey on Individualizing the Management of Overhead Athletes!
Today's guest post comes from Cressey Sports Performance - Florida coach, Josh Kuester.
In some cases, baseball players (especially pitchers) are told that they are fragile, and consequently a heavy dose of “corrective exercises” are handed out. But throwing a baseball is the fastest motion in sports, and hitting a baseball might be the most challenging task in all of sports. Baseball players are not merely finesse athletes; they are power athletes. I love integrating exercises that challenge both of these ends of the spectrum to some degree, and the 1-arm, 1-leg Kettlebell Swing with Rack Assistance is a perfect example.
Here are four reasons why I like this exercises with some of my thoughts as to how I might implement this variation with athletes:
1. Beauty in Simplicity
For coaches who train large groups of athletes with limited time (and/or resources), you understand that there is beauty in simplicity. Additionally, for baseball players, I think simplicity in the weight room is really important because their sport is highly complex. For a long time, CSP has been implementing medicine ball training as a staple for power development. There are numerous benefits to medicine ball training: plane specific power, fascial system development, lower and upper half connection. However, one element that might be overlooked is that throwing a medicine ball is relatively simple, and simple exercises have higher intent. The learning curve on the 1-Arm, 1-Leg KB Swing with Rack Assistance is very low and allows athletes to move a moderate load on a single leg with high intensity.
2. Unilateral and Sagittal Power Development
While the 1-Arm, 1-Leg KB Swing with Rack Assistance is more of a sagittal plane exercise, it is a unilateral variation and baseball is a unilateral sport. Additionally, in the early to mid-off season, we are not aggressively going after large volumes of transverse plane power development. In many cases, we are re-establishing sagittal plane mechanics before progressing to more frontal and transverse plane power exercises later in the off-season.
3. Contrast Training
Contrast training is something that we use at CSP from time to time. In short, contrast training is using a variety of exercises (anywhere from 2-4) that hit different points on the force/velocity curve to potentiate the neuromuscular system to produce more force. I like this variation because it fits in the rather large gap between absolute strength and absolute speed on the force-velocity cure.
This variation will fit nicely in a contrast training cluster of:
1. Safety Squat Bar Split-Squat from Pins 2. 1-Arm, 1-Leg KB Swing with Rack Assistance
3. Split-Squat Cycle Jumps
4. Band-Assisted Split Squat Cycle Jumps
Or:
1. 1-Arm, 1-Leg KB Swing with Rack Assistance
2. 1-Leg Broad Jump with 2-Leg Stick
4. Heel Connection
Pitchers and hitters alike often discuss the concept of “heel connection” and wanting to feel the ground. Staying connected in the back hip allows for better sequencing of hip and thoracic rotation when throwing/hitting, which results in more efficient transfer of energy from back-side to front-side. If an athlete gets into the ball of their foot too early, it can influence the magnitude and direction in which they apply force. I love this variation because it forces the athlete to feel the ground, and because the load is moderate, it forces the athlete to have heel reference; otherwise they will lose balance.
Final Thoughts on Performing and Implementing this Exercise
1. This is an exercise that I would only use for an athlete with a moderate to high training
age.
2. Pick a weight that you would use for a single leg RDL.
3. The added stability of holding the rack allows for high intent/speed with a moderate load.
4. The stabilizing hand should be just above hip height.
5. I prefer to have athletes perform this barefoot or in minimalist sneakers so that the athlete can feel the ground.
About the Author
Josh Kuester serves as a Strength and Conditioning Coach at CSP-FL. He began his collegiate career playing baseball at DIII UW-Whitewater where he played middle infield. After an injury plagued freshman and sophomore season, he ended up pursuing his bachelors from the University of Wisconsin and his masters from UW-Stevens Point. He is a Certified Strength and Conditioning Specialist (CSCS), and a board-certified Athletic Trainer (ATC). He has been a strength coach at the high school and collegiate level. In addition, he has coached various ages of travel baseball for Impact Sports Academy, a club baseball program out of De Pere, Wisconsin. From the fall of 2020 to the spring 2021 he served as a Sports Medicine intern at Northwestern University where he primarily worked with the football team. You can follow him on Instagram at @JoshKuester.
Sign-up Today for our FREE Baseball Newsletter and Receive Instant Access to a 47-minute Presentation from Eric Cressey on Individualizing the Management of Overhead Athletes!
Just like everyone else on the planet, I'm offering some great Black Friday/Cyber Monday sales. We're just going to kick it off a week early so you have time to sort through it all! From now through next Monday (11/29) at midnight, you can get 25% off the following resources by using the coupon code BF2021EC at checkout.
These eight resources can be purchased through my secure website:
Sturdy Shoulder Solutions- My most recent product release delves going into a ton of depth on some important topics with respect to upper extremity evaluation, programming, and training. Learn more HERE.
CSP Innovations - A collaborative effort by the Cressey Sports Performance staff about a variety of topics. Learn more HERE.
The Specialization Success Guide - A great resource for those looking to pursue strength gains on the big three (squat, bench press, deadlift). Learn more HERE.
The Ultimate Offseason Training Manual - This was the first book I wrote, and it's stood the test of time because of how much of the writing was based on principles that'll last forever. Learn more HERE.
In light of some recent questions about my popular resource, Sturdy Shoulder Solutions, it seemed like a good time to update this series on program design strategies. Many fitness professionals and strength and conditioning enthusiasts have looked to this resource as a model upon which to base some of their program design efforts, so I thought I'd dig in a bit deeper on a few useful principles you'll find in it that should be consistent across all programs.
1. Use your "pre-work" to address the most pressing issues.
In Cressey Sports Performance programs, you'll see five distinct "components" to each day in most programs:
a. Warm-ups
b. Pre-Work
c. Strength Training
d. Metabolic Conditioning
e. Cooldown
Of course, there's always some variation included. For instance, not every day will feature metabolic conditioning, and there may be training sessions that don't include strength training. All that said, when folks come to observe at CSP and take a glance at a program, they're often most intrigued about our "pre-work."
This section of the training session comes at the end of the warm-up and before the strength training for the day. Typically, it's power training that'll include some medicine ball work and sprint/agility/plyometric work. However, we'll often take it a step further and include some single-leg balance work, or even mix in some technique practice on something like a Turkish get-up. Basically, it's a bridge from the warm-up to the heavier lifting; we want this period to be all about athletes actually being athletic: moving fast, and being challenged in a rich proprioceptive environment.
Typically, in this time period, there are some rest periods that athletes have a tendency to rush through. Since they don't feel very fatigued from a set of 6/side rotational medicine ball shotputs, they tend to rush from one set to the next. To get the most of these drills, though, we need to slow them down - and if we're going to have them rest, we might as well make it productive rest. To that end, we use the pre-work period as a great time to mix in some fillers. Here's an example we might use for an athletes with a flat thoracic spine and poor end-range external rotation control:
The secret is to pick the 2-3 highest priority movement struggles for each athlete and attack those in the 2-3 fillers you have each day in the pre-work. Over the course of a week, this could be an additional 15-20 sets to help get things moving in the right direction.
2. Proximal-to-distal almost always works great...almost.
Anyone who's followed my work knows that working proximal-to-distal is a strategy I like to employ when addressing movement challenges. The principle is simple: work on something toward the center of the body (e.g., neck positioning) and it'll often yield downstream benefits (e.g., shoulder range-of-motion) as we work our way to the extremities. One time you might backtrack this strategy, however, is when there is a known pathology more distally. I'll use myself as an example. I had a left knee meniscus repair (the first orthopedic surgery of my life) just over six weeks ago, and it has actually been a great learning experience for me.
As part of the surgery, my medical-collateral ligament had to be loosened (the equivalent of a Grade 2 sprain). There are some very specific post-op contraindications: I can't flex the knee beyond 90 degrees in weight-bearing right now, and any of the classic drills that take my hip into external rotation (like a cradle walk) and abduction (split-stance adductor mobs, or lateral lunge) can easily irritate the medial (inside) aspect of my knee. Additionally, when you're a bit limited in how much you can flex the knee during the gait cycle while in the brace, you tend to "cut off" hip extension on each stride. What does all this mean? The hip on my surgery side feels tighter than normal.
Sure, I can get creative with my hip mobility drills and even do some soft tissue work to settle down some muscles that can't be lengthened, but the best solution is actually a distal to proximal one: get my knee right! Sure enough, getting the swelling out of the joint early on and hitting all my ROM targets immediately improved the hip symptoms because my weight-bearing strategies improved.
The take-home message here is that before you look to integrate a proximal-to-distal approach, be sure your assessment picks up on any unusually "sticky" joints. And, where appropriate, refer those cases out to someone who can get them "unstuck."
3. Make your warm-ups more efficient so that you don't have to "sell" them as much.
Let's face it: people don't typically enjoy the warm-up period. It's without a doubt the "most likely to be skipped" part of any training session. We probably aren't going to change people's perspectives on this, but we can change the situation in which they operate. In other words, we can adjust our programming to make it logistically easier to complete for our clients/athletes. One way to accomplish this is to just structure the program in a more convenient context. To that end, here's how I like to structure a warm-up:
a. Ground-based (e.g., positional breathing drills, supine/quadruped mobility drills)
b. Standing, stationary (e.g., wall slides, bowler squats)
c. Standing, moving (e.g., classic dynamic warm-up drills like lateral lunges, spidermans etc.)
This approach saves the time of having athletes get up and get down over and over again; it's a more efficient flow.
Once you've incorporated this strategy, you can make them even more efficient by considering the location of any equipment - bands, benches, TRX straps, etc. - that they may need to complete the drills. In an individualized warm-up, putting these implements in convenient spots helps athletes keep their body temperature up while they're moving from one spot to the next.
Finally, you can always use "combination" exercises to attack multiple qualities in the same drill. As an example, an adductor stretch with extension-rotation gets you both hip and thoracic mobility.
I'll be back soon with another "Programming Principles" installment, but in the meantime, be sure to check out my popular resource, Sturdy Shoulder Solutions if you're interested in digging in deeper on upper extremity assessment, programming, and coaching.
Sign-up Today for our FREE Newsletter and receive a four-part video series on how to deadlift!
Today's guest post comes from Cressey Sports Performance - Massachusetts coach Drew Cobin.
Hands Assisted lower body training is nothing new. To my knowledge, the Hatfield Squat was the first popularized exercise of this nature in the sports performance world. The Hatfield Squat is a Safety Squat Bar Squat with your hands assisting you by holding onto the squat rack. By holding onto the rack, we would increase stability because instead of having just two points of stability, there are now four points of stability: two feet & two hands (as long as the floor and rack are stable).
This concept leads to an interesting question to consider. Since strength and stability go hand and hand, can we use increased stability to increase loading potential?
Mike Boyle popularized the idea of doing unilateral lower training for sport specificity and decreased spine load. When doing unilateral training, we usually will work to decrease stability over time as a means of progression so that one leg is working harder. A sample progression would be going from a Squat to a Split Squat, and then to a Single Leg Squat. What’s interesting to me is that stability – rather than force production capabilities – often becomes the limiting factor when performing a Single Leg Squat, which results in limiting the external load. As mentioned before, stability and strength go hand-in-hand, so sometimes, if you can increase single leg strength via increased load, you will in turn increase single leg stability. The example here would be to do a single leg squat with hand assistance from a rack to increase points of stability, thereby increasing external loading capabilities, as shown below:
Using hand assistance appropriately in a training program can be great for unilateral strength and stability. So, when is it appropriate to use assistance in a program? And what are some examples of exercises that utilize this concept?
It’s important for strength and conditioning coaches to understand that most sports are played one leg. Usually, we see one leg on the ground while the other prepares to hit the ground, or we might see feet in different positions, serving the purpose of producing forces in certain directions. What we never really see, however, is an athlete using their hands for stability by holding an immovable object like a squat rack, although proper upper extremity action can aid in stability and movement efficiency. As such, it’s important to see using hand assistance for what it is: a training tool, used to increase stability and load, to get stronger and more stable to produce more force in the right direction without assistance.
How, then, can we use it? One of my favorite ways to use this is by performing what I like to call an Eccentric Overload. This is when you use more load on the lengthening phase of a resistance exercise than the shortening phase. An example would be using a heavier kettlebell than you can handle on an unassisted single leg squat (you can also use a dumbbell or safety squat bar). Here you would slowly lower in the single leg squat without assistance, then once you reach the bottom of your chosen range of motion, use the free hand for assistance from the rack. This works well because the hardest part of an exercise is the reversal of movement, and by using assistance here, we are able to train with a supramaximal load on the eccentric phase of the single leg squat. We are also able to get more braking forces if we want to, which come in the form of eccentric/isometric contractions in sports. After the downward phase in this exercise, we can have the athlete hit the brakes at the joint position that we want to work on for applying braking force prior to using hand assistance for reversal of motion.
Using hand assistance has no limits and can be used outside of just strength movements. We can also intelligently use it for plyometrics as well (once again to increase stability), and also overspeed exercises to improve conduction speed. You can use band assistance on jumps and sprints, or hand assistance on single leg hops. All these methods can work great for changing body positions, as well as ground contact times, and therefore their transfer to sport.
To recap, using hand assistance is one way to change to demands of a given exercise. As coaches, hand assistance is another tool in the toolbox, but it’s not the be-all, end-all. Hands assistance will increase load tolerance via increased stability. Manipulation of load and stability throughout an athlete’s training program is key to the program’s success. Going through periods of increased and decreased stability, load, and speed are key elements to an athletic development and rehabilitation programs.
Here’s a video to represent a programming progression going from assisted to unassisted and challenging stability/reactivity in plyometrics:
If you like these videos or want more ideas on this subject, follow @DrewCobin on Instagram for more. Enjoy!
Sign-up Today for our FREE Newsletter and receive a four-part video series on how to deadlift!
With my last post, I kicked off the "Best of 2020" series with my top articles of the year. Today, we'll highlight the top five videos of the year.
1. Birddog Rows -This is one of our favorite horizontal pulling variations. Check out this great write-up on the drill from CSP-FL Director of Performance, Tim Geromini.
2. Half-Kneeling Kettlebell Windmill - This drill comes to you courtesy of Cressey Sports Performance coach Derek Kambour. The Half-Kneeling Kettlebell Windmill is an awesome full-body exercise that delivers several important benefits. Learn more in this write-up.
3. Adductor Slides - This is an awesome exercise for adductors that are both long and strong. Check outthis full write-upto learn more about how we use this drill.
4. Bottoms-up Kettlebell Arm Bar - The Kettlebell Arm Bar is an awesome exercise that delivers several important benefits, but we've admittedly taken some time to warm up to it. Learn more here.
5. Bowler Squat to J-Band Y - This exercise is the brainchild of physical therapist Eric Schoenberg, who works out of Cressey Sports Performance – Florida. When I first saw him implementing it with a patient, I immediately thought, “How have I never thought of it?” It actually combines two of my favorite exercises: the bowler squat and the J-Band Y. In doing so, we get an awesome arm care exercise that integrates single-leg balance and hip mobility. Learn more here.
I'll be back soon with the top guest posts of 2020!
Sign-up Today for our FREE Newsletter and receive a four-part video series on how to deadlift!
Just like everyone else on the planet, I'm offering some great Black Friday/Cyber Monday sales. We're just going to kick it off a week early so you have time to sort through it all! From now through next Monday (11/30) at midnight, you can get 25% off the following resources by using the coupon code BF2020EC at checkout.
These eight resources can be purchased through my secure website:
Sturdy Shoulder Solutions- My most recent product release delves going into a ton of depth on some important topics with respect to upper extremity evaluation, programming, and training. Learn more HERE.
CSP Innovations - A collaborative effort by the Cressey Sports Performance staff about a variety of topics. Learn more HERE.
The Specialization Success Guide - A great resource for those looking to pursue strength gains on the big three (squat, bench press, deadlift). Learn more HERE.
The Ultimate Offseason Training Manual - This was the first book I wrote, and it's stood the test of time because of how much of the writing was based on principles that'll last forever. Learn more HERE.
Stay on top of the ball. Extend the arms. Stay tall. Finish high. Stay back. Follow-through. Use your legs. Snap your wrist...
You’ve probably heard these cues before. Maybe you’ve even used them yourself. From individual sports like tennis, to team sports like baseball, and even in the weight room, coaches have been using verbal cues like these for decades.
While some may be effective, many have issues. For instance, if I tell an athlete, “use more of your legs” when trying to jump higher, what does that really mean?
You see, most of these cues are a bit vague and leave room for ambiguity. But the root problem is this: the types of cues we give an athlete will direct their focus and attention. And this, in turn, will impact their ability to change a movement and learn a new skill.
So the question becomes: what should coaches bring their athletes’ attention to during practices and drills? The same question can be asked about the gym; does cueing differ on the field vs in the gym? Surely learning to hit a 95mph fastball with the game on the line isn’t the same as setting a bench press PR in the weight room.
That’s what we’ll explore in this post. We’ll set the stage by outlining the difference between two types of cueing strategies: internal and external. We’ll then present additional focus of attention research (a branch of motor learning theory) - and suggest a rebuttal to that research. Finally, we’ll provide additional examples to gain some clarity from a coach’s perspective.
One caveat before I continue. I played competitive tennis (the equivalent of the minor leagues in baseball) and hold a MSc degree in sport science. Given this, my role is often one of bridging the gym with the court. In other words, I can relate to both sides of the coin: the technical and tactical elements of the game, along with the off-court elements needed to be physically prepared. Eric, who I have admired for years, is someone who not only can relate to these two elements, but can also bring sports medicine into the mix.
I’m bringing this up because, first, I think that no matter where you lie on the spectrum - on the field as a skills coach or in the lab as a researcher - knowing a little bit about cueing and learning is probably a good thing so that you can have at least have a meaningful conversation about it.
Second, a lot of these principles are interchangeable with different branches of the performance world. Even physios can apply some of the research on attention and motor learning with their patients, just in a slightly different context.
Lastly, because of my experiences in tennis, a lot of the examples you’ll see in this post will stem from there. I’ll do my best to tie in other sporting examples, especially from the baseball world, but please don’t be too hard on me if I’ve made a baseball nomenclature mistake along the way.
What’s the Difference Between External and Internal Cues?
Internal
Remember the cueing examples in the intro? In tennis, we see similar ones. Things like "turn your shoulders" and "move your feet." The commonality here is that each instruction is focused on a body segment or part.
Gabriele Wulf - prominent researcher in attention and motor learning - would say that these cues are bringing an athlete’s attention to internal factors. More specifically, she defines internally-focused cues as “where attention is directed to the action itself” (2007).
But how does a player interpret a cue like, “bend your knees?” How low should the athlete go? Is a 90-degree knee bend as effective as a 100 degrees of knee flexion? At what point in the swing/movement? Should one knee be bent more than the other?
As you can see, this cue can be interpreted in a number of different ways, depending on the athlete and the context.
Now, I’m not saying this cue can’t be used or that it’s not effective. The fact is, however, it’s got to be much more specific. For example, perhaps I want my player to load the rear leg on the forehand side to initiate a more forceful hip and trunk thrust towards the oncoming ball. So, instead of “bend your knees,” you might say, “put more weight on that rear leg during your set-up, then use it when accelerating to the ball.”
See how much more specific that is compared to “bend your knees”? You might be saying to yourself, “but that’s a pretty long cue”. Yes, it is. But we may only have to use that entire cue once (or periodically). The athlete will now understand a shortened version of it like "load that rear leg" or "add pressure to that back foot" or some similar alternative - and we’ll still end up at the same outcome.
External
Here’s an example of an athlete practicing their serve (and missing a lot) using external cues only (i.e. a target):
Orienting your attention externally, on the other hand, is described as “where the performer’s attention is directed to the effect of the action” (Wulf 2007).
To clarify, external focus instructions are aimed at factors outside the body, like an implement, support surface, the trajectory of an object, or a target. A baseball batter, for example, could direct his/her focus to the bat (its path, velocity etc), the ball (its spin, speed, trajectory etc.) or to the area of the field they’d like to hit into (target).
In tennis, hitting with depth (i.e. getting the ball to land near the opponent’s baseline) is a pretty important skill. Because in today’s day and age, if you hit just a touch short, you’ll soon be on defense. To practice this ability, we often use an externally-focused cue, and it’s usually a target. For instance, with our elite guys, we might mark a line three feet from the baseline and get them to focus on hitting the ball past the line. With younger players, a starting point for "depth training" might simply be to get the ball to land past the service line.
In this example, the cue is not only external, but it’s also distal and has an environmental component - meaning that the focus is further away from the athlete. An example of a proximally-oriented external cue would be focusing on the movement of the racquet. This would not fall under the environmental component, but what researchers call skill-oriented (i.e., we’re directly attempting to target the skill of swinging the racquet - or some sort of technical outcome).
On the gym side, as we’ll see below, there’s been a fair amount of research suggesting the benefits of cueing athlete’s externally to produce more force, more power or during speed training. For example, instead of asking an athlete to use more of their legs during a countermovement jump, you might ask them to “push the ground away” or simply pick a spot on the wall (or use a basketball hoop) and see how high they can touch. I like the latter as a form of competition amongst a group of athletes (see vid below) it’s also more distal/environmental vs. proximal/skill oriented.
Here's an example of athletes trying to touch the highest part of a ceiling during a jump.
The Theory
If you haven’t figured it out already, a lot of the recent evidence points to bringing an athlete’s attention to external - instead of internal - factors. But why is that?
According to Wulf (2013), internal focus of attention instructions contribute to a conscious awareness of the desired movement. And if we’re more conscious of what we’re doing, this will inhibit automatic processes. The opposite is true for externally-focused cues - they almost deliberately facilitate a subconscious control of movement.
One theory behind this - one which Wulf (2013) suggests - is that directing attention to a particular limb for example, will provide a neural representation of the self. The result, according to Wulf, is we over-regulate our actions.
So instead of moving with more grace, we end up increasing tension. Instead of effortlessness, our movements are rigid and more mechanical. We’ve all been there before, right? You’re given feedback to keep your wrist locked at impact, for example, and what happens? Your entire arm, shoulder, neck, etc. get tight, and you can’t even make clean contact with the ball.
But perhaps there’s a place for being more aware? To consciously move the elbow into a certain position. At least for some period of time.
What’s the Research on Attention and Motor Learning Have to Say About This?
If you’re like me - and get really hyped up about this sort of stuff - then you’re probably eager to find out, what’s the research suggesting? Which is best for learning and ultimately, performance?
In a review article by Wulf (2013) where close to 100 studies were investigated, significant differences exist between externally and internally-focused cueing across a variety of sports and disciplines
Specifically, it’s externally-focused cues that significantly and consistently outperform internal cues. Apart from a few studies that showed benefits to internal cueing - or no significant difference between the two types of cueing strategies - external seems to be the way to go.
But here’s the thing, most coaches use internally-focused cues most of the time. In fact, Porter (2010) found that 84% of track & field athletes reported that their coaches gave instructions that were specific to the movement of a body part or segment. Van der Graff et al (2018) reported a similar finding in elite Dutch league pitchers; they only heard externally-focused cues 31% of the time. If collected, I’m sure data would reveal similar findings across many sports.
Specific Research Examples
In a 2007 study on golfers, Wulf and Su found that external instructions were superior in both novices and experts. When attention was directed at the swing of the club or a target (instead of a specific movement of the arms), performance was better. Conversely, Perkins-Ceccato et al. (2003) found that internal instructions were more beneficial with less skilled golfers than more skilled golfers.
In baseball, the results vary based on a number of factors, including the skill being coached. Out of four different attentional conditions, Castaneda and Gray 2007 found that highly skilled batters performed best when attention was focused on “the flight of the ball leaving the bat.”
These same batters performed worse when attending to “the movement of their hands” where the focus was internal. Interestingly, however, the less-skilled batters performed worse when attending to environmentally-oriented external cues. These batters fared best when the attention was aimed toward the execution of the skill - and there was no significant difference between external and internal instructions. So, in less skilled performers, both internal and external cues benefited performance.
In other sports, we see more of the same (Wulf 2013). Basketball free throw shooting accuracy benefited more from external cueing vs internal - i.e. focus on the trajectory of the ball instead of the flexion of your wrist. On the performance side, agility scores were better after external cues versus internal ones (Porter et al 2010).
There’s a host of other studies that have reported better results for externally-focused groups versus internally-focused ones (Wulf 2013). Benefits include greater maximal force production, more reps being performed during a bench press test, reduced 20m sprint times, increased broad jump distances, further discus throws, and a host of others. For specifics, I direct you to Wulf’s review, Attentional focus and motor Learning - A review of 15 years.
My Counter-Viewpoint
By now, you’re probably ready to throw all your internal cues out the window and completely switch over to external cueing strategies. Before you do, hear me out.
Let me be candid for a moment. Yes, there’s some compelling evidence suggesting that directing an athlete’s focus externally is more effective compared to internally. But after dissecting some of the research, conversing with world-class coaches - and testing it with my own athletes - I’m not sure that I’m completely convinced.
Because there’s an issue with a lot of the research. First, most studies are short lived. Learning is similar to typical training adaptations; there’s often a latency period (and at times, a pretty lengthy one at that). So, we’re still not quite sure if long-term retention and learning would be better served by using external versus internal cues.
Second, most seasoned coaches employ a combination of these two cueing strategies. They assess the situation and the athlete, and then provide a cue that corresponds to the needs of that particular moment/setting.
Do you really think a basketball player will become a better shooter, in the long run, if the only thing they focus on is the target (i.e., the basket)? That improving elbow position, and sequential extension of the elbow and flexion of the wrist won’t help the player perform better, eventually? If so, I’m sorry but you haven’t been around sport enough; and in particular, you haven’t seen less skilled athletes evolve their skills.
Sure, tell the basketball player to “flick the wrist” after releasing the ball and you’ll probably see them tense up certain muscles...initially. But over time, as that movement becomes automated, and they now have the ability to add spin and height to their shot, those muscles will eventually relax. And now tell that player to focus more on the hoop.
Personally, I believe there's a constant tug and pull, a back and forth, a mix and match type scenario that should occur. Sometimes, we need to focus on the positioning and/or execution of a particular body part. Other times, we should focus more on an external factor like the flight of the ball or a target. But this will all depend on the athlete, their preferences, their skill level, the time of year, the complexity of the task, the sport in question, and probably a host of other factors I haven’t yet considered.
My Experiences and Personal Observations with Cues
1. With beginners, I’ve used a mix of strategies from day 1. I have never been a fan of a kid standing in line waiting to hit a tennis ball from a stationary position. So instead, we would try to get kids rallying as quickly as possible. And a good way to do that would be to get them to focus on some external cues first. Drills that would help with the perception of an oncoming ball, the trajectory of the ball, a target, focusing on bouncing the ball off the string bed and so on. Then, we would try to tie in some interna’ cues to help them rally with more power, get more spin and so on. Things like “get your chin to touch your front shoulder” to facilitate more of a shoulder turn worked well.
2. In certain cases, external cueing can be more beneficial when approaching competitions. Many tennis players I’ve coached don’t want to hear anything about “traditional” technical cues (e.g., arm position, leg drive) when a big match is around the corner. In these instances, I’ve found that talking more about targets and trajectories works well. Things like “add shape” (using my hands to show the shape I’m looking for) to the ball might help to get more height (and safety) over the net. “Aim for the baseline” might help achieve more depth on shots when players are hitting short. Those types of external cues are also more distal - which get players thinking even less about their bodies (and letting automation take over).
3. While most players I’ve worked with don’t want to hear much about technique during competition time, there are some that need that type of feedback. In most cases, keeping cues familiar and simple has worked best. The key though, is that it should be specific to that player, and what you’ve been working on (and reinforcing) of late. For instance, one of my “minor league” pro guys was getting stuck with his forehand. He just wasn’t creating enough space between his elbow and his torso, which took some power off the swing (less leverage). We tried many cues but what worked for him was the feeling of getting his elbow “straighter” at contact (even though it was never completely straight). This actually forced him to prepare a little sooner, so that he could strike the ball earlier (more in front), which led to more distance between his elbow and torso (and all the other benefits - kinematically - that come with that) and which resulted in more speed on his forehand. This internal cue (“get that elbow straighter at impact”) worked for this player, no matter the time of year (even hearing it during the warm-up before a match helped).
4. I believe that some of the externally-focused cueing has been blown way out of proportion. On certain tasks, do we really need to bring an individual’s attention to an external source? Here’s an example I heard recently that a coach was cueing an athlete’s stance during a squat and said, “Imagine you’re standing on two railway tracks.” Really? Can we not just say, “stand shoulder width apart”? Is that going to make a big difference? Perhaps a cue like “I want to see your shirt logo during the entire squat” could help an athlete maintain better trunk positioning...but some athletes might be just fine with, “Keep your chest up”. As you can see, a lot of this is probably very athlete-dependent, which means a coach needs to know their athlete. And a lot of the cueing will be trial/error. And I think that’s completely fine!
5. One cue in, one cue out. This has been a game-changer for me, as I believe certain athletes are intelligent individuals and can process more than one cue at a time. For this to work well, tell the athlete to focus on one cue at the beginning of a movement - usually internal. And then one cue after that movement, or during the execution portion - usually external. For instance, during a jump, you might tell an athlete to “swing the arms back” as they are loading the movement and then ask them to “push the ground away” just prior to the propulsive (jumping) phase. The same can probably be done with swinging a racquet and hitting a baseball - keep the elbow [insert internal cue] during the prep phase and aim for the [insert external cue] when in the midst of striking.
6. The type of sport matters. Running, track, strength training, all have less opportunities for external focus cues compared to open-skilled sports like tennis and baseball. Therefore, it’s no wonder that more track coaches employ internal vs external cues with their athletes; there’s logic to that. Tennis and baseball, on the other hand, probably allow us to use a bit more externally-focused cueing strategy and just let the athlete go at it for a while.
Wrapping it Up...And What’s Next
I’ve heard the argument from researchers before - because most coaches use internal cues instead of external cues, athletes are accustomed to them and prefer them. But I’m not entirely convinced of this. Many elite settings - like Cressey Sports Performance, Altis, and others - have coaches who understand and employ both.
Either way, as you’ve noticed, I don’t believe we should use one type of cueing exclusively. Both have their place. Dan Pfaff, an elite tack coach (and mentor of mine), offered me this advice: “Most successful coaches are the ones that know when to use one over the other, and how to tread that line.”
He also mentioned that the timing/frequency of cueing - when, how often, etc. – is equally, if not more important. And when it comes to internally-focused cues, maybe that’s the issue. Maybe it’s tough to learn when you’re hearing five different cues in the span of ten seconds? But that’s a whole other can of worms...one we’ll explore in a follow-up post.
Note from EC: if you're looking to dig a bit deeper on this topic, I'd highly recommend you check out this podcast I did with Nick Winkelman:
About the Author
Matt Kuzdub, MSc, (@CoachKuzdub) is best known for creating www.mattspoint.com - an online platform for all things tennis training - including coaching, resources and ebooks. He also coaches a small group of elite players (college & pro), both on and off the tennis court. Previously, Matt was the lead sport scientist at 'Train with PUSH' and holds an MSc in Strength & Conditioning from the University of Edinburgh. You can follow him on Instagram at @mattspoint_tennis.
Sign-up Today for our FREE Newsletter and receive a four-part video series on how to deadlift!
With my recent sale on The High Performance Handbook, it seemed like a good time to update this series on program design strategies. Many fitness professionals and strength and conditioning enthusiasts have looked to this resource as a model upon which to base some of their program design efforts, so I thought I'd dig in a bit deeper on a few useful principles you'll find in it that should be consistent across all programs.
1. The warm-up should always build context for the strength and power training exercises that follow.
A good warm-up shouldn't just get your body temperature up; it should also be a chance to drive quality movement so that you're patterned for the loading that follows.
Planning to sprint and want to improve the likelihood that you'll get clean hip extension? Try a glute wall march iso hold.
Looking forward to a big overhead pressing day? Get in a set of the back-to-wall shoulder flexion drill.
[bctt tweet="Specificity doesn't just matter with respect to how your high-load and high-velocity movements carry over to performance; it also relates to how your warm-ups prepare you for those movements in the first place."]
2. In any program, the most important work should occur early in the training session.
In my opinion, one of the absolute ways to teach a young coach how to efficiently and effectively program is to ask him/her to take a 4x/week strength training program and pare it back to a 3x/week and eventually a 2x/week program. In doing so, it forces the coach to really consider what the most important programming inclusions are.
95% of the time, you'll find that it simply means cutting off the last exercise pairing from each day, trimming the volume on certain exercises, and then simply rearranging the exercises so that there aren't competing supersets (which can often happen when switching from an upper/lower split to a full-body approach). If you go through this exercise and find that any of your A1/A2 and B1/B2 programming is "expendable," then you probably need to reconsider your programming approaches.
3. Make use of combination exercises when you need to be efficient - or just more athletic.
Let's face it: you don't always have unlimited time to get in an optimal training effect. In this situations, it's really helpful to have exercises you can plug in to combine some of your favorites. Here are just a few examples:
Landmine Squat to 1-arm Press - I love this as a first exercise on the middle day of a 3x/week strength training program. You can train a squat pattern, get a bit of lower body stimulus, and still drive some free scapula pressing under considerable load.
Rear-Foot Elevated 1-arm Low Cable Row - This is a great horizontal pulling exercise you can plug in when you also want to get a little single-leg emphasis, but don't want to bury an athlete with fatigue or soreness. I might use it on a full-body day when we've already had a deadlift variation and lateral lunge variation, but I want some kind of single-leg work in the sagittal plane without making the session last much longer.
The possibilities are really endless on this front, but the point is that you always need to have options for delivering multiple training effects without driving excessive volume or really long sessions.
I'll be back soon with another Programming Principles installment, but in the meantime, be sure to check out my flagship resource, The High Performance Handbook, as an example of how I attack my programming.
Sign-up Today for our FREE Newsletter and receive a four-part video series on how to deadlift!
This edition random thoughts from around the field of health and human performance is long overdue. Fortunately, more of the world is online more than ever, so at least it'll have a good audience now!
1. Physical maturity and training experience impact pitching stress.
File this one under the "duh" category, but it's good to have a study supporting the concept nonetheless. In this study, Nicholson et al found that while pitching velocity was weakly related to shoulder distraction force, this relationship was only observed in high school (and not college) pitchers. The researchers noted, "These findings suggest that older pitchers may attenuate shoulder forces with increased pitch velocity due to physical maturity or increased pitching mechanical skill in comparison with younger pitchers."
Here's the position (ball release) to which they're referring:
I've seen research in the past that reported shoulder distraction forces were 1.5 times body weight at ball release, but those numbers never made sense to me in light of the kinetic chain concept. Wouldn't a pitcher with better front hip pull-back, core control, thoracic spine mobility, scapular control, and posterior cuff strength have a better chance of dissipating these forces over a longer deceleration arc than someone who wasn't as physically prepared? And, wouldn't different release points (as shown above) relate to different stresses? This study demonstrates that being physically prepared and mature goes a long way in reducing one potential injury mechanism in throwers.
2. "You can’t separate biomechanics from metabolism."
I remembered this quote from Charlie Weingroff years ago when I recently heard White Sox infielder Yoan Moncada discussing how he hasn't felt like himself ever since he came back to playing after having COVID-19. Obviously, this is a more extreme perspective, as we know some cases lead to myocarditis and other challenging complications. It's certainly not out of left field, though. Just think about it:
Your joints often ache when you have the flu.
Many people get neck pain when they're stressed.
And, as Charlie observed in that same presentation, the higher your free cortisol, the poorer neurogenesis is.
I don't think we have to just consider these challenges only when someone is sick or under crazy stress. Rather, we have to appreciate that optimizing our metabolic environment - whether it's building a robust aerobic system or eating well and exercising frequently to improve insulin sensitivity - likely has an impact on how our musculoskeletal and fascial systems feel and perform. And, the nice thing about a lot of these initiatives is that they aren't hard to chase: you can build your aerobic system with some low-key cardio or even mobility circuits.
3. Vary surfaces with plyometric activities.
The latest Journal of Strength and Conditioning Research featured a very intriguing study that compared outcomes of a plyometric program on grass-only versus one that was matched for volume, but spread over six different surfaces: grass, land-dirt, sand, wood, gym mat, and tartan-track. The group that performed the multi-surface program outperformed the grass-only group at post-testing even though the testing took place on grass (which means it was a better program to the point that it also outperformed pure specificity over eight weeks, a relatively short intervention).
This is great because training should always be about providing a rich proprioceptive environment for athletes while still providing specificity. The surfaces were stable and ranged in their ability to challenge the stretch-shortening cycle (i.e., it's harder to "turn over" a jump quickly in sand than it is on a track surface).
Intuitively, it makes sense: give athletes variability across similar exercises and you get better adaptation. And, you could even make the argument that it likely reduces the potential for overuse injuries. Just imagine if they'd also rotated types of footwear: barefoot, minimalist sneakers, cross-trainers, turf shoes, cleats, etc.
Suffice it to say that I'll be leveraging this knowledge heavily at our new Cressey Sports Performance - Florida facility. We've got outdoor turf, indoor turf, grass, and indoor gym flooring - and we could do all three either in shoes or barefoot. There's eight options right there, and it's not hard to get access to sand in South Florida!
4. Exercise selection is the most important acute programming variable.
When you're writing a program, the big rocks to consider are intensity (load), volume, rest, tempo, exercise order, and exercise selection.
You'll see a lot of debates about whether 4 sets of 6 reps works better than 6 sets of 4 reps, and whether you need to do one set or three sets to get optimal gains. People may argue about whether you have to train above 90% of 1RM to get strength gains. And, internet arguments are fierce over tempo prescriptions and whether you should squat before you deadlift, or vice versa.
You know what doesn't get debated? The simple question, "Does an exercise hurt?"
This is why exercise selection will always be the most important acute programming variable to consider. If it causes pain, all the other variables don't matter, because it's a harmful training stimulus. This is why it's tremendously important for coaches to not only understand progressions, but also regressions and "lateral moves."
Squatting hurts your hips? Let's try a reverse lunge with a front squat grip.
Deadlifting isn't agreeing with your low back? Let's try a hip thrust instead.
Bench press is making your shoulder cranky? Let's pivot to a landmine press instead.
These quick and easy adjustments can absolutely save a program - and make all the other programming variable important actually matter. This is a big reason why I included an Exercise Modifications Library in The High Performance Handbook; they enable an individual to keep the core benefits of the program intact even if they have to modify a few exercises along the way.
Sign-up Today for our FREE Newsletter and receive a four-part video series on how to deadlift!